
Introduction
This project will introduce you to incorporating several components on the same project. We will use the 128x64 OLED screen and the AM2320 to measure temperature and display a result. These both communicate over I2C.
Tools
-
-
Before you complete this tutorial, make sure that you have completed the Feather M4 Express, OLED display, and AM2320 tutorials first.
-
You will also need myriad jumper cables and two resistors with resistance of 3k-10k ohms, in addition to the Feather, AM2320, and OLED display.
-
Order a Feather and OLED on Adafruit to create this project. Their links can be found above this step. Ask a Maker-E tech where to find the other materials.
-
-
-
For this project, we'll combine the functions of a temperature sensor and an image display in order to create a crude digital thermometer. This could be great to leave inside your room, outside, or elsewhere.
-
For initial setup, the OLED display and AM must be set up the same as they were in their tutorials. Place the display right on top of the feather, and use the pull-up resistors and jumper wires to connect the AM to the Feather with the proper communication and power lines.
-
-
-
To use CircuitPython for this tutorial, you will need these libraries from the adafruit bundle: adafruit_bus_device, adafruit_display_shapes, adafruit_display_text, and adafruit_displayio_sh1107.
-
Make sure the version matches your installed CircuitPython version.
-
-
-
First we'll need to create a set of .bmp images to display on the OLED screen. To do this, use Photoshop or Inkscape to create a 128x64 canvas. Then create the thermometer that you'd like to see, remembering to leave room for text. Also remember that the OLED display only shows in black and white, so the white areas are what you'll actually see.
-
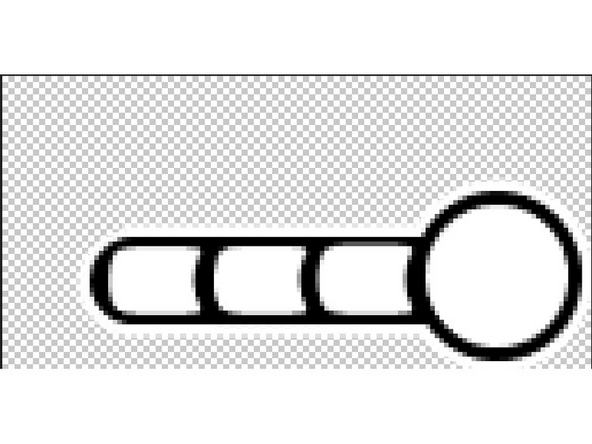
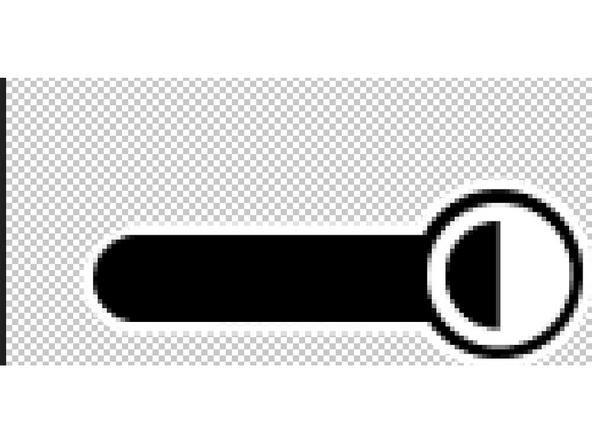
Make sure that your thermometer has different sections, preferably created in separate layers. This means that you should be able to hide certain layers and simulate movement of the value inside the thermometer. Export each state that the thermometer could be in as a .bmp file. Two examples can be seen, at the lowest and highest temperature states.
-
-
-
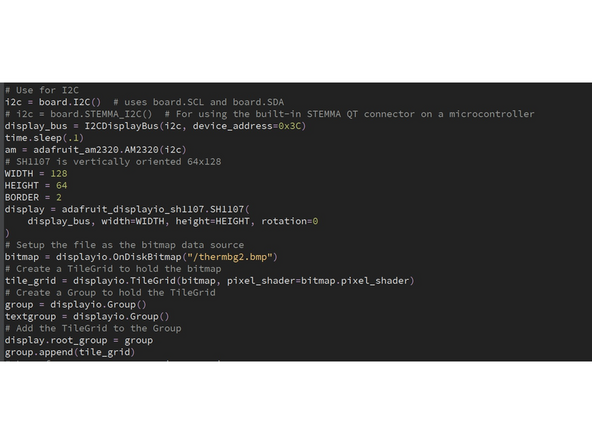
To set up thermometer movement on the display, use the same setup that you learned in the OLED tutorial. Use the name of your lowest state as the first one imported, to have a baseline for the thermometer. In the code example, mine is named thermbg2.bmp.
-
Make sure all of your thermometer images are saved in the root of your Feather. This makes it so the Feather can find them when you call for them. Include a / before the filename to indicate that it's in the root folder.
-
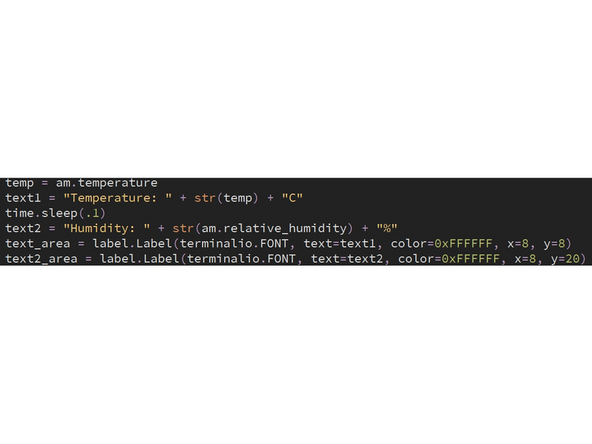
After initializing everything in the program, you'll need to create a loop to continuously update the image. Define your text that you want to show by finding out the temperature, then store that text in labels to be displayed by the OLED display. Remember that any and all I2C calls/commands need to be separated by at least 0.1 seconds.
-
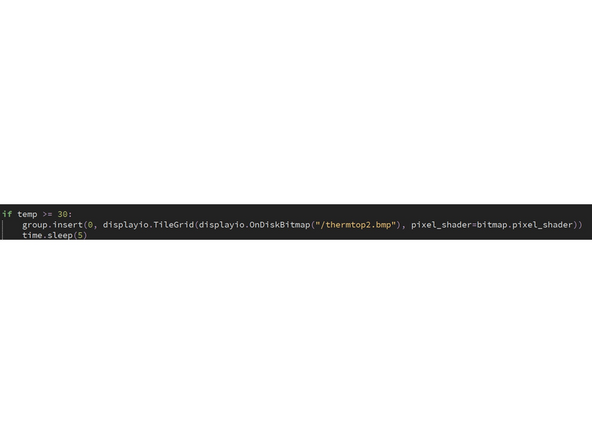
After appending the text boxes you made onto the location that you want, start at the hottest temperature and work your way down. For example, if the temperature is hotter than 30* Celsius (the default unit for the AM2320), insert the full thermometer image at the first index (0) so the text will show up on top of it. If not, check for 27*, etc.
-
After you check for all states of the thermometer, make sure that you include group.pop() three times at the end of your loop. This removes the last thing added, so it will remove the image and two text boxes. If this doesn't happen, the text will remain on top and continue to write over itself, which quickly becomes unreadable.
-
Enjoy your thermometer! Use resources like ChatGPT or Perplexity if you're truly stuck, after you have exhausted all of your ideas and asked for help from a tech or classmate.
-

This project can be extrapolated in several directions to create a more involved product. For example, you could add WiFi capabilities and upload temperature data to a storage platform to have a record of the temperature and humidity. Instead, you could swap out components or change what you show on the display. The possiblities are endless!
This project can be extrapolated in several directions to create a more involved product. For example, you could add WiFi capabilities and upload temperature data to a storage platform to have a record of the temperature and humidity. Instead, you could swap out components or change what you show on the display. The possiblities are endless!