
Tools
Parts
-
-
If using a factory Feather, the bootloader may need to be uploaded and CircuitPython installed.
-
To do so, follow Adafruit's guide on updating the bootloader: If your version is newer than v3.9.0, this step is not neccessary.
-
Download the appropriate bootloader from the CircuitPython website, at the bottom of the page
-
-
-
To install CircuitPython, follow Adafruit's guide on installation.
-
CircuitPython can be downloaded from the same page, simply choose the first download instead of the last.
-
Use your micro-USB cable to plug into the silver port on the Feather, and use the other end to interface with a personal computer or Lab PC.
-
-
-
To use external hardware or use some certain code, you need the specific libraries that will allow you to call functions, take sensor data, and use the onboard pins.
-
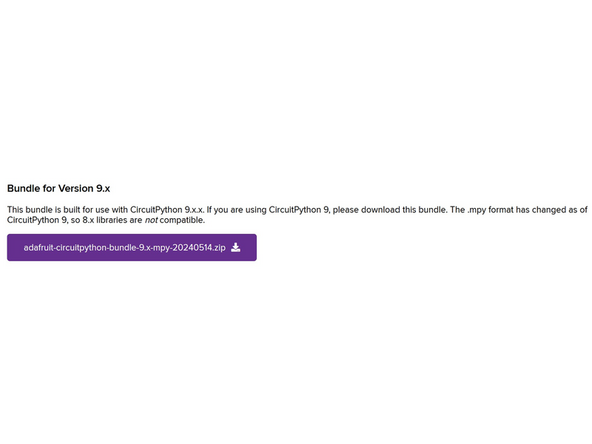
CircuitPython hosts library bundles, where you can download large lists of libraries for any number of applications. We will simply find the ones we need in the bundle and use them.
-
Make sure that the libraries you download match the version of CircuitPython you downloaded in the last step. Version 9.x.x is not the first download link presented.
-
Extract the .zip file anywhere convenient for you. If your Feather has enough storage space, it may be convenient to keep all the libraries onboard.
-
-
-
To fully utilize the Feather's onboard capabilities, we will need a few specific libraries.
-
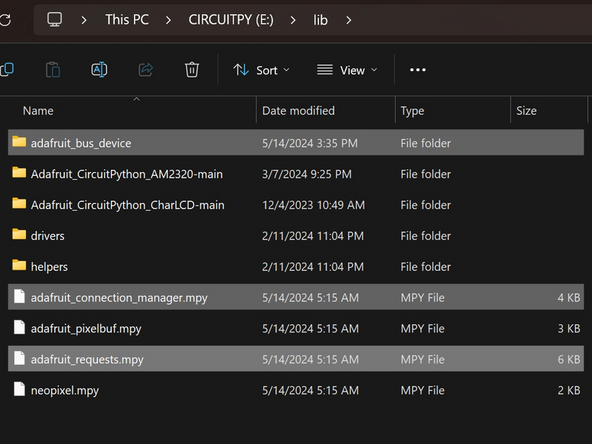
If not uploading the entire bundle to the Feather, find the adafruit_bus_device folder, the adafruit_connection_manager.mpy file, and the adafruit_requests.mpy file.
-
These need to be placed not in the root of your CIRCUITPY drive, but in the lib folder. Copy or move the above files into the lib folder, and do not place them into the drivers folder.
-
-
-
The Feather with CircuitPython can use either Python or Arduino code in the typical formats.
-
To use the Feather to it's full potential, make sure that you have an IDE installed that can write and read said languages. You may be familiar with Mu Editor, VSCode, or any other IDE that you prefer. For first-time users, we recommend Mu Editor as it is effective and lightweight.
-
CircuitPython will only run code named code.py. Make sure that you name your file code.py and save it when you want to run it.
-
-
-
With the correct files on the Feather and an IDE to communicate with it, you can do anything your heart desires with a Feather.
-
Most people choose to write code for it in Python, and it will compute anything you give to it.
-
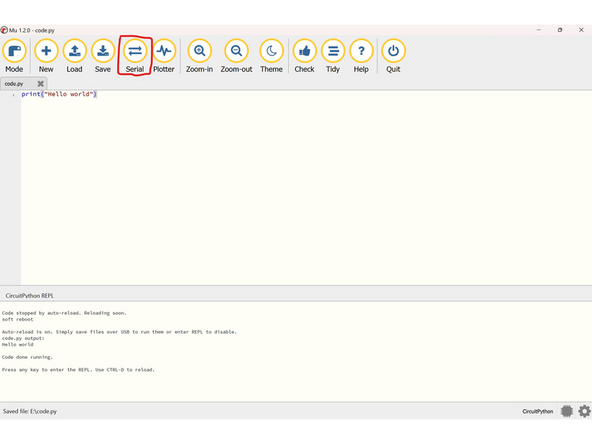
Typical Python syntax applies, so print("Hello world") will do exactly what you think it will. For more Python instruction, visit W3Schools.
-
CircuitPython does have one quirk, that it runs the code whenever it's updated. That is, when the Feather is plugged into power or code.py is saved onto the CIRCUITPY directory. It will only run the code saved as code.py.
-
-
-
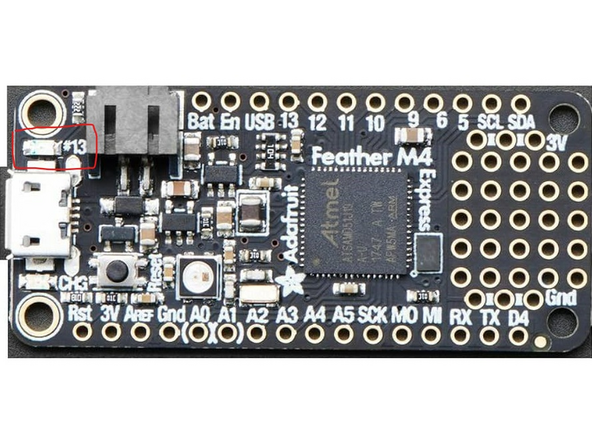
To earn your badge for the Feather, use the onboard LED to blink out some sort of pattern.
-
The onboard RGB led looks like this on the left side of the USB port on the feather.
-
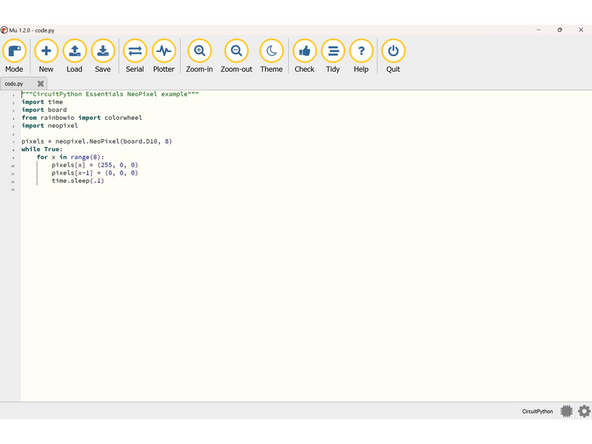
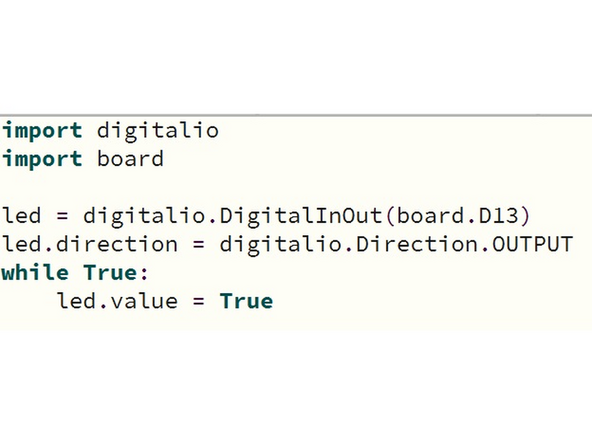
Use the digitalio library to define an LED with the onboard red light (board.D13). The example code is in the second image.
-
Now you can define the LED's direction by using the variable.value function, for example led.value = True/False.
-
A simple while loop is currently making the LED stay on. To create a pattern of turning it on and off, use time.sleep(number) to wait for a set amount of time, number in seconds. If you use this syntax, remember that you must include import time at the beginning of your code.
-
Set up a recurring pattern with the onboard LED.
-


Feather M4 Express: Quiz