
Introduction
The AM2320 is an introductory temperature sensor that can read both local temperature and humidity. It communicates using I2C. Learn more about I2C here!
Tools
-
-
Before you complete this tutorial, make sure that you have completed the Feather M4 Express tutorial first.
-
You will also need these extra components: 4 female-to-male jumper cables, 2 male-to-male jumper cables, an AM2320, and two 3-10k ohm resistors.
-
-
-
This component uses the I2C method of data communication. I2C is an alternative to UART that is much faster and more efficient. It accomplishes this by using a clock connection (SCL) and a data connection (SDA). This way, data can be transmitted asynchronously and as fast as possible with no restrictions.
-
I2C also supports multiple devices on the same input pins, which can allow for multitasking and better efficiency. For more information about this method of inter-component communication, visit SparkFun's basics website.
-
Importantly, I2C often requires pull-up resistors in order to work properly. Sometimes these are included on microcontrollers, but often, including wiht the Feather, we must direct power to a breadboard rail and connect resistors between SCL and power, and SDA and power. If these are missing, Python does a good job of stating a clear error message.
-
-
-
This component works by measuring the temperature and humidity internally, then sending its data over the I2C protocol to the Feather. The AM2320 library for CircuitPython allows us to easily call functions specific to this component, which makes reading data simple.
-
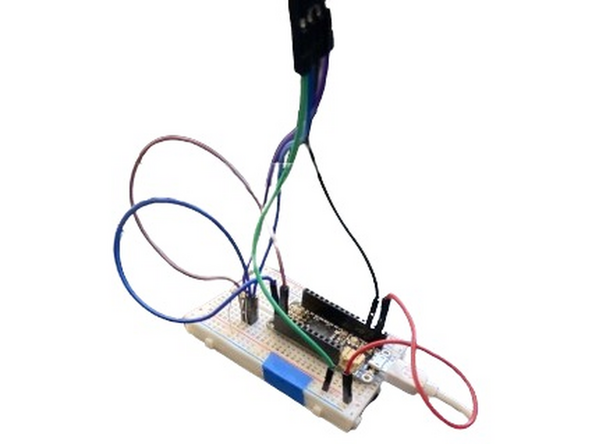
To connect the AM2320 to the Feather, connect the ground pin to the ground header on the Feather. Check Adafruit's pinout page here. Use the grid on one side of the sensor as a marker.
-
Next, use one of the male-to-male jumpers to connect the 3.3v output of the Feather to one of the rails on the side of the breadboard. Basic breadboard knowledge will be needed for this tutorial. See more information.
-
Now use the other two male-to-male jumpers to connect the SDA and SCL headers to any two rows on the breadboard. Use two female-to-male jumpers to connect the SDA and SCL pins on the AM2320 to the same rows, to match SDA to SDA and SCL to SCL. This process will be the same for any component that uses I2C.
-
Finally, connect the VIN pin of the AM2320 to the rail that you connected 3.3v power to. Then take your two resistors and connect them between the rail and the rows with SDA and SCL communication. These will act as pull-up resistors.
-
-
-
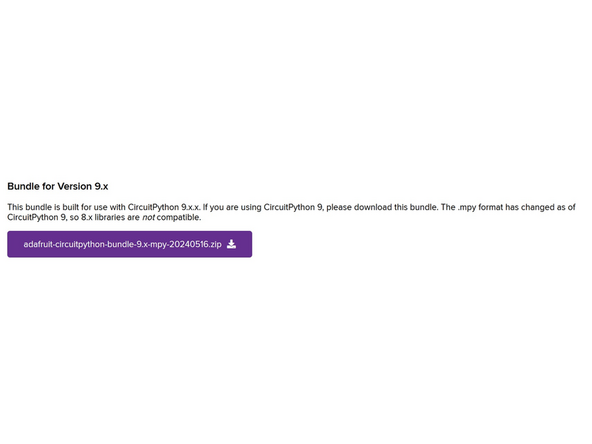
To use CircuitPython for this tutorial, you will need the adafruit_am2320.mpy and adafruit_bus_device libraries from the common bundle.
-
Make sure the version matches your installed CircuitPython version.
-
-
-
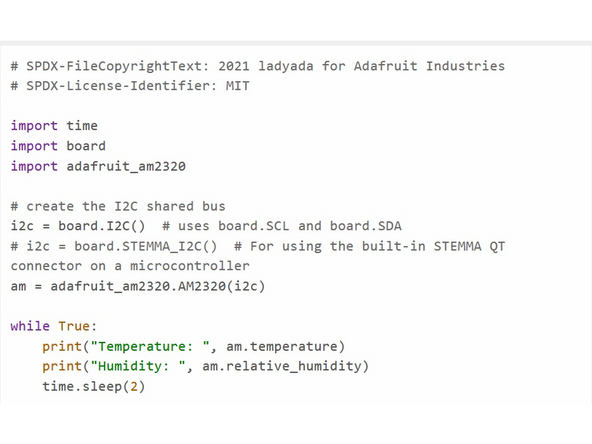
It's important to remember that you need to initialize both the I2C protocol and the current component. To do this, make sure you import everything needed and use i2c = board.I2C() as well as sensor name= adafruit_am2320.AM2320(i2c)
-
After introducing both variables, you can use the basic functions of the AM2320 such as sensor.relative_humidity and sensor.temperature.
-
While there isn't much more to do with the AM2320, you can find some information on the CircuitPython site.
-
It's important to note that the AM2320's primary goal is to be inexpensive. This means it takes some time to read values, and will throw an [Errno 5] Input/Output Error if you try to read values too quickly after each other. To fix this, input a time.sleep of really any value to give the sensor a pause between readings.
-
To download example code to ensure everything is set up properly, follow this link.
-
-
-
To earn a badge for this component, successfully set up a looping temperature measurement. Then use that measurement to set the onboard NeoPixel to different colors corresponding to temperature levels. For example, if it's cold the NeoPixel is blue, and if it's hot the NeoPixel is red. For extra points, combine this with a CharLCD or OLED display!
-
The onboard neopixel can be addressed with pixel = neopixel.NeoPixel(board.NEOPIXEL, 1)
-


Adafruit AM2320 and I2C: Quiz