
Introduction
IR is a method of wireless technology that uses emitted light invisible to the human eye. In short, an emitter blinks an LED at the 940nm wavelength extremely quickly, and a receiver can see this light and decode the blinks into meaningful data. This has many advantages and drawbacks, but is mostly used in remotes, such as for TVs, or for peer-to-peer communication over reasonable distances when line of sight is guaranteed. Learn more about the IR communication protocol here!
-
-
Before you complete this tutorial, make sure that you have completed the Feather M4 Express and NeoPixel tutorials first.
-
You will also need these extra components: A breadboard, 6 male-to-male jumper cables, and an IR emitter and receiver.
-
-
-
IR communication works by sending waves of light invisible to human vision. They use a high wavelength, around 940nm most of the time, so that there is minimal interference from light in our surroundings. Using some Python libraries, the Feather is able to encode and decode regular data from strings or arrays into series of extremely fast flashes.
-
For this tutorial, we will make the Feathers send and receive RGB color codes. Use a color picker to see different RGB values and their corresponding hex codes. To connect the IR boards to the Feathers, set up a breadboard similar to the one shown in the image.
-
Ensure that the Feather's pins are not on the red or blue runners on the side of the breadboard. Also make sure that the receiver's switch is set to "H", for horizontal input. Then put the male headers into the breadboard on opposite sides, so that the sensors are pointing at each other.
-
The labels near the headers are fairly self-explanatory, but use Adafruit's pinout pages for the Emitter and Receiver if you need extra help. Use male-to-male jumpers to connect breadboard rows, and make sure that the Feathers' pins don't overlap with either breakout board's.
-
-
-
To use CircuitPython for this tutorial, you will need the adafruit_irremote.mpy library from the common library bundle.
-
Make sure the version matches your installed CircuitPython version.
-
-
-
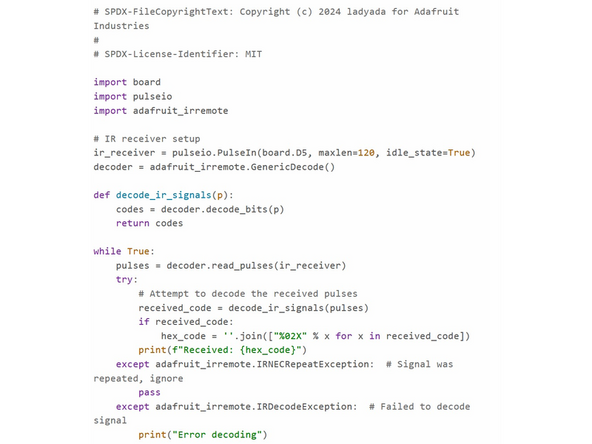
Since the two Feathers are independent systems communicating wirelessly with each other, they need to be coded separately - one to continuously transmit and one to continuously receive.
-
We will use the Adafruit example code as usual, one program for each board. The basic design is that they will use PulseIn and PulseOut to define the transmission and receipt on breakout boards, then set up an encode/decode protocol that can be called to transmit or receive based on the same format. Find the example code for the Transmitter and Receiver here.
-
Read the library documentation to learn more about possible functions, syntax, or further uses.
-
-
-
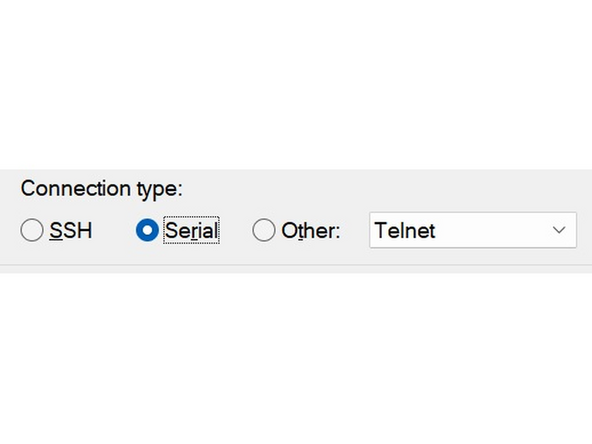
To read two serial windows at the same time on one computer, we'll need an external program. PuTTY is a program that allows you to do this and much more, but our uses for it will be fairly simple. Download it here. We'll open a window in PuTTY first so that Mu won't try to have both open and break both of them.
-
First plug in just the emitter Feather to your computer. Open PuTTY and stay on the default starting screen. Change the connection type to Serial on the right-hand side. Then we'll need to find where the Feather is located for your device. For Windows, go to the search bar and open Device Manager. Scroll down to Ports (COM & LPT).
-
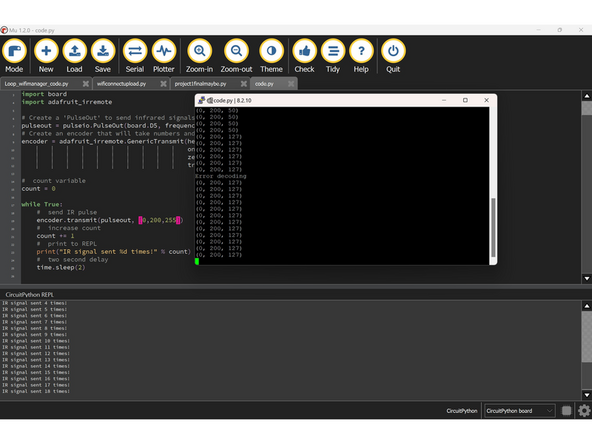
The Feather should show up as USB Serial Device, with a COM number next to it. Note that number and put it into PuTTY, where COM1 is already entered into the Serial Line window. For example, in the third picture, I'll put COM6 into PuTTY. Click Open at the bottom of the screen and a black serial window should show up.
-
This window should show a count-up of how many times the RGB color code is being emitted from the breakout board. Now we'll connect the receiver to have a result. Plug it into your computer on another USB port and open Mu. There should be only one option to click Serial and have the receiver's information show up.
-
If everything is connected properly, with the example code the RGB color code input into the emitter program should be translated into a hex code on the Mu window. (Note that in the first image, the emitter and receiver are switched for Mu/PuTTY.) Congratulations, you've just transmitted that color code entirely wirelessly, with IR light!
-
-
-
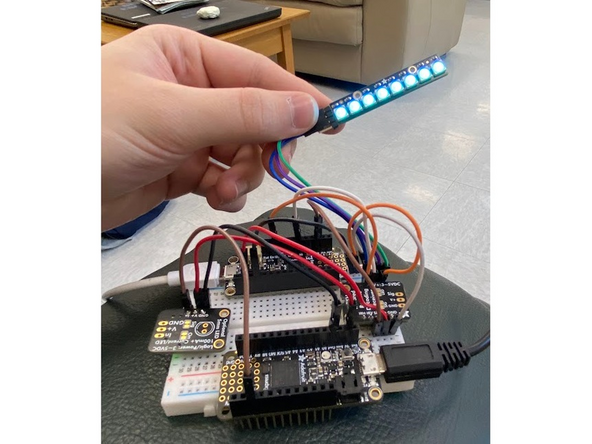
To earn a badge for this component, use the included NeoPixel and jumper cables to add lights onto the receiver Feather. Then change your code so that instead of converting into hex, the Feather will set the NeoPixel to the color set in the transmitter code.
-
You'll need a NeoPixel, three male-to-female jumper cables, and an extra male-to-male cable in order to spread the receiver Feather ground to a breadboard row.
-


Wireless IR Communication: Quiz