Introduction
This guide is an introductory guide into using the Fusion3 EDGE printer located in ACET 237
-
-
This tutorial is set up to be an introductory tutorial for use of the Fusion3 Edge printer
-
Turn on the Fusion3 EDGE
-
Power switch can be found beneath the LCD screen.
-
Verify the build plate is clean and clear of any previous prints.
-
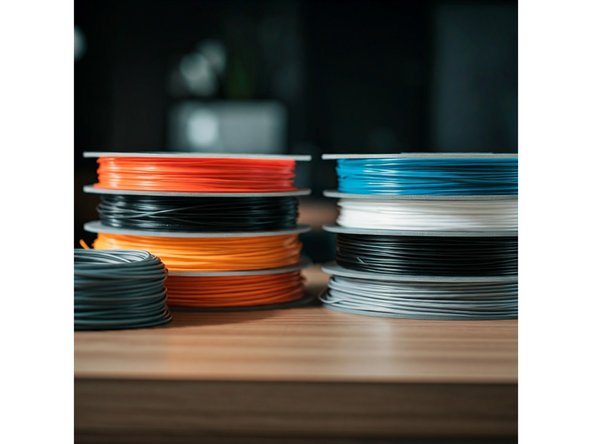
Verify or load the correct filament into the printer.
-
A tutorial going through the different types of filament can be found here.
-
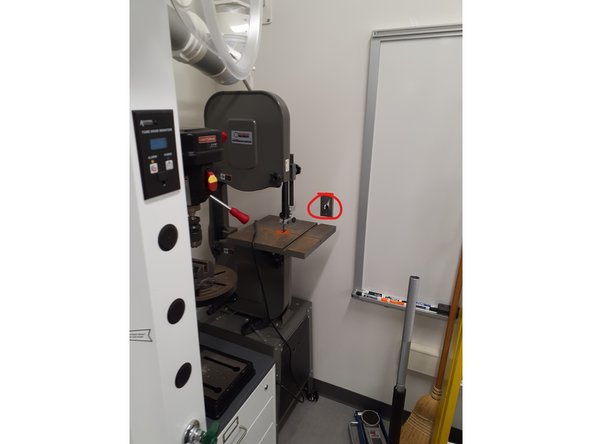
Turn on ventilation if required due to the filament type.
-
-
-
Verify or load the correct filament type into the printer.
-
A tutorial going through the different types of filaments can be found here.
-
A tutorial for changing filaments can be found here.
-
If the filament required proper ventilation, turn on the snorkel. The switch is found in the back of the room by the band saw as shown in the second image.
-
-
-
Verify or install the correct build plate that corresponds to the type of filament being printed.
-
Build plates are found below the Fusion3 F410 printer, under the table.
-
For PLA, PETG, TPU and others, use the black matte Buildtak build plate.
-
For ABS, use the yellow PEI build plate.
-
For PC, use glass with a glue stick applied to the surface.
-
-
-
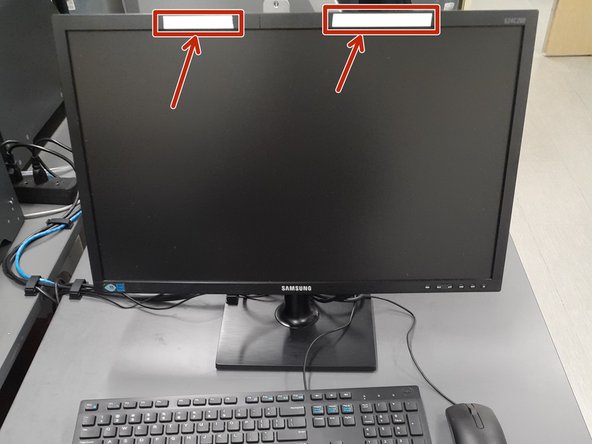
Log in to the computer near the printer using the credentials at the top of the screen.
-
Open the slicer software which is PrusaSlicer.
-
The PrusaSlicer Logo is shown in the second image.
-
Documentation for PrusaSlicer can be found here.
-
-
-
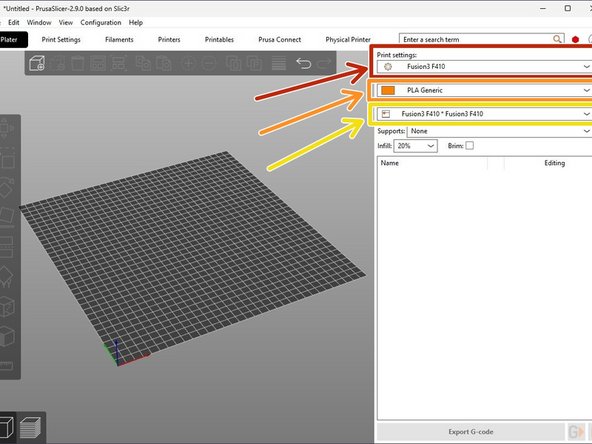
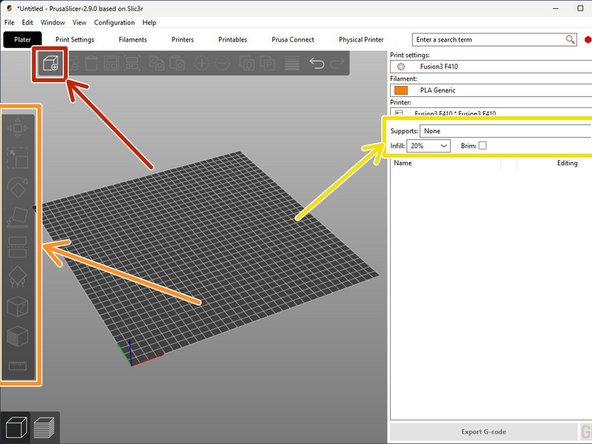
Verify "Fusion3 EDGE" is selected under "Print settings".
-
Select the correct filament type.
-
A tutorial going through commonly used filament types is found here.
-
Within the third text box under "Physical Printers" select "Fusion3 EDGE".
-
-
-
User interface for PrusaSlicer can be found here as needed.
-
To upload a STL file, select the box as shown in the image.
-
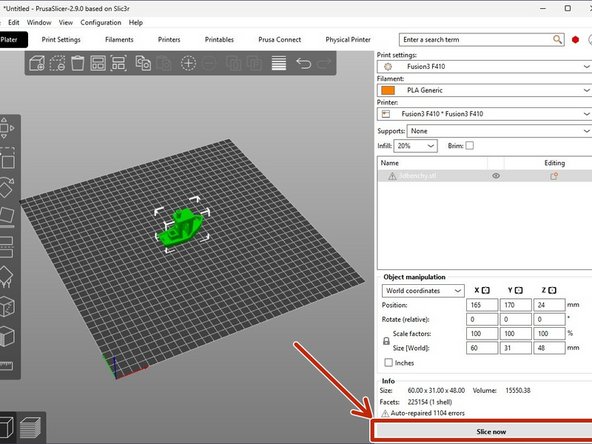
Use the object manipulation tools for positioning, scaling, orientation and so forth as discussed in the Object Manipulation tutorial.
-
Placing an object perfectly flat on a build plate is necessary to avoid generating support material or printing difficult angles. More information can be found here.
-
Modify the support material options that can be found below the printer selection.
-
For further information on support material and why it is needed, refer to the Support Material tutorial.
-
-
-
Once you are satisfied with the orientation of the part, select the 'Slice Now' button on the bottom right of the window.
-
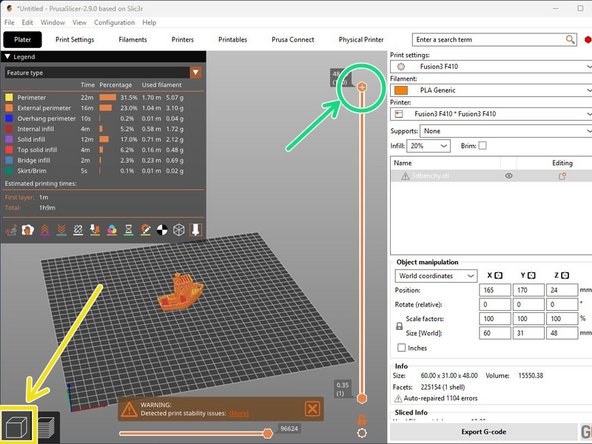
After slicing is complete, PrusaSlicer will display a preview of the print as demonstrated in the second image.
-
Verify that the part on the screen is what was intended.
-
The layer cross-section can be viewed by clicking and dragging the orange sliders on the right side of the window as shown.
-
If further changes are needed, select the 3D box icon on the bottom left of the screen.
-
-
-
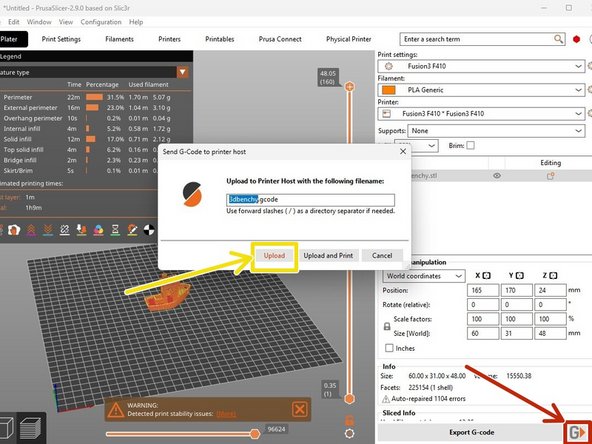
Once the file looks ready to print, select the "G" button in the bottom right of the window.
-
Rename the file to something easily recognizable.
-
Select "Upload" to transfer the file to the printer automatically.
-
-
-
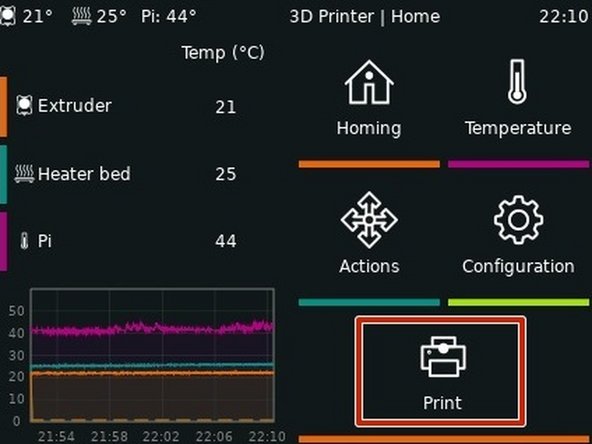
On the printer select Print.
-
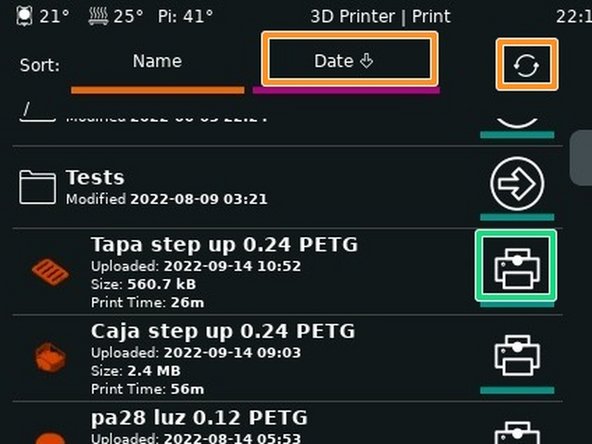
Locate the uploaded file.
-
The date and refresh buttons may help.
-
Select Print.
-
After verifying the selected file is correct, select Print again to start the print.
-
Wait until the first layer prints correctly before leaving.
-
-
-
This printer requires periodic monitoring.
-
The user is expected to check on the printer every two hours.
-
If this is not possible, notify the Lab Director for further instructions.
-
If this is not done, access to the Fab Lab may be revoked.
-
Further questions or comments can be directed to the lab director.
-