
Introduction
This tutorial will guide you through setting up the UART camera and saving the image onto the SD Card Breakout Board. This camera can be utilized in various scenarios. To learn more about UART, visit the link below,
-
-
To open links in a new tab, right-click on the link and select "Open link in new tab" to avoid losing your progress while following this tutorial.
-
Before you complete this tutorial, make sure that you have completed the Feather M4 Express tutorial first.
-
Make sure that you're viewing this tutorial in Operator View! You must use Operator View to earn credit for this tutorial. Hit the button in the top right of your screen.
-
Make sure you have the Micro SD Card BreakOut Board tutorial completed.
-
Lastly, make sure you have completed the UART tutorial
-
-
-
Please ensure the following libraries installed on your Feather M4: adafruit_vc0706.mpy, adafruit_sdcard.mpy, and adafruit_bus_device.
-
Adafruit has provided a thorough explanation of how to set up the board. For more details, please visit this link. In this summary, I will highlight the important aspects.
-
Camera 5V to board USB Camera GND to board GND. Camera RX to board TX. Camera TX to board RX
-
Follow the Micro SD Card BreakOut board tutorial to see how to connect the pins. Make sure to specify the correct pin in your code. Here, I have it connected to D6.
-
-
-
Some potential uses for the camera might include a "doorbell" security system that records and captures pictures based on motion detection.
-
Having a time-lapse of pictures with a timer to take repeated shots.
-
Include it in IoT (Internet of Things) devices to capture pictures remotely.
-
-
-
Upload the example code from the github website under Capture_Image.py.
-
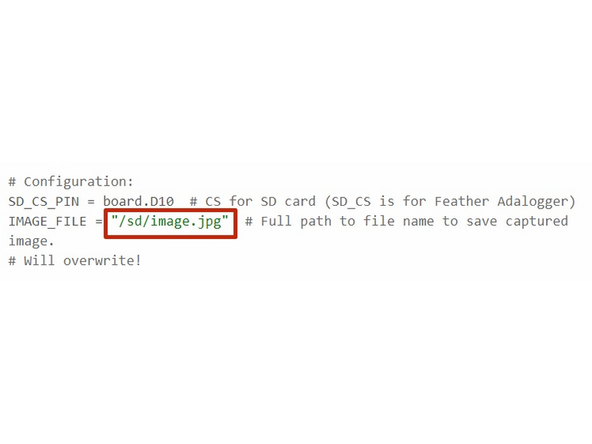
The image will be saved as image. If you want to rename it to something different, make sure to modify IMAGE_FILE = "/sd/image.jpg", specifically /sd/image.jpg, to something like /sd/personA.jpg.
-
-
-
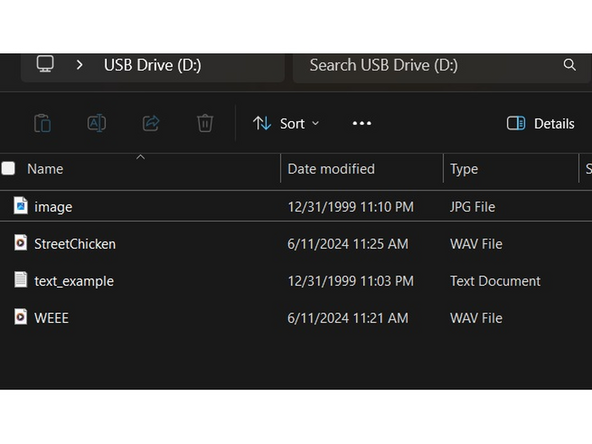
Now, remove the SD card and insert it into the micro SD card adapter. Then plug the adapter into your computer.
-
In the file explorer, you should see it pop up when plugged in. You can use it to view the image captured by the UART camera.
-


UART Camera: Quiz