
Tools
-
-
To open links in a new tab, right-click on the link and select "Open link in new tab" to avoid losing your progress while following this tutorial.
-
We are using the Trinket M0. To get this board working, follow the Feather M4 Express tutorial as the trinket works the same way.
-
As well as UART Communication tutorial
-
Make sure that you're viewing this tutorial in Operator View! Hit the button in the top right of your screen.
-
In this kit, you have: one micro-USB cable, one mini breadboard, two 220 ohm resistors, one light-emitting diode (LED), one phototransistor, one Feather M4, and sensor and breadboard cables.
-
-
-
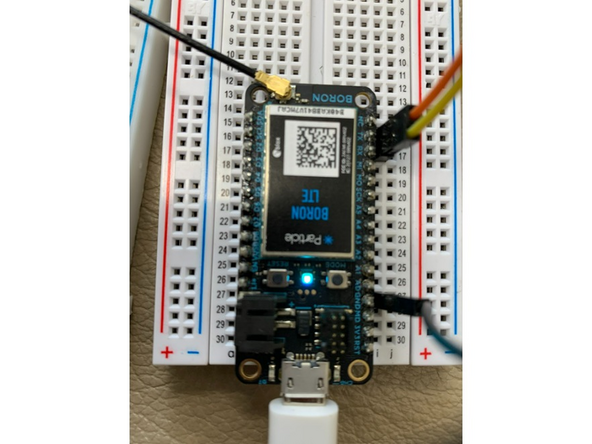
This tutorial will help you get started with the Particle Boron BRN404X, specifically focusing on its cellular capabilities.
-
You should be able to transfer data from another microcontroller to the Boron. Then, the Boron can post the values on the Particle Cloud to your account and transmit that data to ThingSpeak without using Wi-Fi.
-
-
-
This board runs on C plus plus code. to learn more about C++ visit this link.
-
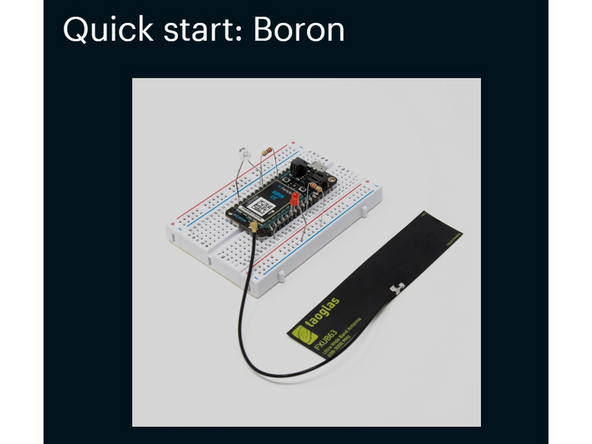
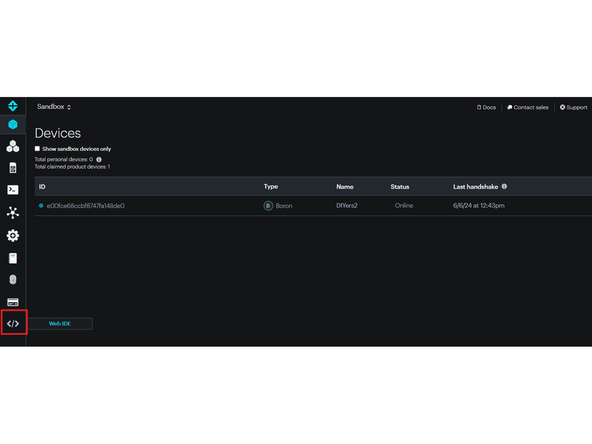
First Create an account then follow a quick start: Boron to set up your board. If you come across "Device can’t be claimed even after it has been unclaimed by another owner" wait a couple of hours before trying again
-
Once you have set up your board and completed the blinking LED example, you can proceed to the next step.
-
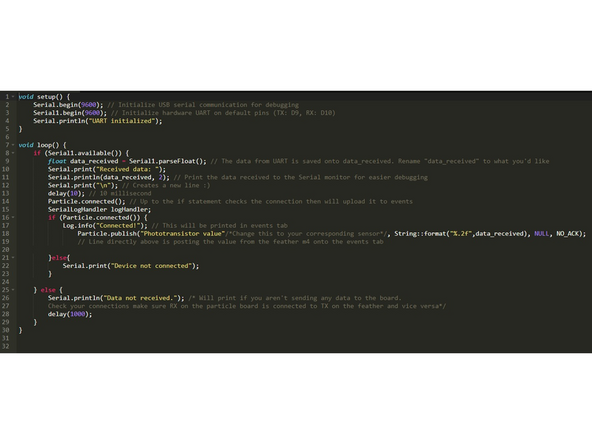
The third image is the example code for the web IDE that you will need later in the tutorial
-
-
-
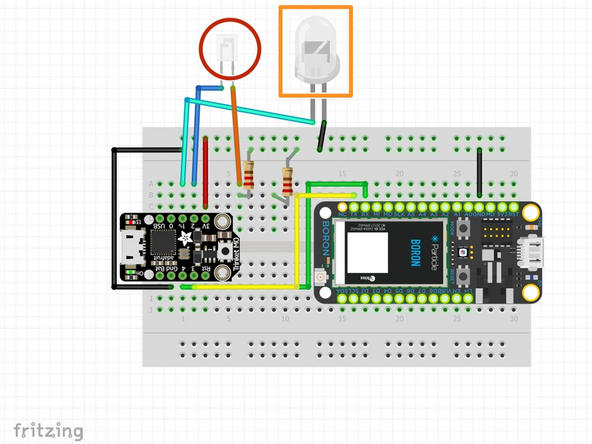
The phototransistor is circled, while the LED is inside the rectangle.
-
Connect the longer leg of the phototransistor to pin 2 and the shorter leg to a 220-ohm resistor. Next, connect the other leg of the resistor to GND. Then, connect the longer leg of the LED to pin 1~ of the Trinket M0 and the shorter leg to another 220-ohm resistor. Lastly, connect the other leg of this resistor to GND.
-
Upload the example code from the GitHub website to the Trinket M0, ensuring that the MU serial prints "Data sent: [value of phototransistor]".
-
When you cover the top of the phototransistor, the LED should turn on.
-
-
-
Connect a jumper cable from GND on the particle board to the Feather M4. Then, connect RX on the particle board to TX on the Trinket M0 and TX on the particle board to RX on the Trinket M0.
-
Open the Web IDE, paste the example code from GitHub, and flash it to upload to the particle board.
-
The Trinket records the values of the photoresistor and sends them to the boron using the UART communication protocol.
-
The boron then uploads that data to the Cloud using its cellular function.
-
-
-
After your device flashes purple, it will strobe green for 30 seconds to a minute. Once it has a slow, fading blue light, the code has been successfully flashed and is now running on your particle board.
-
-
-
In the events tab, you should see the values of the sensor being printed.
-
It will first print that the particle boron is connected then under the name you will see phototransistor and the values of it is under data
-
If you do not see any values, ensure that your connections are correct. Have RX connected to TX, TX connected to RX, and both boards share a ground.
-
-
-
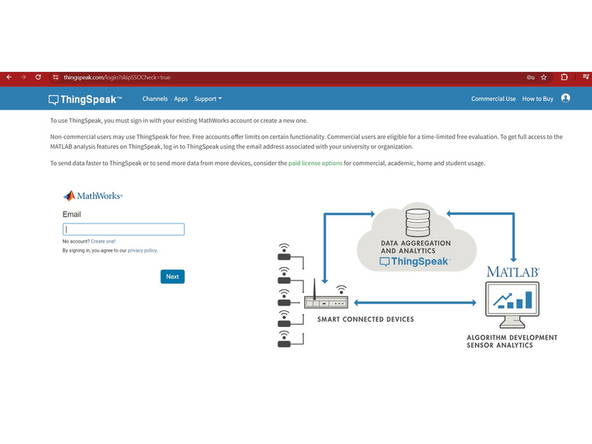
First, create an account by visiting ThingSpeak. Then, click on "New Channel" where you will be prompted to enter a name, description, and field. The field is where your data will be posted. If you have multiple sets of sensor data, you can include more fields.
-
Once you have created an account, use this linkto help you send the data from your phototransistor to ThingSpeak.
-
-
-
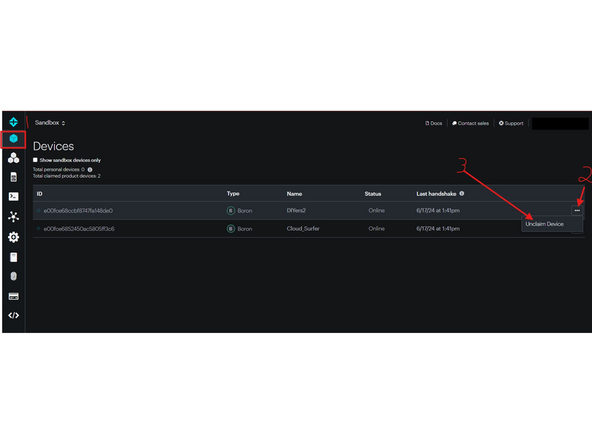
Do not skip this step as it is crucial to removing the device allowing others to claim it.
-
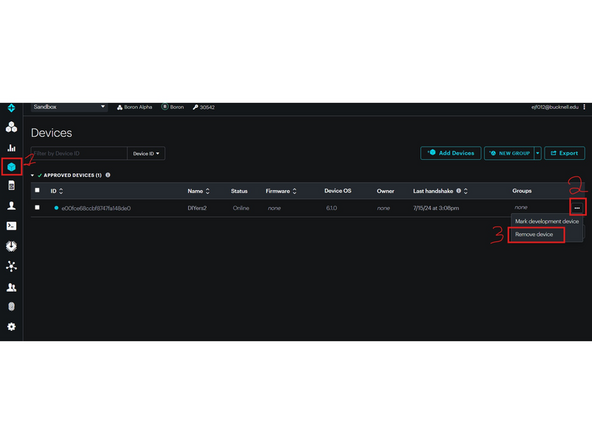
Once you have finished the challenge, go to the console.particle.io website, click on "My Devices," then click the three dots next to the Boron, and select "Unclaim Device."
-
Next, reload the page click on devices then the 3 dots then remove the device. Now the device has been successfully been removed
-


Cellular Communication: Quiz