
Introduction
This project will create an enclosed system to help bicyclists or motorcyclists by telling them their lean angle and forward/backward acceleration in real time.
Tools
-
-
To complete this project, you will need to have completed the Feather, Accelerometer, and Monochrome display tutorials. Also ensure that you are certified on any 3d printer that the Maker-E offers.
-
In addition, you will need to order a Feather M4 Express, an ADXL 343, and a display from Adafruit prior to beginning this project. You will be able to find USB cables, jumper cables, screws, and a battery in the Maker-E.
-
-
-
The purpose of this project is to provide informational data about the rider's status while riding either a bicycle or motorcycle. It will provide a reading of lean angle and acceleration so that the rider can accurately measure their performance.
-
This is done with a simple accelerometer and some math. Usually a smaller microcontroller would be more than enough for this project, but unfortunately the displayio built-in module is required to drive a monochrome display and thus we need to use a full Feather.
-
-
-
First start your print so that it'll be working while you complete the rest of the project. Go to the Technology Kits Github page for this project and download both .STL files. Follow the instructions in equipment tutorials to start this print on any of the Maker-E printers. Lay the box flat on its side with the display window and the lid on its bottom.
-
After this, begin collecting your materials. As well as the components you ordered, you will need 8 female-to-female jumper cables from the supply closet, as well as four m2 nuts and bolts from the drawers in the closet. Finally, order any LiPo portable battery from MakerStock. Finally, find a hot glue gun by asking a tech.
-
-
-
After collecting all components and starting your 3d print, start assembling the computation system. Use female-to-male jumper cables to connect up the ADXL like normal, then use the bottom of those same headers to attach the female-to-female jumpers to the monochrome display. This eliminates the need for a breadboard and thus saves space.
-
After connecting everything up, add a couple dabs of hot glue to the jumpers, especially the ones on the bottom of the Feather and the ADXL. These can come off fairly easily and need to be secure in their places. Prepare your LiPo battery and plug it in, making sure that the Feather turns on, as do the green LEDs on both the ADXL and display.
-
-
-
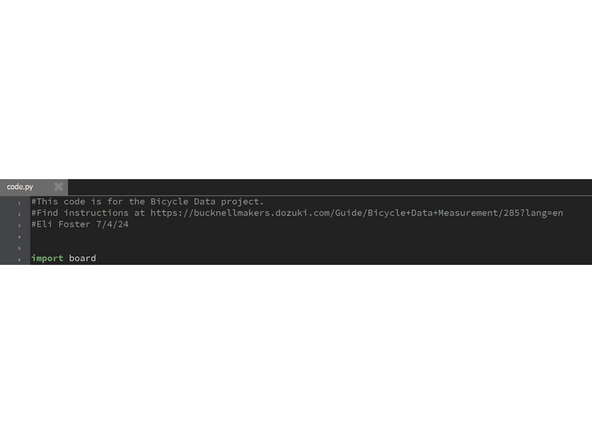
After connecting everything, unplug the LiPo and connect the Feather to a computer. Go back to the Github and download lib.rar, code.py, and bike.bmp. Extract lib.rar back into a folder and place all files in the root of your CIRCUITPY drive, replacing the current code.py file and lib folder.
-
After this step, code.py and bike.bmp should both be in the root of the drive, while the extracted libraries should be in D:\lib\[libraries]. Open code.py in a code editor, ensuring that the commented text at the top matches this project. Run the code and make sure no errors appear.
-
-
-
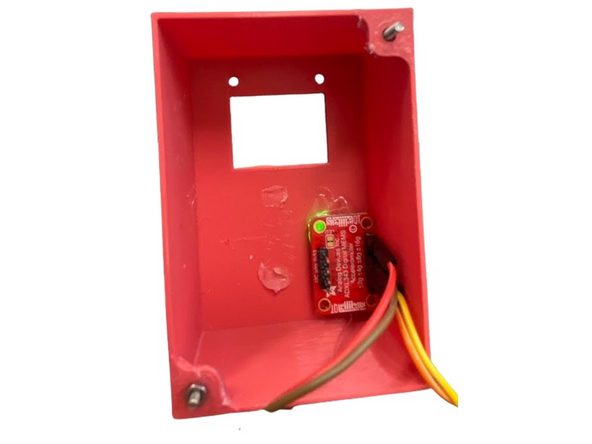
Once your case is done printing, take it off the printer and make sure to clean up after yourself. First and foremost, add hot glue onto the top of the ADXL and glue it top-down inside the case. This ensures that it will be registering "up" as when the case is face-up.
-
Now take two of your M2 screws/bolts and thread them out of the case from the inside on the two holes that go to the lid. Add a generous dab of hot glue to keep this in place. Since we can't get an allen key at their heads inside the case, these must stay stationary so we can thread a nut on the other side.
-
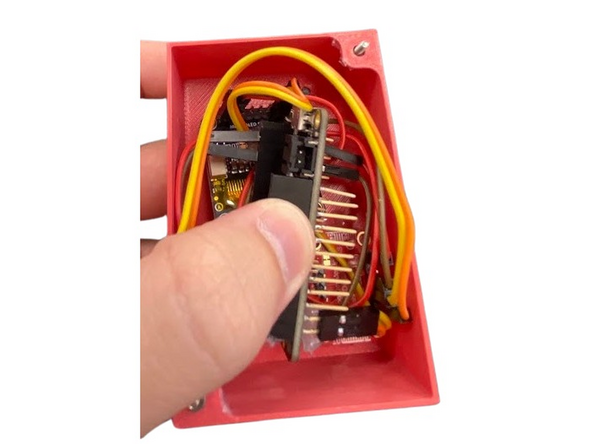
Next, take your display and insert two of your bolts into the open holes next to the jumper cables. Line up these screws with the holes in the case and make sure both go through. Hold these in place and thread on an M2 nut onto the bolt on the outer side of the case. Finger-tight is fine. Make sure that your display will stay in place.
-
Finally, cram your full-size Feather into the back of the case as close to flush as you can. This may be a tight fit. Make sure that the JST connector on the Feather is face-up! We want to be able to plug in and unplug the Feather from power with relative ease. Now, simply plug in the LiPo and store it somewhere inside the case.
-
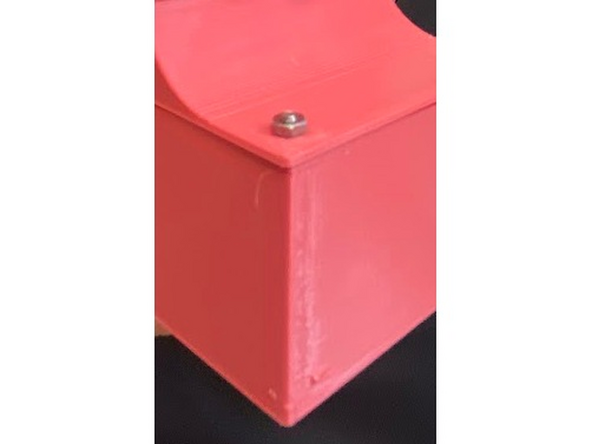
Finally, push the lid on and screw on your other two nuts. Take a rubber band or similar material, place the curved portion on your handlebar, and stretch the band between the two hooks. That's it!
-


It's important to note that if the system is not mounted directly vertical, the acceleration may be inaccurate because of the effects of gravity. This project should not be used for scientific testing or for important data. Enjoy your riding!
It's important to note that if the system is not mounted directly vertical, the acceleration may be inaccurate because of the effects of gravity. This project should not be used for scientific testing or for important data. Enjoy your riding!