
Introduction
The MakerGear M2 is a 3D printer used to create physical three-dimensional objects from 3D computer models. Plastic is the most typical medium. While this printer is capable of printing in several different types of plastic filament, we ask that you only use PLA. The basic function of a 3D printer is almost like a robotically controlled hot-glue gun that follows certain patterns generated by horizontally slicing 3D models into layers. The hot end assembly of the printer draws each layer by extruding filament onto the print bed. After all the layers build up, the object is complete! If you would like to learn more about 3D printing or have difficulties with a project the “A-Z 3D Printing Handbook” is a comprehensive manual that discusses many of the issues of getting good 3D prints. You can access the PDF file attached to the bottom of this guide.
Published by Ryder R. Nance with contributions from Matt P. Lamparter.
-
-
The 3D printers are not for printing boxes or any high-cost material print that can be easily achieved by other methods, such as laser cutting. If you believe your print is an exception, please email Matt Lamparter, ECE Lab Director and manager of the Maker-E, with a copy of your design and a justification via mlampart@bucknell.edu.
-
For box creation using laser cutting, users can use these tool to generate SVG files: https://festi.info/boxes.py/
-
-
-
-
Please keep the Maker-E clean! There is a handheld vacuum (Dyson v7 Trigger) to clean debris out of the 3D printer’s enclosure. You can find it mounted to the wall between several printers.
-
The nozzle (hot end) of the printer gets very hot in order to melt the plastic filament. To avoid burning yourself, do not touch the nozzle while the printer is running, or immediately after a job has finished. Note that the print bed will also get hot.
-
Our 3D printers typically use one of two types of plastic filament: PLA or PETG. We use mostly PLA in the Maker-E. If you wish to use PETG, please speak with a technician or visit the Mooney Lab makerspace.
-
Because you will be logging in to the computer using a local account, you will not to plan ahead how you will access the file you wish to print. Options include:
-
using a USB flash drive
-
emailing yourself the file
-
accessing networked or cloud storage such as Google Drive or Bucknell's Netspace.
-
-
-
Confirm that PLA filament is loaded on top of the printer.
-
You can check the filament type by referring to the label on the side of the filament roll.
-
If PLA is not loaded, please see a technician for assistance.
-
-
-
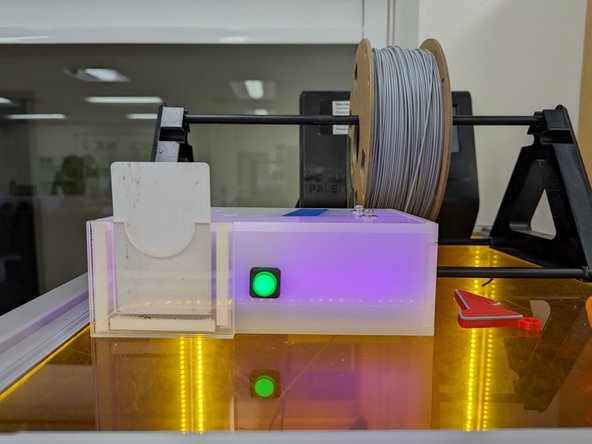
Speak with a Maker-E tech to have them place the printer in training mode for you. The Portal box should illuminate purple to indicate training mode.
-
Confirm that the printer has turned on by checking the LCD.
-
-
-
Once the printer powers up, continue by logging into the laptop using the following credentials:
-
Username: makerequip
-
Password: BucknellMaker-5
-
Note that while you can still log in to the computer using your Bucknell credentials, the printer will not function properly this way.
-
When logged in using the above credentials you will not be able to access any files in your private Netspace. Your file(s) should be accessible via public Netspace, Google Drive, email, physical media, etc.
-
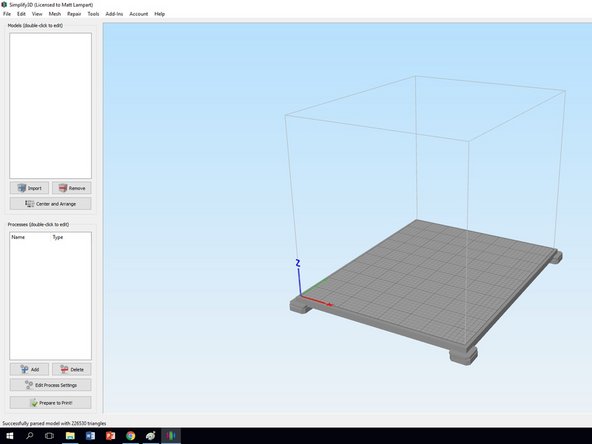
Launch the Simplify3D application by double clicking the shortcut on the desktop.
-
After Simplify3D opens you should see the screen shown here. If you encounter a login screen, please stop and see a technician.
-
-
-
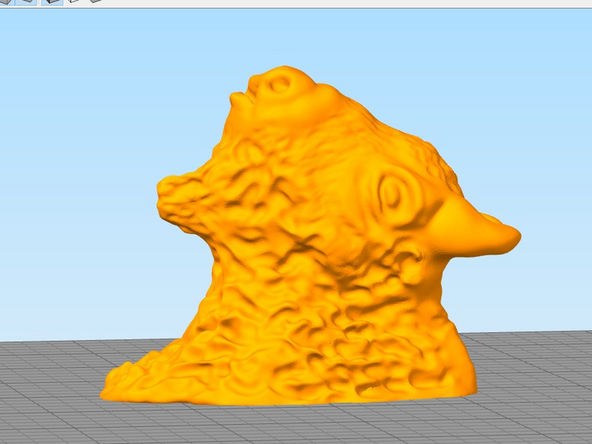
If you are using the printer for the first time to pass your certification then download the bisonHead.stl file attached to the bottom of this guide. This file came from Thingiverse, which is a great resource for free 3D object files.
-
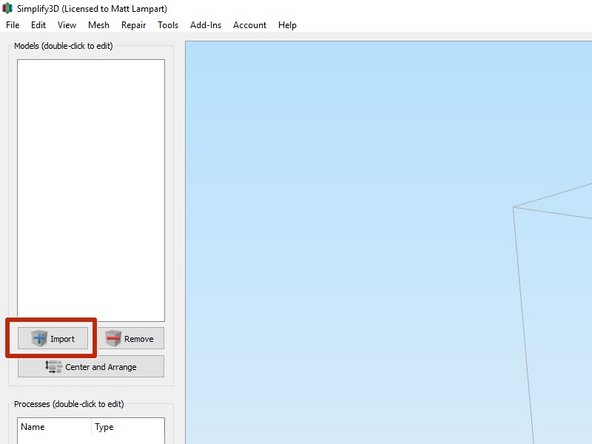
Click Import and navigate to where your STL file is saved. After you have imported your file, experiment with using the mouse to navigate the workspace. Zooming, rotation, and translation are all possible with the scroll wheel, left button, and right button, respectively.
-
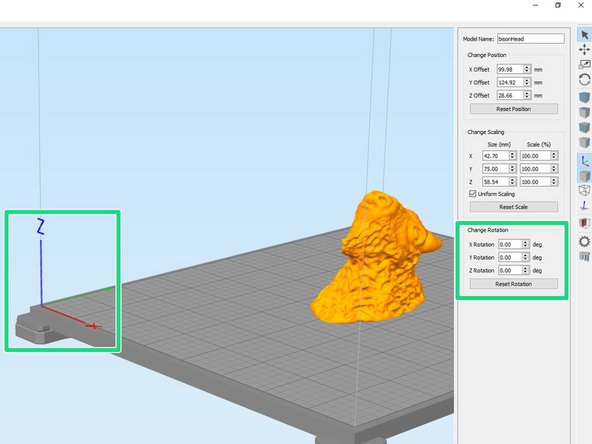
The orientation of your object may affect how much support material is needed. More on this later. The basic idea is to rotate your part so that as much flat surface area sits on the print bed as possible.
-
You can change the rotation by double clicking the object then adjusting the rotation settings as needed. The bisonHead.stl object has a flat bottom which is already resting on the print bed. Thus, it does not require any rotation.
-
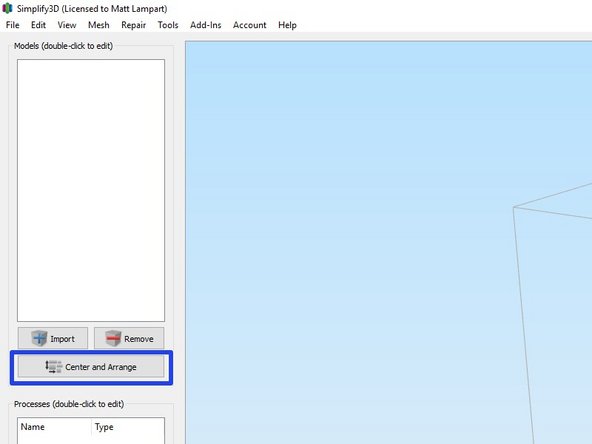
If you rotated your model, click Center and Arrange to reposition your model in the center of the print bed and drop it flat on the surface.
-
-
-
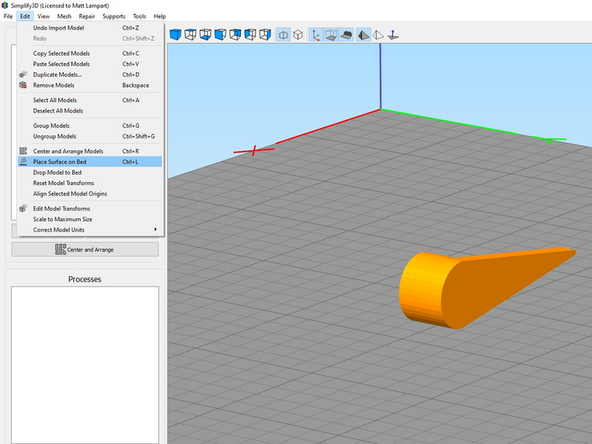
Sometimes you wish to rotate an object so that a particular face or surface sits flat on the print bed. Rather than arbitrarily guessing rotation axes/angles you can use a Simplify3D function.
-
In the example shown here, the object needs to have the broad, flat side (highlighted with red arrow) placed flat on the bed for maximum adhesion to the bed.
-
Choose Edit -> Place surface on bed from the menu bar. Then click on the surface you wish to place flat on the bed.
-
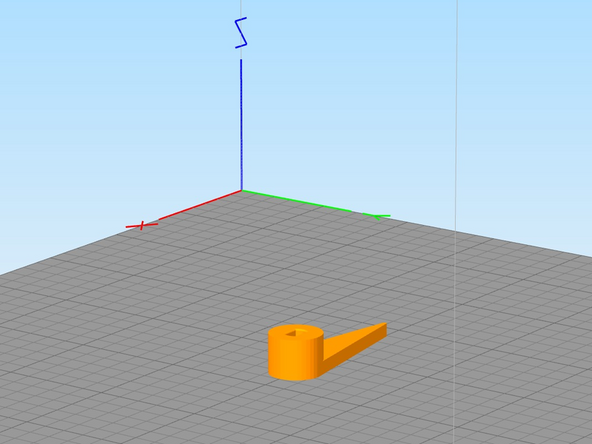
You should see the part rotate such that the surface you clicked on is now flush against the print bed as in the second image here.
-
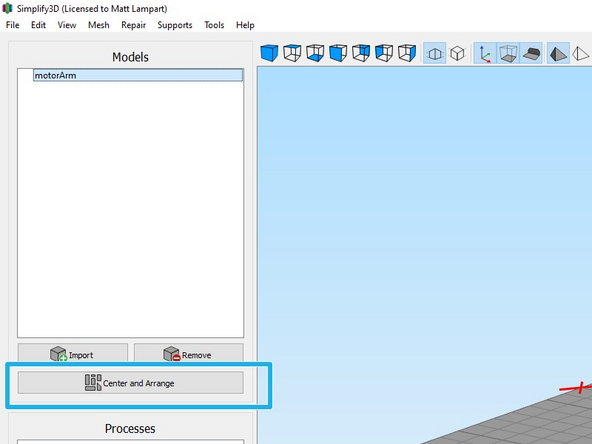
Don't forget to click Center and Arrange again if your part moved off center during the rotation.
-
-
-
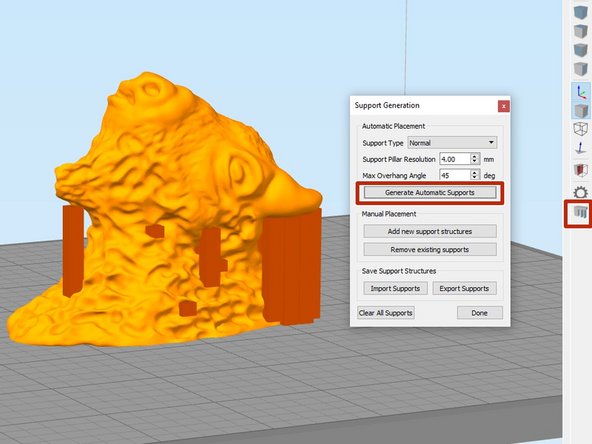
Notice how in this example the bison's horns and chin stick out from the head, with nothing underneath them? If the printer tried to print these as shown it would be extruding hot plastic in midair - which would promptly fall! We call this overhang.
-
The solution is to define "support material" underneath these overhangs which will give the printer something to rest the overhangs on while they are being printed. Support material is generated in such a way as to provide good support while printing, but can be easily removed once the print finishes. Support material is temporary.
-
Begin by clicking the stonehenge-looking icon on the right to bring up the Support Generation window. Click the Generate Automatic Supports button to have Simplify3D add supports where it deems necessary.
-
You can see the automatically generated support pillars in the second image, shown in dark orange.
-
-
-
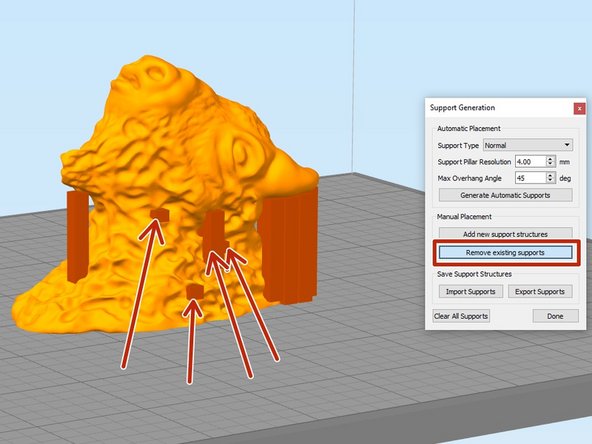
Simplify3D does a pretty good job at placing support material, but it is important to examine the automatic placement and think about how the resulting model will print. In this example, there are several areas where support is not needed and will only make for difficult removal. These are called out in red arrows.
-
Click on the Remove existing supports button and then left click on all of the supports you wish to remove. Remember to check both sides of the model!
-
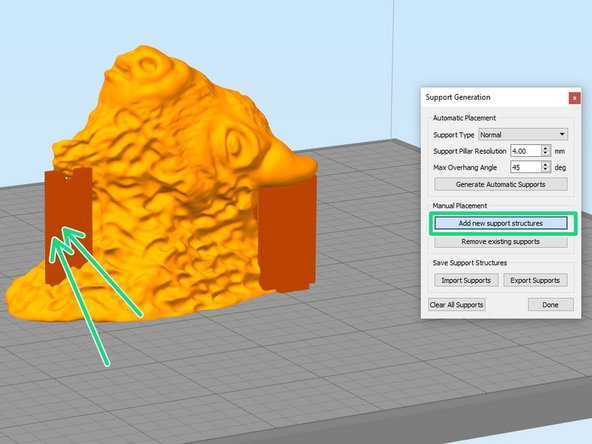
You should also add several additional supports for the chin to ensure it prints properly. These are called out in green arrows.
-
Click on the Add new support structures button and then left click where you would like to add support.
-
Click Done to exit support definition when you are satisfied.
-
-
-
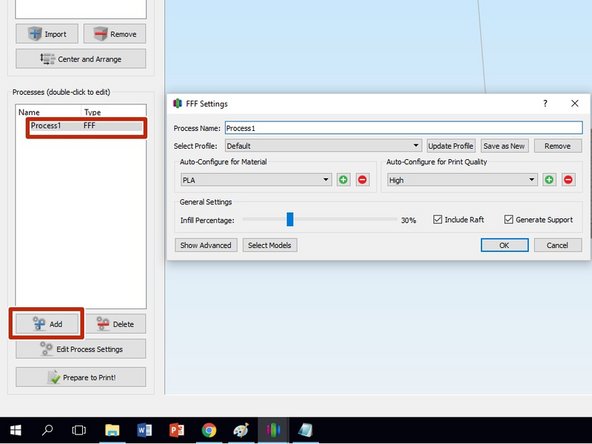
Double click Process1 in the Processes window to bring up the Print Settings dialog. If Process1 does not appear, click Add to generate a new process and open the dialog window.
-
Adjust settings as shown:
-
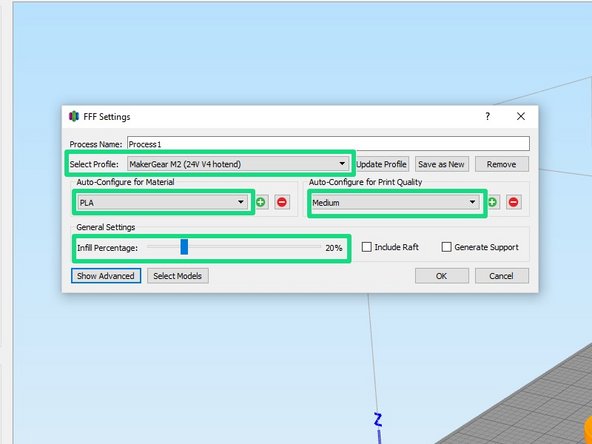
Select the MakerGear M2 (24V V4 hotend) profile.
-
Select PLA as your print material.
-
Choose to print Medium quality. The trade off between Low and High quality comes in the form of quality vs. print time. Generaly, Medium results in good prints at reasonable speeds.
-
Set Infill to 20%. This parameter determines whether your part is completely hollow, solid, or somewhere in between. Increasing infill will add rigidity to your part if it must withstand heavy loads. However, this will also increase the print time for your part, and increase the likelihood of warping.
-
Confirm that MakerGear M2 (24V V4 hotend) is displayed in the Select Profile field. If this profile is not selected, or not available as an option, quit Simplify3D, log out of the computer, and go back to the beginning of this tutorial and be sure to log in to the computer with the proper credentials!
-
This profile will set the heated bed and extruder to the correct temperatures for the filament you choose. There is no need to adjust the temperatures manually.
-
-
-
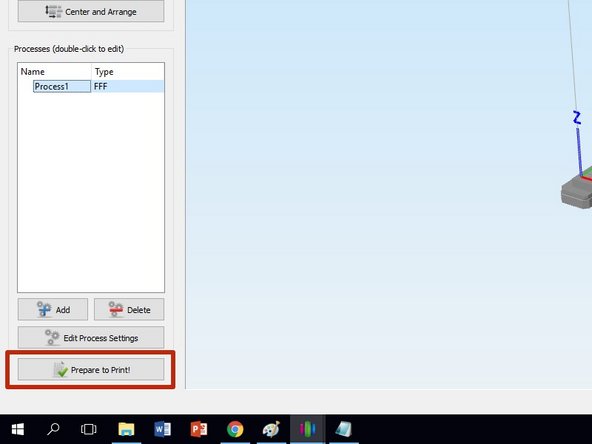
Now click the Prepare to Print button. Simplify3D will show you a preview window detailing the toolpaths used to construct your object.
-
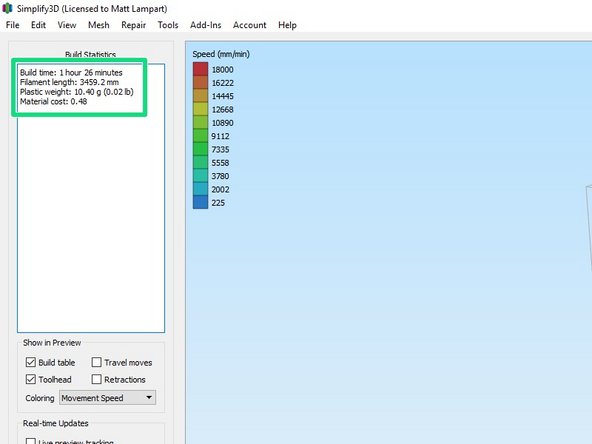
The top left of the screen shows useful build statistics such as build time, filament usage, and cost of material. Remember the build time as you will need this value in a future step.
-
-
-
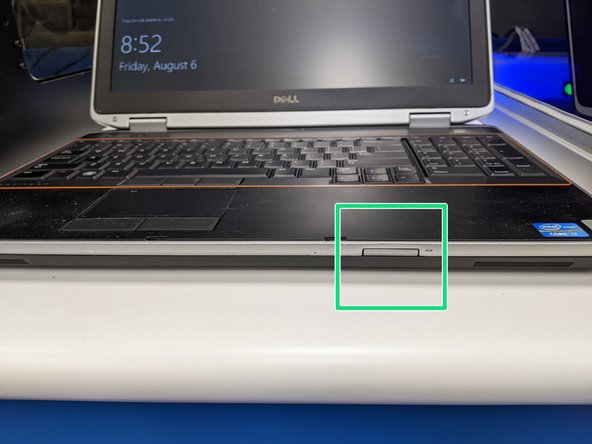
Now you need to transfer the information to the printer. Remove the SD card from the printer control interface, located on the bottom right side of the printer.
-
Insert the SD into the card reader located on the front of the laptop.
-
-
-
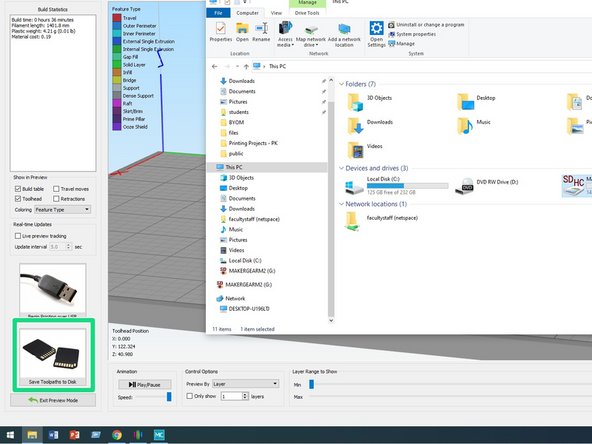
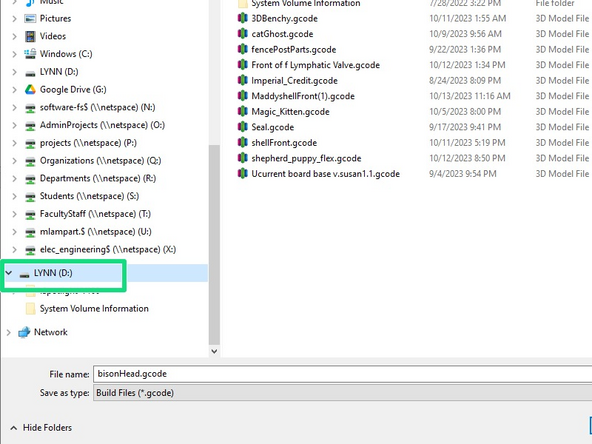
Now click Save Toolpaths to Disk and save your file to the appropriate drive. The SD card should show up labelled with the name of printer. For example LYNN or JERRYLAWSON.
-
-
-
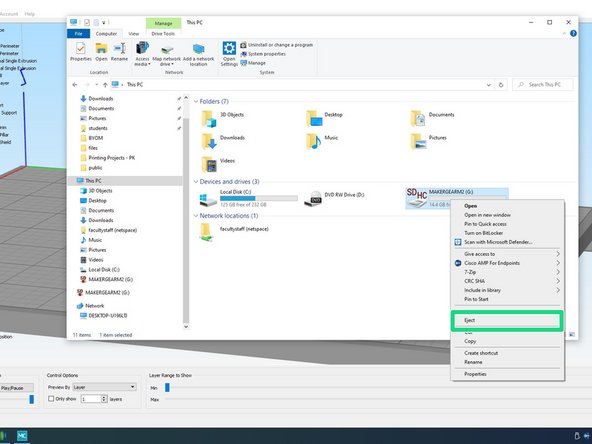
Open a File Explorer window and locate the the same drive where you just saved your gcode file. Right click on this drive and choose Eject. Wait until the drive disappears from Windows Explorer.
-
Be sure to eject the SD card properly from Windows. Failure to follow this step can cause the card to become corrupted which will prevent you from printing.
-
Remove the SD card from the computer by pushing on it, then insert it back into the printer.
-
-
-
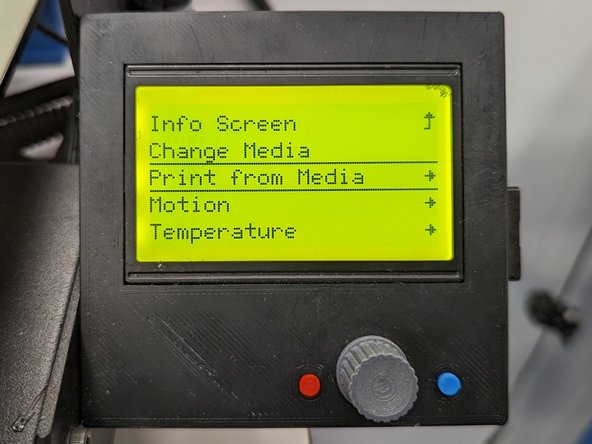
With the SD card loaded, press the scroll knob on the controller interface. This will bring up the Main Menu. You should rotate the knob until Print from Media is selected. Press the scroll knob to confirm your selection.
-
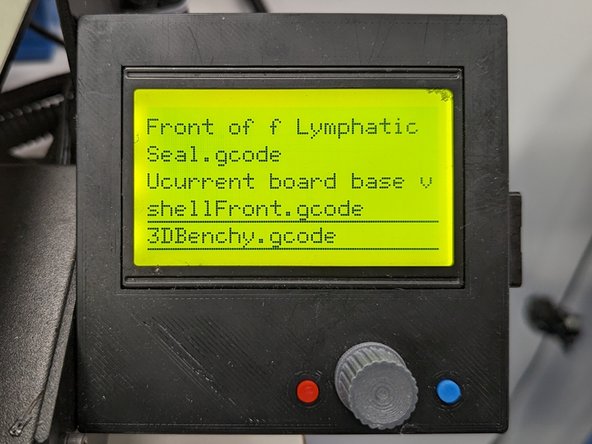
Rotate the scroll knob clockwise to scroll through a list of print jobs on the SD card. Highlight your job (here the example is 3DBench.gcode) and press the scroll knob to confirm your selection.
-
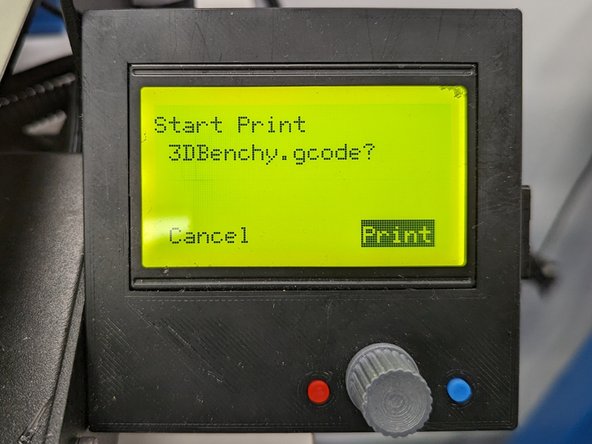
You will be prompted to confirm your print job selection. Rotate the scroll knob clockwise to highlight Print, then press the scroll knob to confirm your selection.
-
-
-
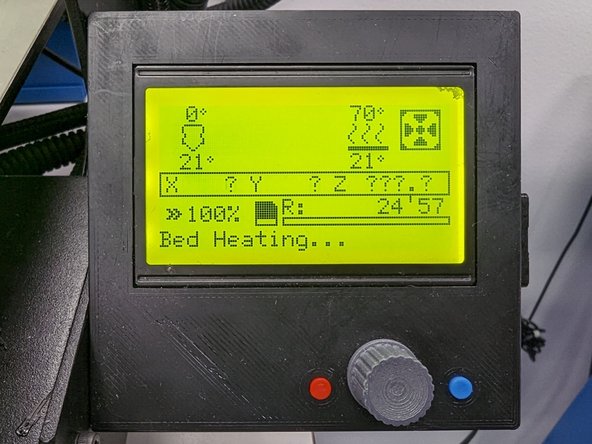
The LCD should now display Bed Heating... and you should see the bed set point (70° in this example) with the current temperature (21° in this example) below. Once the bed reaches the set point then the same process will happen for the hotend.
-
Once the printer is at temperature your print will begin. You should always watch the first layer of your print! The majority of print failures happen during the first layer. Watch for the following:
-
Confirm filament is extruding from the nozzle
-
Confirm the nozzle is not being driven into the print surface
-
Confirm filament is adhering to the print bed
-
-
-
When the print is finished, let it cool for several minutes. The object could warp if it’s handled before cooling. Also, the bed will cool after several minutes, making it safer to remove your part.
-
The bed may or may not drop after your print completes, depending on the amount of friction in the z-axis drive.
-
If the bed does not automatically lower, it may be necessary to slightly turn the z-axis adjustment knob in order to get the bed to lower. Be sure to support the bed as it drops to the bottom. Failure to support the bed will cause it to rapidly crash into the bottom of the printer frame which could damage the printer.
-
-
-
!!!STOP!!! It is tempting to just pull your print off the bed, but you can damage the machine or cause misalignment if you try this. Make sure to carefully read and follow the instructions below to remove the print.
-
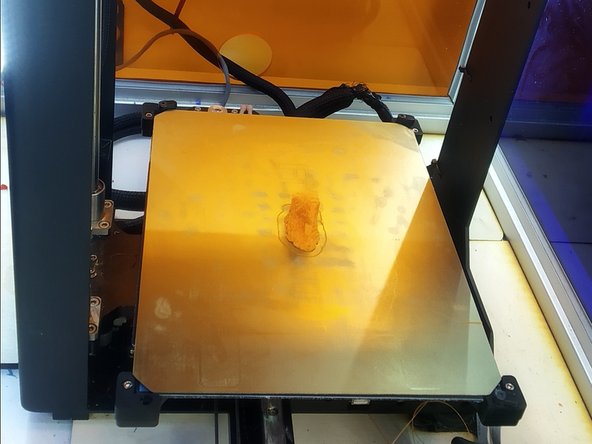
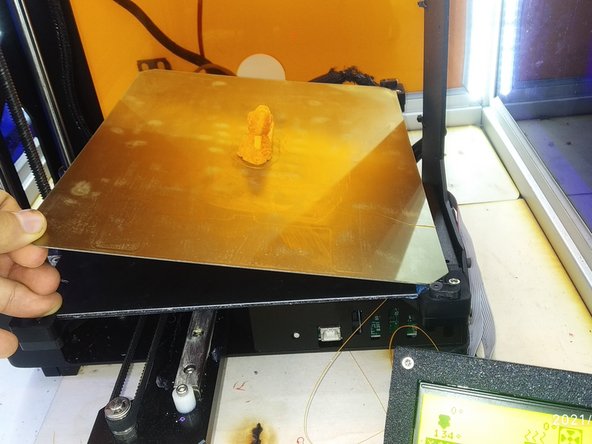
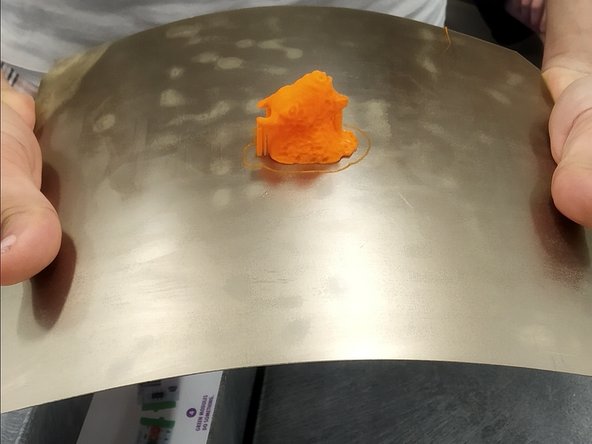
Be careful not to burn yourself, wait a couple minutes before completing this step. Hold down on the edge of the bed and pull magnetic layer off. Once the metal sheet (with your print) is out of the printer then remove the print by gently flexing the plastic.
-
-
-
If your part had support material, you may now safely remove it. Use pliers and exercise caution.
-
Again, be careful when using tools to remove support material. Do not let the tools slip which could cause cuts on your fingers and hands.
-
-
-
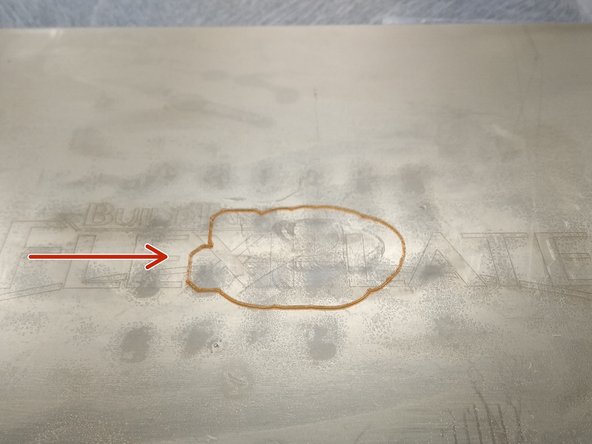
Remove any remaining plastic from the print bed by gently scrubbing with a dry cloth. The M2 printer will print a skirt, a small ring of plastic, around the perimeter of your part. Be sure to remove this skirt.
-
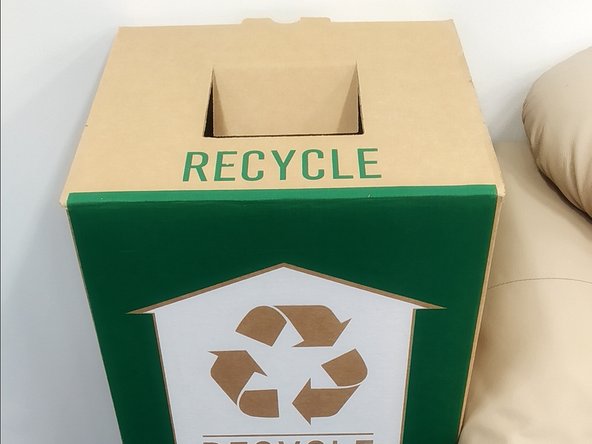
Clean up any bits of plastic and all of your support material. All of your PLA scraps can go in the PLA Recycling box behind the 3D printer. ABS can go in the trash.
-
Use the vacuum mentioned earlier if there are a lot of small bits of plastic.
-
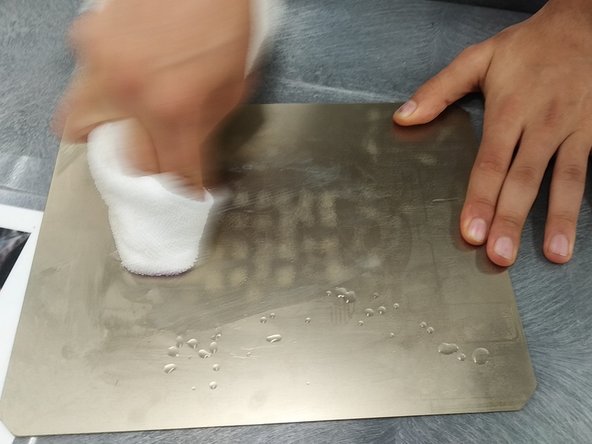
Use the opaque white spray bottle with water to wet the surface of metal bed. Next, scrub the surface thoroughly with the provided microfiber cloth to get rid of ALL the remaining glue present on the surface of the bed.
-
At the end of this step, the surface of the bed should be clean and there should NOT be any residue of glue or filament present on the bed.
-
-
-
The final step is to place the plastic sheet back on the printer. Locate each corner of the printer and align the magnet bed to the corner. Gently place the magnetic bed between printer corners.
-
Finally, remove the 3D printer training card from the badging box and return it to a technician.
-
Congratulations on completing your first 3D print!
-


Cancel: I did not complete this guide.
51 other people completed this guide.
Attached Documents
Team
5 Comments
This tutorial was very useful even though I did not start with the bison head. It was still very applicable, and 3D printing using this machine seems much simpler.
Chris Toomey - Resolved on Release Reply
This was super helpful in learning how to use the 3D printers. I found it incredibly important to wait and ensure that the print starts successfully so that you don’t come back later to a spaghetti of filament.
Chris Stankus - Resolved on Release Reply
Awesome tutorial! I was able to follow along with no problems. One suggestion I do have for anyone new to 3D printing is to make sure you the supports accordingly, the generate supports setting was very useful to me but I had to remove some that seem unnecessary. Don’t worry about removing the supports later because it comes off easily.
Alvin Huynh - Resolved on Release Reply
Note that it takes a while for the bed and nozzle to heat up. You might have to wait with the printer for a few extra minutes to check that the first layer went correctly which will not happen until after the heating process is done.
Sivanne Bachrach - Resolved on Release Reply
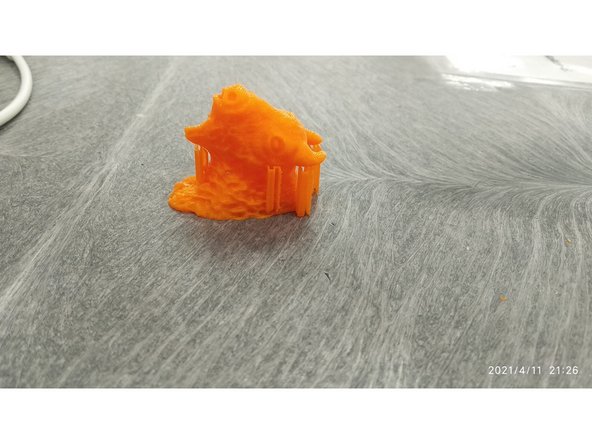
This tutorial was great and the printed bison is a cool trinket to keep.
Darren Miller - Resolved on Release Reply