-
-
There are many different types of materials of objects that you can mold. By using one of our 3D printers or the laser cutter, you could even create a custom design and then create a mold on the vacuum former to mass produce it later.
-
If you are using the 3D printer to create your design make sure it has at least 20% infill so the object does not break when the air pressure is removed.
-
When creating your design, be mindful of the undercuts that are in your design. You want to be able to easily pop your original object out of the mold and if you have too many ridges or undercuts on the edges the object may be stuck within the mold.
-
-
-
The vacuum former takes approximately 20 minutes to heat up so as you are getting your plastic ready to mold turn the machine on first.
-
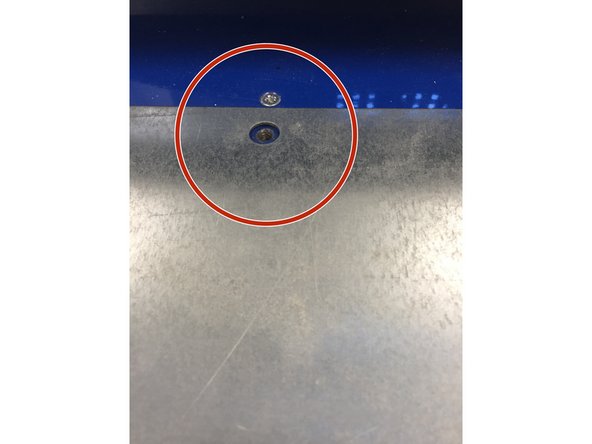
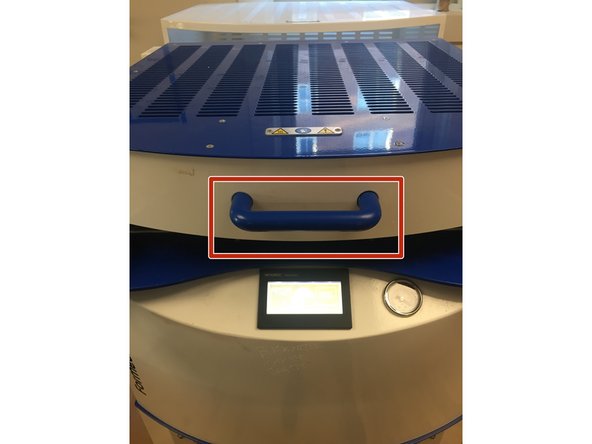
The machine has a switch on the backside on the bottom left-hand corner next to the power cord. Turn this on.
-
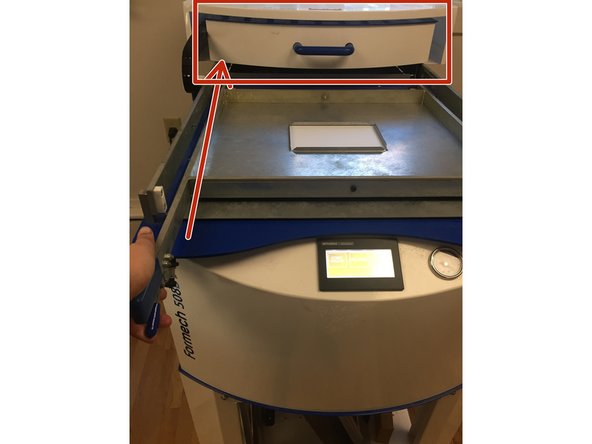
Make sure the heated box is pushed to the back of the machine in order to begin heating up.
-
-
-
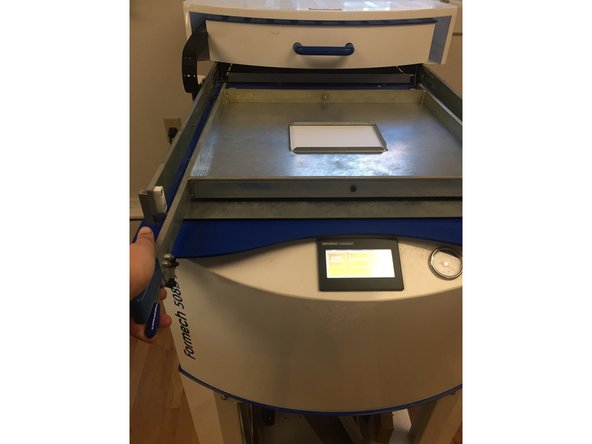
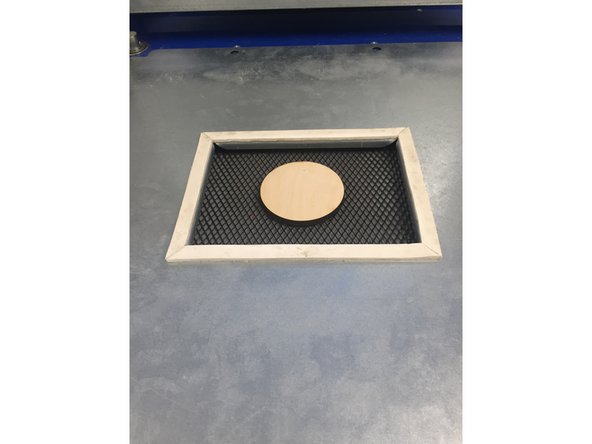
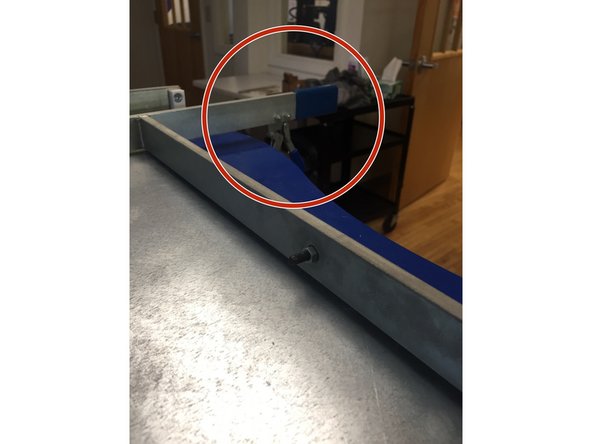
The vacuum form bed is the flat surface in which your object is going to be placed on.
-
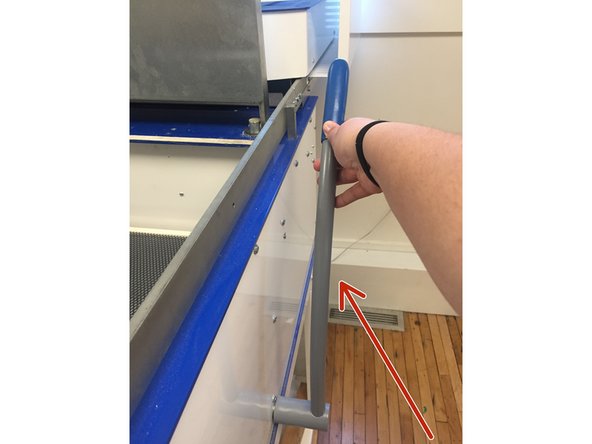
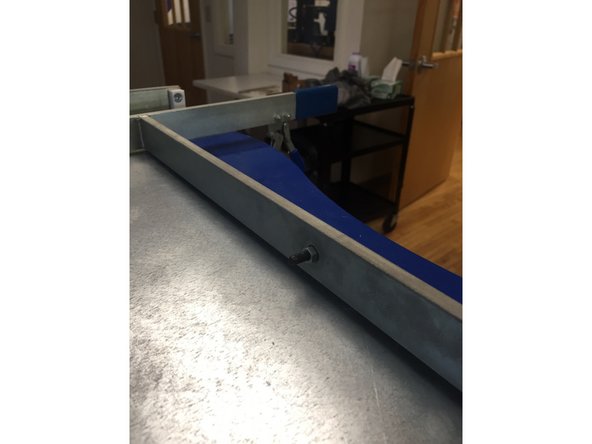
While the machine is heating up, we are going to pull the bed up by pulling on the table lever located to the right of the machine. This lever should snap into position.
-
-
-
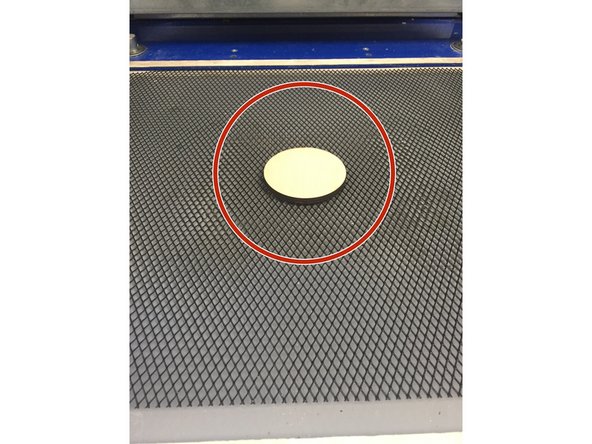
Place the object you want to mold onto the center of the bed.
-
-
-
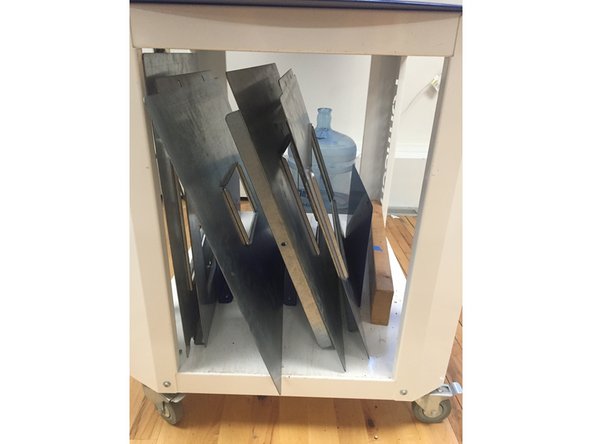
There are 3 different pairs of frames located below the vacuum former. These frames are used to keep your sheet of plastic in place while the object is molding.
-
When choosing a framing pair, choose a size that is bigger than your object but not too big that you would be wasting material.
-
-
-
Lift the large square border (the clamp frame) with your hand in order to place the bottom frame into place.
-
Place the frame that has the soft edging around its square upright and on the top of the table. The two holes located at the top of this frame should line up with the two holes on the machine.
-
You do not need to bolt these into place.
-
-
-
Place the top frame on top of the bottom frame so the inner cut out rectangles are lined up.
-
Make sure any nuts or bolts are unscrewed.
-
The frame should be laying flat on top of the bottom frame and with the tall edges pointing upward not down.
-
Lower the clamp frame and make sure the edges of your top frame are aligned on the outside of the clamp frame.
-
The holes of the clamp frame and top frame must also be aligned.
-
-
-
Now that the top frame and clamp frame are aligned, screw the nuts and bolts through the holes to lock the top frame into place.
-
-
-
Ask a student employee to assist you in obtaining a piece of plastic to vacuum form. Try to use any scrap pieces available before cutting a large sheet.
-
Cut your sheet down with a straight edge and box cutter so it is approximately 1 inch larger than the inner rectangle of the frame you are using.
-
For example, an 8"x6" frame should have a plastic sheet cut down to 9"x7".
-
We do this so the plastic sheet will not move during the vacuum form process.
-
-
-
Place your object in the center of the bottom frame while the bed is still raised.
-
Once you do this, you can now lower the bed by moving the lever back.
-
-
-
Now that the object is lowered and in place, we are going to place the plastic sheet we just cut over the inner rectangle of the bottom frame.
-
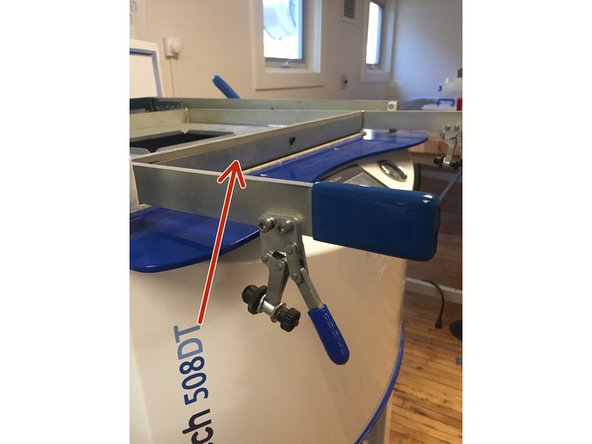
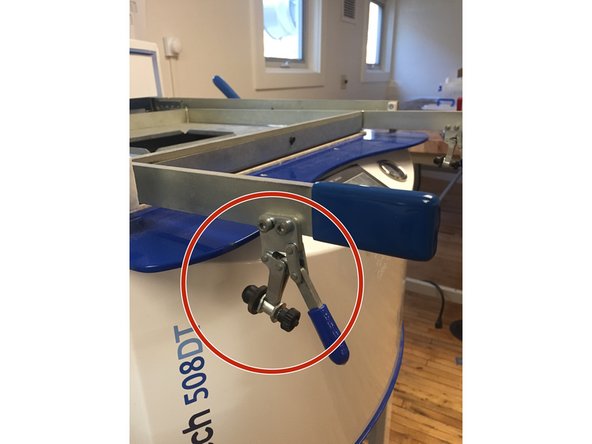
Pull down the top frame and lock it into place by clamping down the two clamps located on either side of the top frame.
-
-
-
Now we are ready to look at the touch screen display and operate the machine.
-
If the machine has been on for less than 20 minutes it would be better to wait a bit until the machine is fully heated up.
-
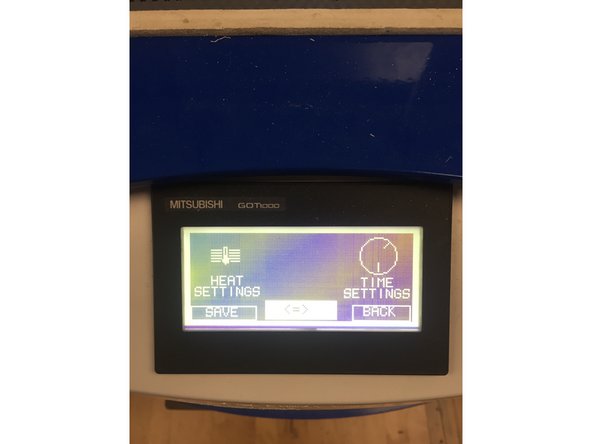
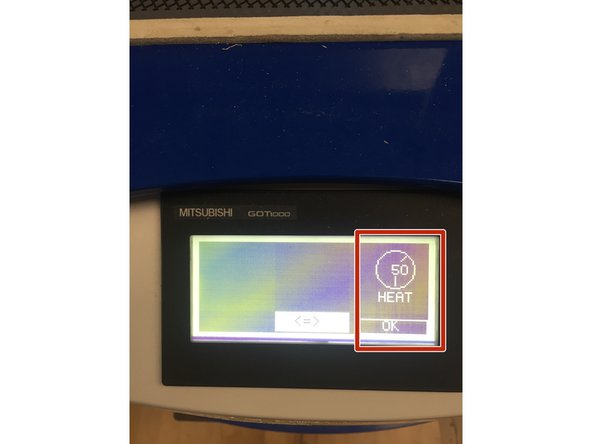
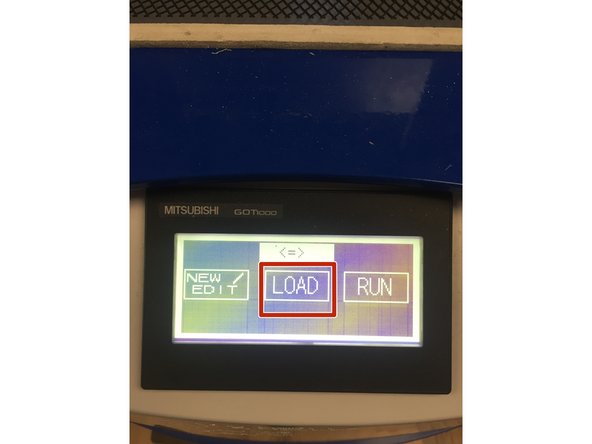
On the screen it will give you 3 different options: "New/Edit", "Load", "Run". Most of the time, you will be creating a new heat/time setting.
-
Press the "New/Edit" button and then press the "Time Settings".
-
We typically do not have to change the heat settings from what they are set as but if your plastic seems to be heating at different rates within the sheet there might be a problem with the heat settings.
-
The time settings we alter based on the material we are using.
-
-
-
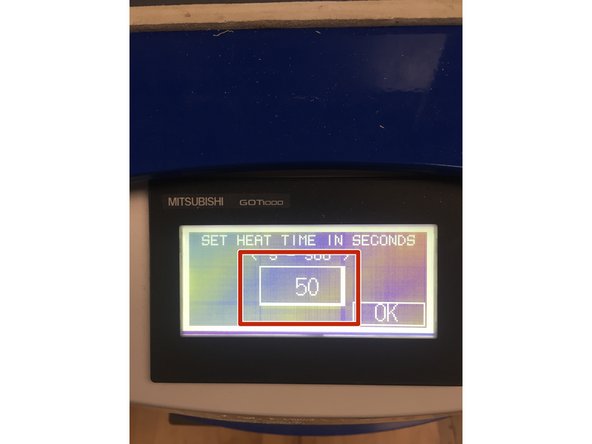
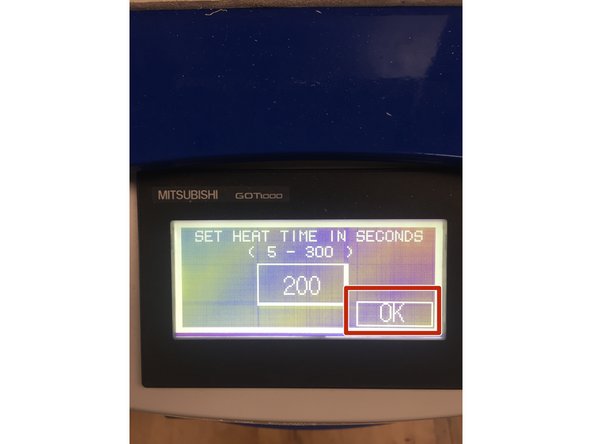
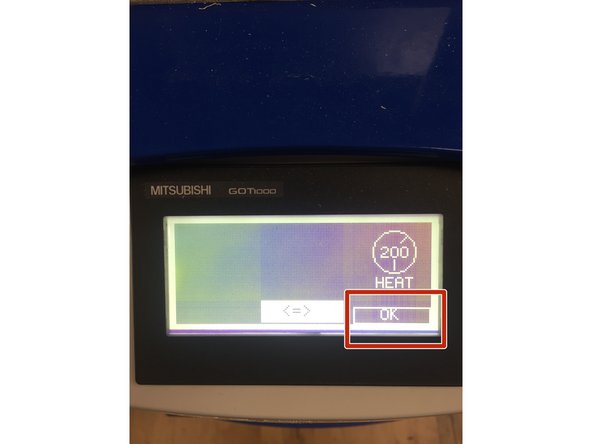
For this tutorial we are going to change our time settings to reflect 200 seconds. Based on the material we have in the space, this has been the best time set.
-
To change the time, you are going to want to click on the "Time Settings" -> "50 Seconds" -> "Set Heat Time in Seconds".
-
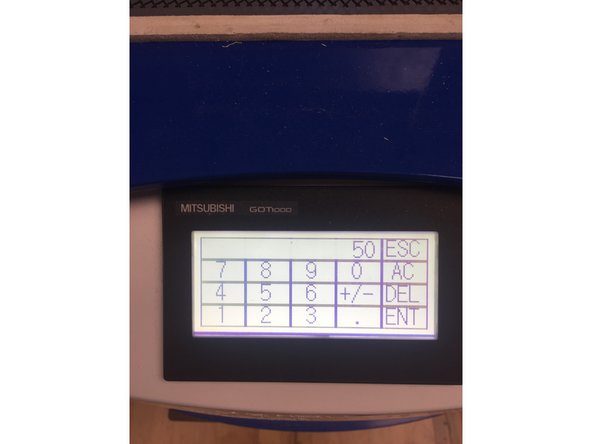
Using the touch screen, delete out the numbers that are already there and input 200.
-
-
-
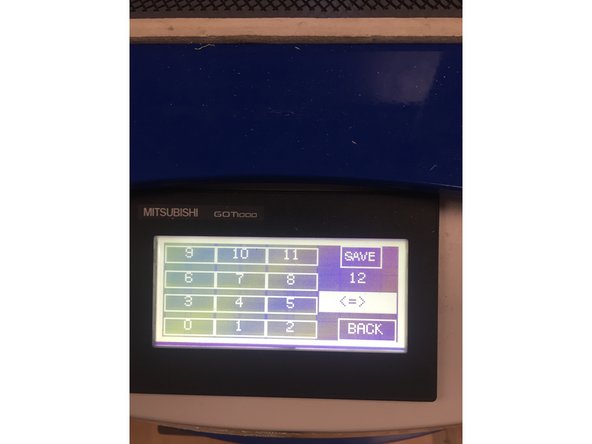
Now that you've inputted the time settings you have to save them and load it to the machine.
-
Press "OK" to save your new time on both of the popup screens.
-
On the next screen, you are going to be brought to the "Load" screen. Save your new settings to whatever pre-load setting works for you. For this purpose, we saved it to 12.
-
Press the "Save" button in the top right-hand corner.
-
-
-
Now you will be brought back to the original screen.
-
Press the "Load" button and load the settings you just saved. (Remember, for us it was under number 12).
-
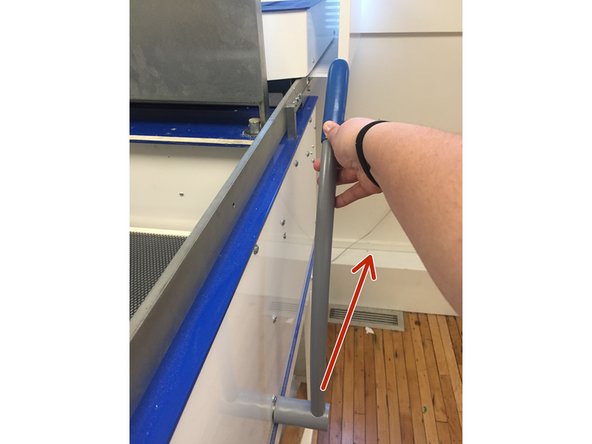
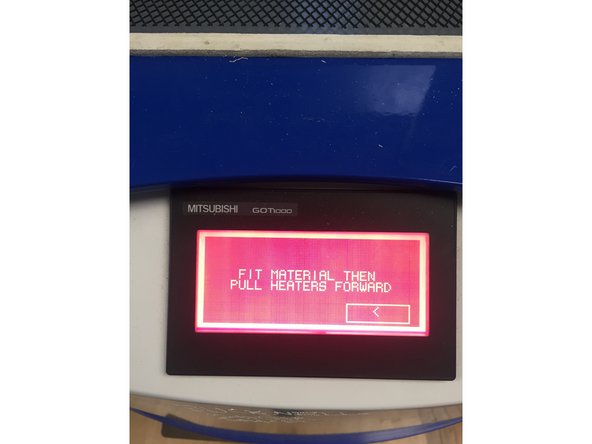
A red screen will then appear instructing you to pull the heat bed forward to begin heating your plastic.
-
Don't forget at this point the heating bed is hot!
-
Pull the lever of the heating bed forward.
-
It must be pulled all the way forward in order to heat evenly!
-
-
-
When the timer finishes it will let off a beep noise and you can push the heat box back into its resting place.
-
Lightly and quickly tap the plastic you just heated. It should feel warm and bouncy (like the texture of a balloon).
-
If it feels cold not bouncy, you will need to run the heat cycle again (and maybe longer time) following the previous steps. If it feels warm and hard it is almost there but needs to be run again.
-
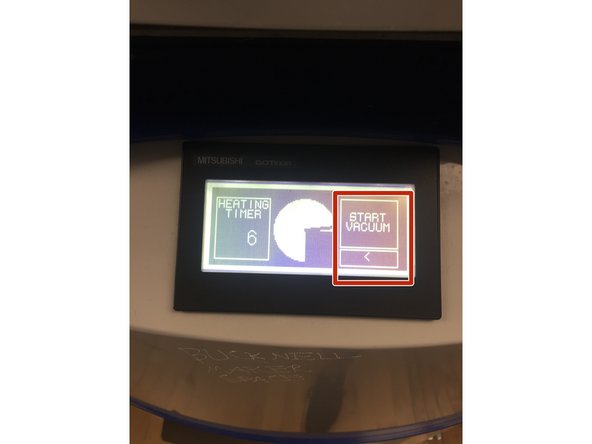
Once the plastic is at the warm and balloon-like texture, you are going to pull the table lever forward and press the "Start Vacuum" button.
-
-
-
The plastic is going to begin forming around your object. Allow it to continue forming enough so you can see the details of your object but not too much that you won't be able to remove it.
-
You should see the air pressure gauge moving on the machine as well.
-
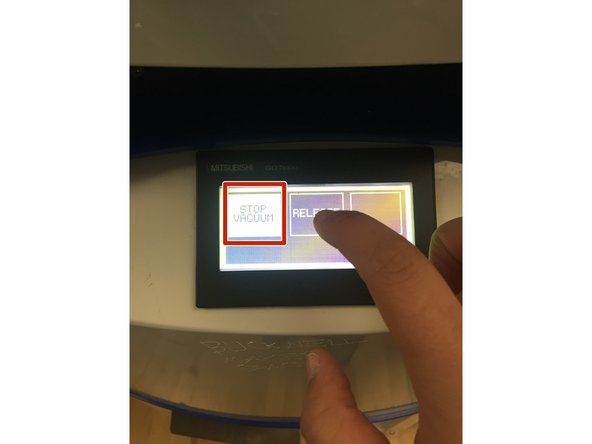
Once you are satisfied with the plastic forming, you can press the "Stop Vacuum" button.
-
After about 10 seconds, pres the "Release" button 3 times.
-
This pumps air into the table to release the object from the plastic.
-
Press "Finish" when you are done.
-
-
-
Release the two clamps that we had set earlier.
-
Pull up the top frame.
-
Remove your plastic and remove the object inside!
-
Now you have a plastic mold!
-
-
-
Check out this link for more helpful information: http://formech.com/about/about-vacuum-fo...
-