-
-
Mold making and casting is a manufacturing process commonly used to make replicas of an object.
-
A fluid material is poured or injected into a premade cavity taking the form of the cavity. The fluid material then solidifies via cooling, chemical or other process creating the replica.
-
This tutorial covers only the basics of molding and casting and is not intended to cover all aspects of this manufacturing process.
-
Furthermore the technique presented here goes through mold making via 3D printing and subsequent casting with silicone.
-
This tutorial was made by Jacob Nickle along with Gemini AI and Microsoft Copilot.
-
-
-
Casting - The process of pouring a liquid material, such as plastic resin, plaster, molten metal or other material into the cavity of a mold.
-
Molding - The process of creating a mold, which contains the cavity for shaping the liquid material.
-
Master - The original object from which forms the cavity for the mold.
-
Cure time - The time required for the casted material to solidify or harden.
-
Pot Life - The time a mixed two-part material remains in a liquid, workable state. In other words, the time available to use the material before it begins to solidify.
-
Negative - The cavity that the Mold takes.
-
-
-
There are safety concerns when mold making and casting. Check the Technical Bulletin and SDS sheets for full safety requirements and disposal requirements. In general, the following safety precautions are required:
-
Wear safety glasses, gloves and long sleeves to reduce the risk to exposure.
-
Proper ventilation is necessary such as using snorkels provided in the fabrication lab or fume hoods in various BME Labs.
-
To reduce potential mess, the following is required:
-
Use an absorbent sheet on any table that will be worked on.
-
If vacuuming, carefully watch to make sure the resin does not overflow into the vacuum chamber.
-
If any mess does result after completing the mold and/or cast, clean up using isopropyl alcohol and paper towels.
-
-
-
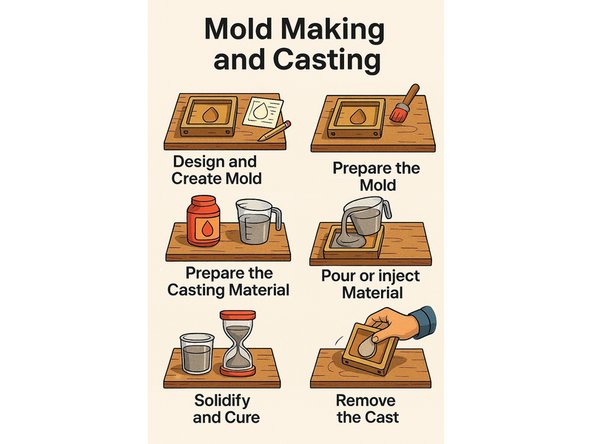
A general progression of molding and casting is as follows:
-
Design and create mold
-
Prepare the mold
-
Prepare the casting material
-
Pour or inject material
-
Solidify and cure
-
Remove the cast
-
Post Processing
-
-
-
It is assumed at this point that the mold has already been designed and created. If not refer to the tutorial Mold Design for more information.
-
Preparing the mold may include the following:
-
Applying a release agent. Note that if the mold was 3d printed, it is recommended to use a release agent even if casting with silicone. This is due to the 3d printed surfaces which are porous and have microscopic, layer lines.
-
Clamping mold parts together. This is done to minimize leakage and ensure proper tolerances especially at the parting line.
-
Verify potential leakage areas and seal. Silicone frequently escapes at the parting line. Additional sealing material such as a hot glue gun or even a designed gasket can help reduce unwanted silicone from escaping the mold.
-
-
-
It is best to read the Technical Bulletin provided with the material to remember specifications such as vacuum degassing, pot life and so forth.
-
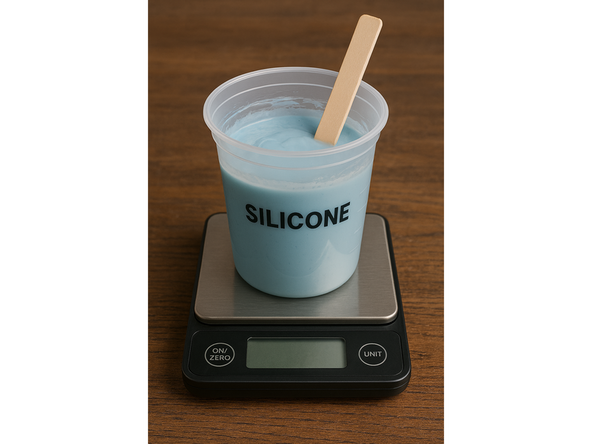
Plan out the needed volume of needed material.
-
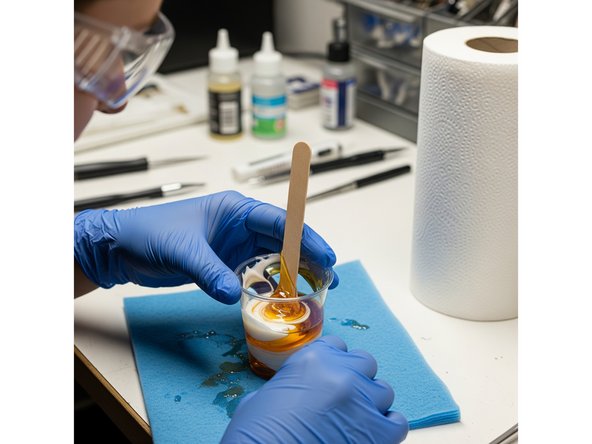
Measure out part A and B in separate disposable mixing cups.
-
Mix part A and B together thoroughly.
-
Vacuum degas the material as needed.
-
-
-
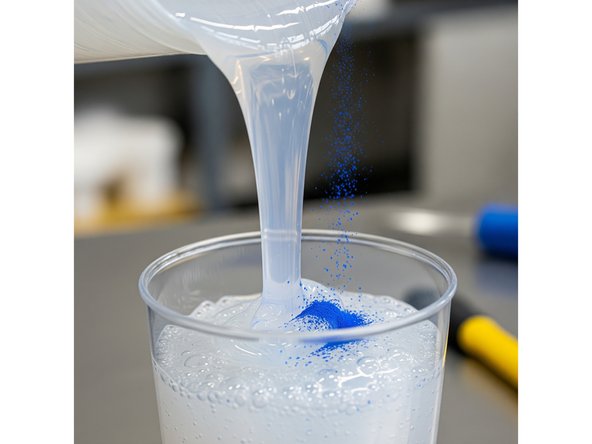
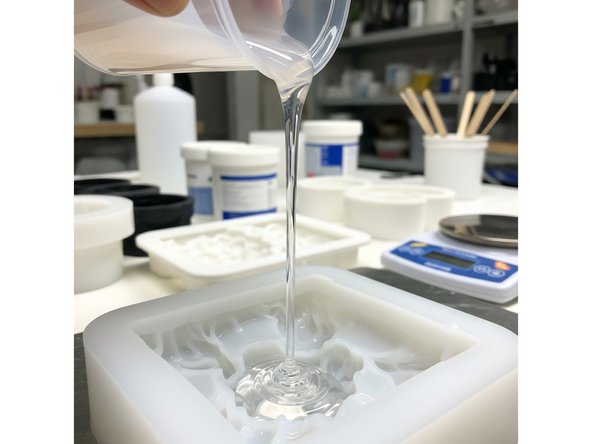
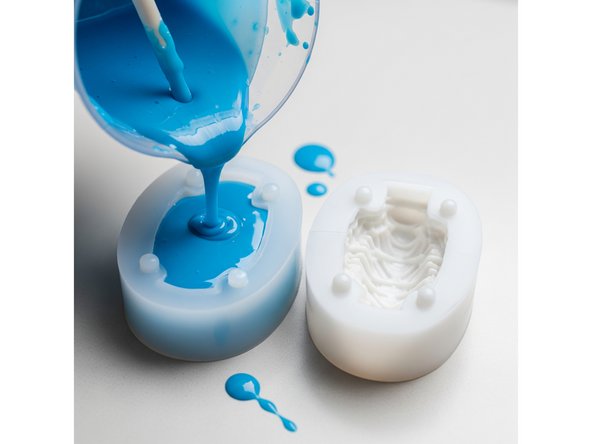
Pour or inject the material into the mold before pot life has been reached.
-
If pouring the material, pour into the lowest spot in a thin steady stream to prevent air bubbles from entering the material.
-
-
-
After the mold has been filled with mixed material, it will start to heat up.
-
Solidifying material is an exothermic reaction.
-
Note the demold time and wait until then before removing the mold.
-
Note also that temperature influences the time until the material is fully cured. Furthermore, adding temperature may be needed to fully cure the material. This can be done using the vacuum degassing chamber heating feature.
-
-
-
Remove any clamps or elastic bands keeping the mold together.
-
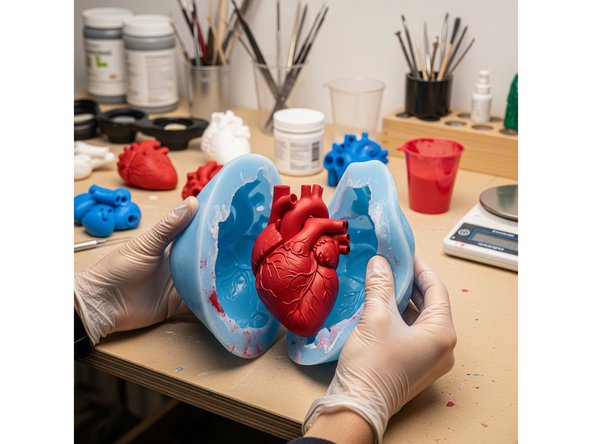
Gently pull apart the mold.
-
Note that vents or sprues can be cut off during mold separation.
-
If the part is not fully cured (e.g., feels tacky), add heat and allow more time for it to fully cure.
-
-
-
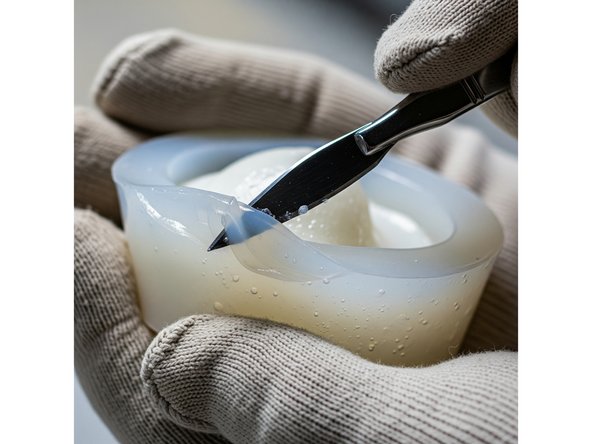
Cut off any extra material. Remember to use cut-resistant gloves.
-
Wash with soap and water or wiping down with Isopropyl alcohol.
-
Do not forget to clean up and return tools/materials.
-