
-
-
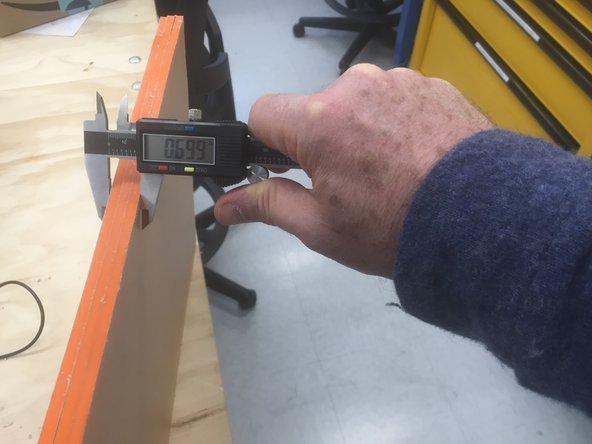
The first step in etching thicker materials is to use a dial or digital caliper to measure the thickness of your materials. If you have never used digital calipers before, watch this short tutorial.
-
For larger materials measure at several points and average.
-
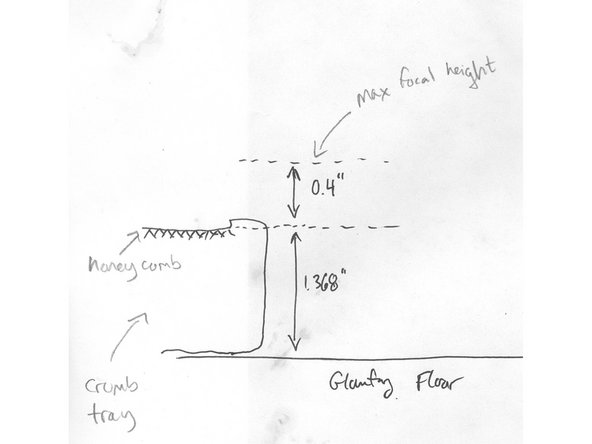
Thickness < 0.4 inches - use the regular tutorial.
-
0.4" < thickness < 1.368" - you will need to remove the crumb tray and raise your material
-
1.368" < thickness < 1.768" - remove the crumb tray and etch
-
Thickness > 1.768" - sorry can't do this on the Glowforge. Use the Thunder Laser or the laser cutter in Mooney Lab.
-
-
-
Open the cover of the Glowforge.
-
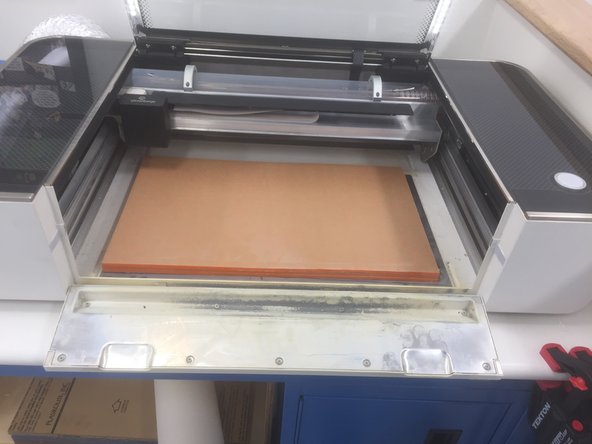
Carefully pull the front panel towards you until it opens as shown in the picture
-
Very carefully lift the front of the crumb tray just enough to slide it forward and out.
-
Be Careful! If you raise the tray too much you can hit the laser head and damage the Glowforge!
-
-
-
The surface of the crumb tray is 1.368 inches above the silver floor of the Glowforge when the crumb tray is removed.
-
You can etch items up to 0.4 inches high if they are on the crumb tray.
-
This means that the surface of the item you want to etch must be between 1.368" and 1.768" high when it is placed on the silver floor of the GF.
-
If your piece is between 1.368" and 1.768" then just put in in the Glowforge, take the height you measured in step 1 and subtract 1.368 and set the focal distance to that height
-
If the height of your piece is less than 1.368" then you will need to stack up several sheets of acrylic on the silver base plate to get your piece to above 1.368".
-
Make sure you measure the height of the stack of acrylic you select, add the thickness of your piece, and ensure this number is between 1.368" and 1.768"!
-
Take the total height of your piece and the stack of acrylic, subtract 1.368, and use this number to set the material thickness.
-
For more detailed information check out this tutorial.
-
-
-
Once you have calculated the material thickness by following the previous steps, you can do the etch as you normally would following the Glowforge etching tutorial.
-
Remember that your piece should be close to a constant height if at all possible!
-


Read this once you have mastered basic use of the Glowforge
Read this once you have mastered basic use of the Glowforge
