
-
-
Open the program Cut Studio located on the desktop computer adjacent to the Vinyl Cutter.
-
Import your jpeg image into the program through file -> import or by cutting and pasting into the file. (Ctrl C (cut) Ctrl V (paste))
-
Make sure the file you are importing is a high quality, graphic image (not a photograph) otherwise the image will not trace correctly.
-
There is a toolbar located to the left of your screen that can assist in scaling, editing or adding shapes, lines or text to your image. Image properties can also edit the appearance of your image.
-
If you want to scale to a specific size you can measure this easily by creating grid sizes by going to View -> Grid ->Grid Setup
-
Please make sure your image is located in the bottom left hand corner to maximize the surface area we are cutting. You can easily do this by selecting the "Move" button in the top toolbar.
-
-
-
Right click on your image and select Image Outline.
-
Adjust the density of the image you are outlining by adjusting the Alignment Image Density.
-
Once you have found a density that replicates your original image, click "Extract Contour Lines".
-
Notice the blue outline created around your image when you click this button. The blue outline is what the image will be cutting. If you don't like the outline adjust the Alignment Image Density or choose another image.
-
Click Ok.
-
Delete out your original image so you only have the outline remaining.
-
Double click on the outline of your image if you would like to adjust or delete individual points on a line. You can also select the second arrow from the top of the toolbar to edit individual points.
-
If you are making a t-shirt, you will want to use heat transfer vinyl and make sure your image is mirrored. To do this, click on your image outline and go to Object -> Mirror.
-
-
-
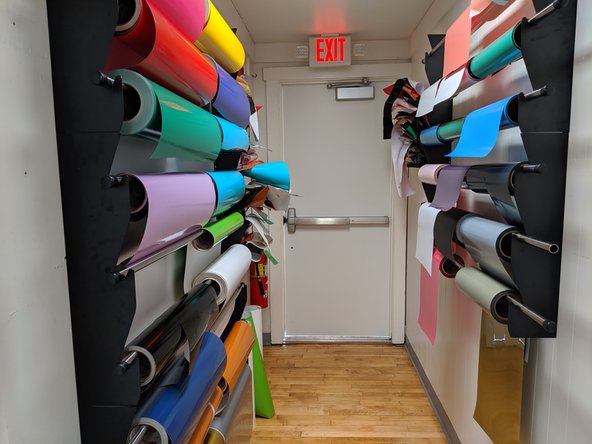
Now that you are ready to cut your image, please ask a student employee to assist you in getting the vinyl from the vinyl wall. Decal/sticker vinyl is on the left. Heat press vinyl is on the right and instructions on how to use it can be found in the T-Shirt press tutorial.
-
It is important to show the student employee the size of your image so they can help determine if you need to use a roll or can cut your image using a scrap piece.
-
For heat transfer vinyl, if you are creating an image larger than 6" in length, there is an additional charge for every 6" of material use. If you are using sticker vinyl, there is an additional charge of $3 per 6" after you use your 24" of free material. Please see a student employee to pay for this material.
-
Ensure the lever is located in a horizontal position.
-
-
-
If you are working with the sticker vinyl, insert the vinyl through the vinyl cutter by sliding the vinyl through the back of the machine. Make sure the colored sticker is facing upwards.
-
If you are working with the heat transfer vinyl, insert the vinyl through the vinyl cutter by sliding the vinyl through the back of the machine. Make sure the shiny side is facing downwards.
-
Pull on the end of the vinyl roll so you can create slack in the material. You want to pull out the length of your image plus an additional two feet. This will allow the vinyl cutter to cut smoothly without getting stuck.
-
-
-
Pull the vinyl through the cutter so there is about 1" of extra vinyl at the front of the vinyl cutter.
-
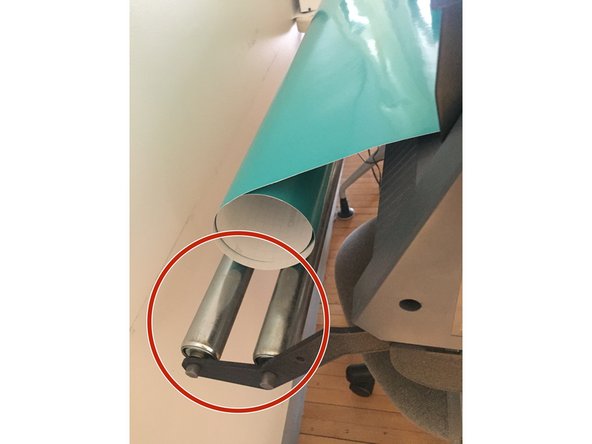
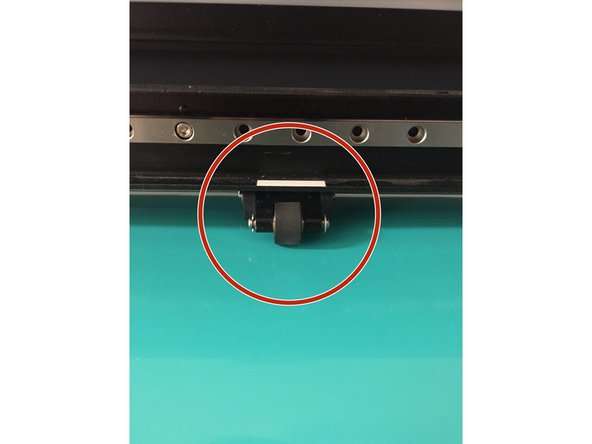
In order to make sure the vinyl moves in a straight and parallel motion when cutting, we now have to lock the rollers in place. The rollers are circled in red.
-
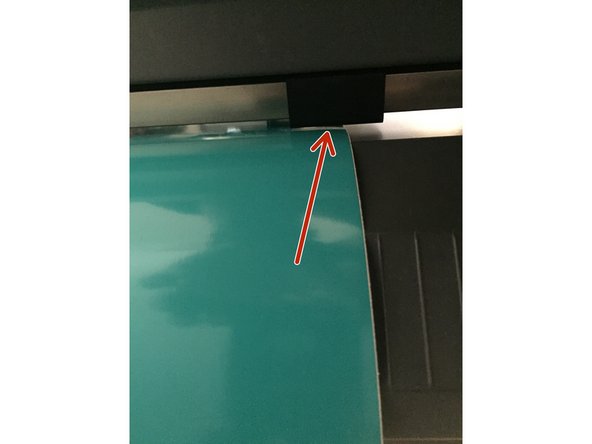
Move the rollers from the back of the machine (looks like a small black square).
-
The rollers must be positioned so each of them are located on the vinyl itself and within one of the white marks on the front of the machine.
-
The leftmost roller should be located in the longer white strip.
-
-
-
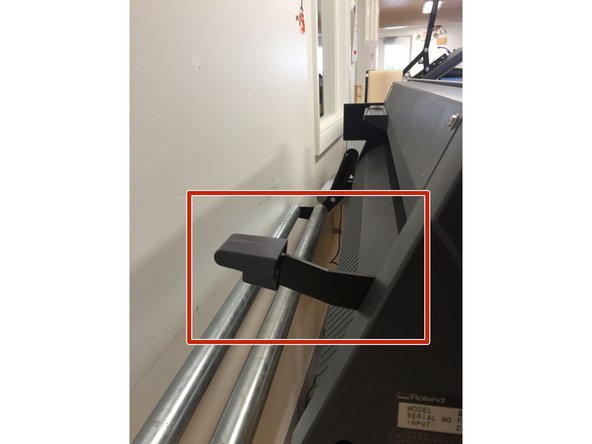
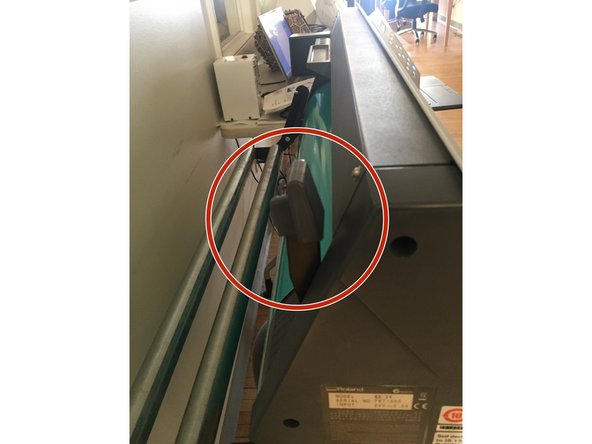
Once the rollers are in the correct position, move the lever from a horizontal to a vertical position by pulling it upwards. You should hear a click. This will lock the vinyl into place.
-
-
-
Turn on the Vinyl Cutter.
-
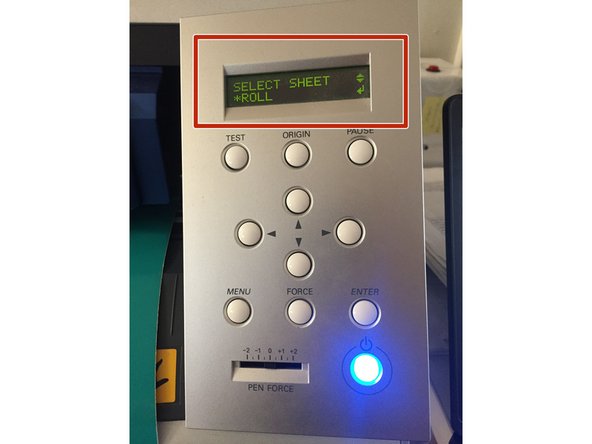
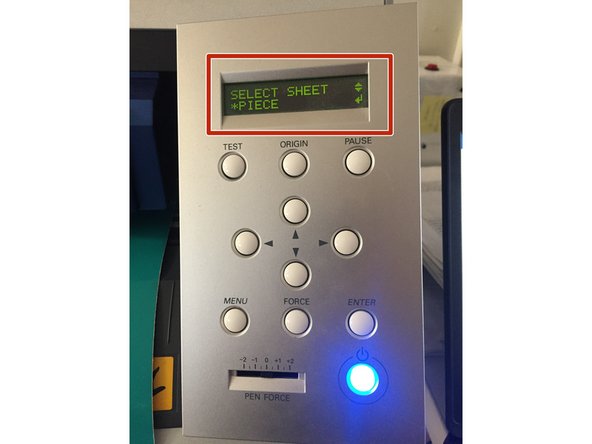
If you are cutting with a roll, press enter. If you are cutting with a piece, press the down arrow and then press enter.
-
Once you press the enter button, the machine will begin measuring your material.
-
With a piece, the vinyl cutter will begin measuring the piece horizontally first and then the vinyl will move forward and be measured vertically. If the vinyl does not move parallel or goes off its rollers, you are going to want to reset the vinyl piece by re-positioning it on the rollers.
-
For a roll, the vinyl cutter will only measure the horizontal distance of the vinyl, not the vertical distance.
-
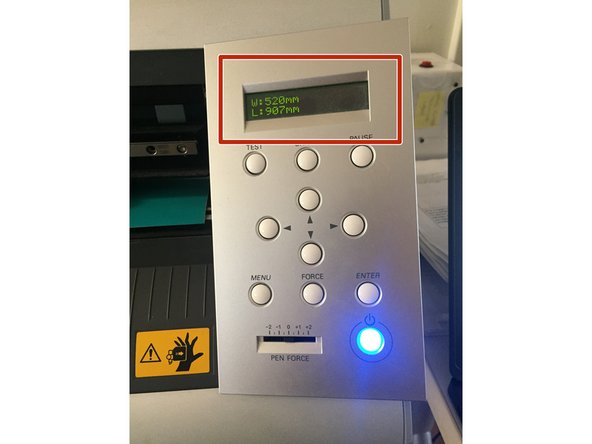
On the vinyl cutter screen you will now notice that there are dimensions located on the screen (the dimensions of your material). These dimensions will end up being transferred over to the computer in later steps.
-
-
-
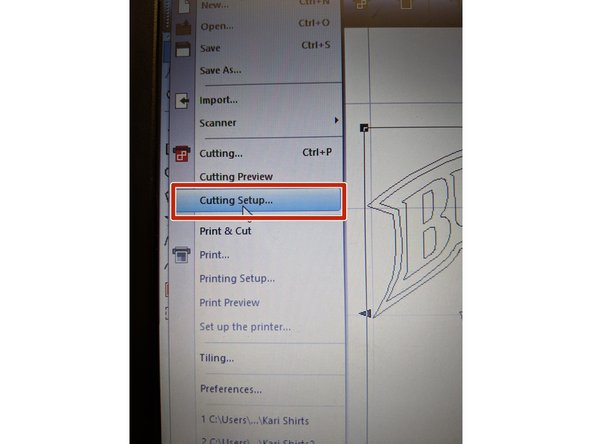
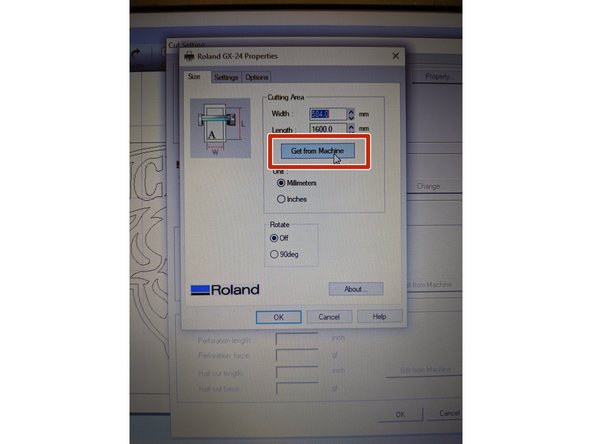
To ensure your image fits on the material you chose, go to File ->Cutting Setup
-
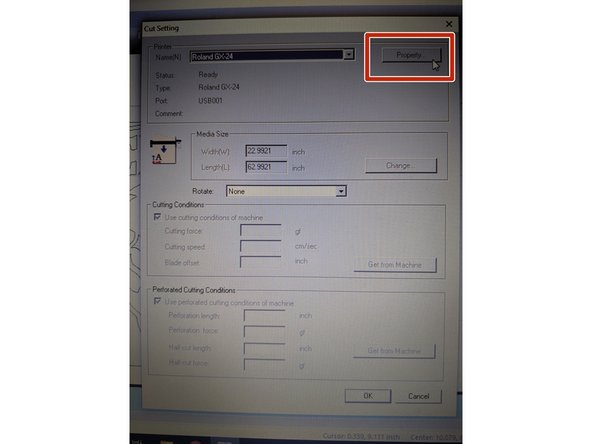
Select "Property".
-
Press "Get From Machine".
-
Press "Ok".
-
Press "Ok" again.
-
-
-
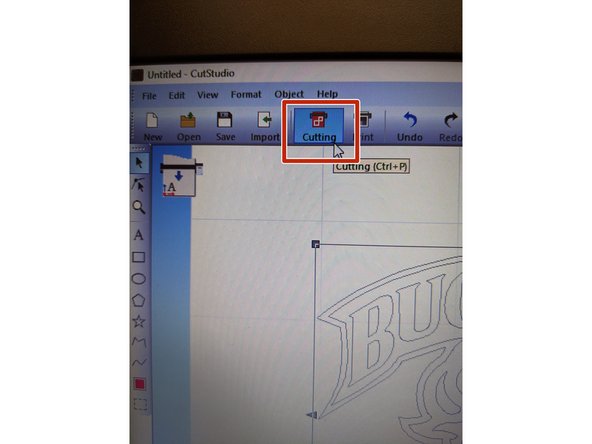
Now that you're ready to cut your file, select the "Cutting" button along the top toolbar.
-
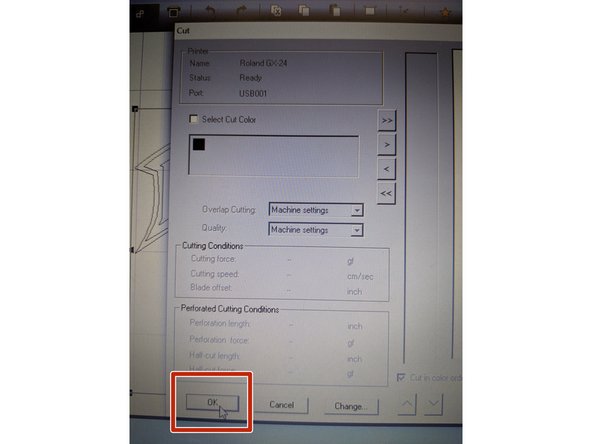
Double check to ensure the settings look like what you'd like and then press "Ok" to begin cutting.
-
-
-
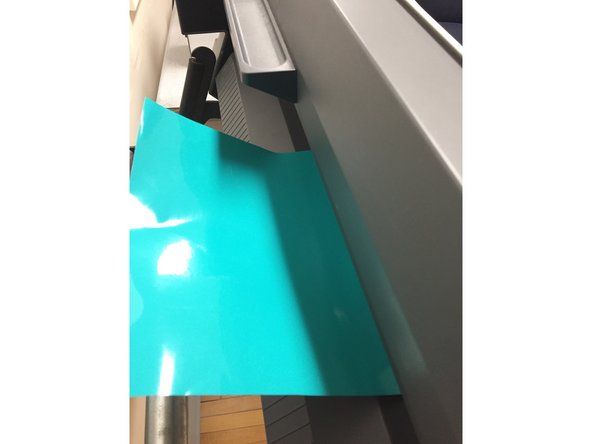
Once your piece has finished cutting on the machine, move the lever back into a horizontal position and pull forward your vinyl to be able to easily cut your piece off of the machine using scissors.
-
-
-
Now that you've cut your material off the roll. Don't forget to tightly roll up the vinyl and put it back on the storage rack..
-
A clean space is a happy space!!
-
Don't forget to turn off the machine when no longer using.
-
-
-
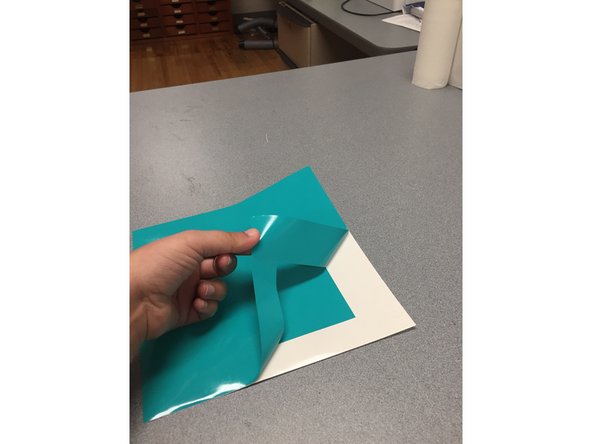
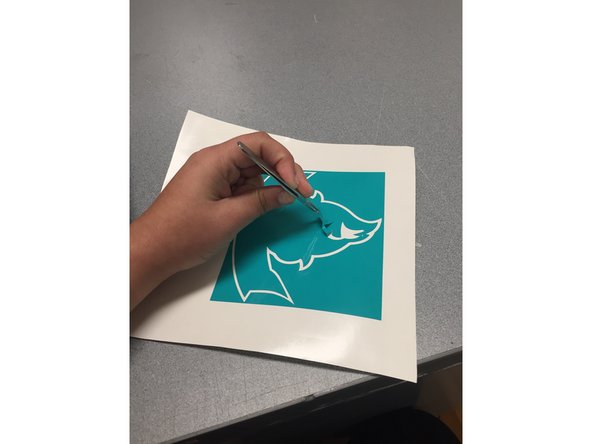
Now that your piece has been cut on the machine you want to peel away any surrounding vinyl that you do not want. The parts you don't want are called the negative.
-
Peeling away the vinyl can be made easier by using a pair of tweezers located in the MakerSpace.
-
For the sticker vinyl, make sure the vinyl that you peel up does not stick to any of the vinyl that you want to keep. If it does, it might ruin the design because it's hard to unstick the vinyl to each other.
-
-
-
This step only applies to the sticker making process.
-
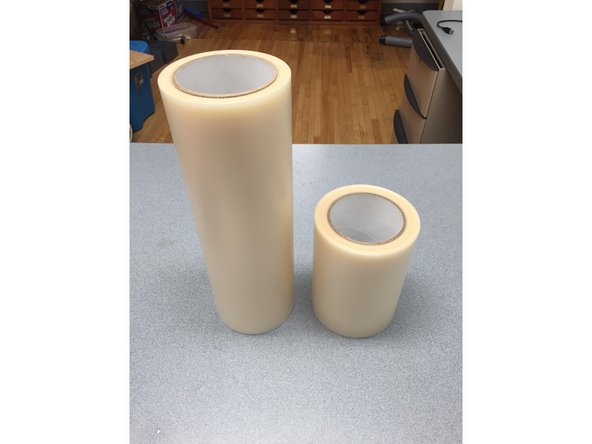
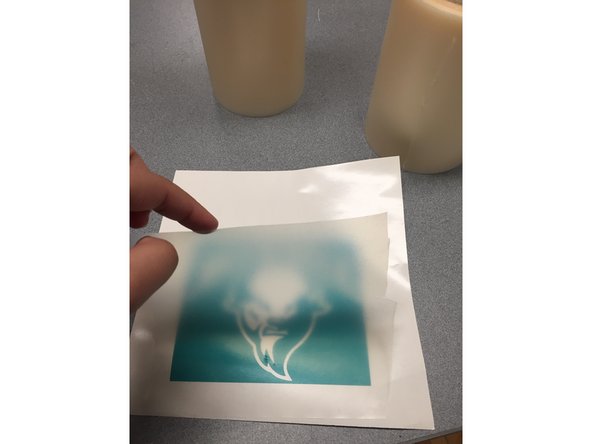
In order to easily transfer your sticker design to the surface you would like we have clear transfer tape to assist.
-
Cut down the roll of clear transfer tape to a size that would be manageable and similar to the size of the sticker/decal you just cut.
-
One side of the clear transfer tape is sticky and should be placed on top of your sticker. Be sure to avoid getting any bubbles in between the clear transfer paper and the sticker.
-
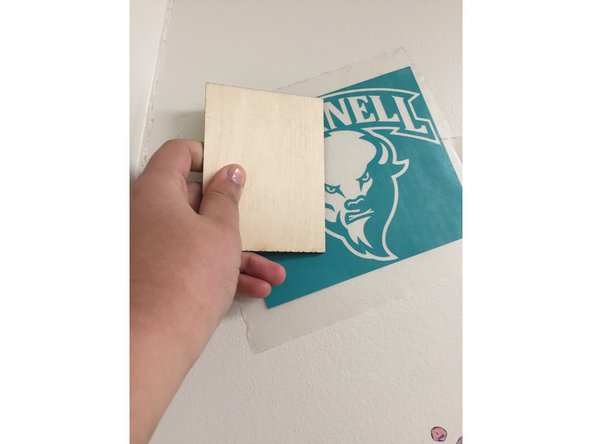
Using your BUID might help to get a clean press on the image.
-
-
-
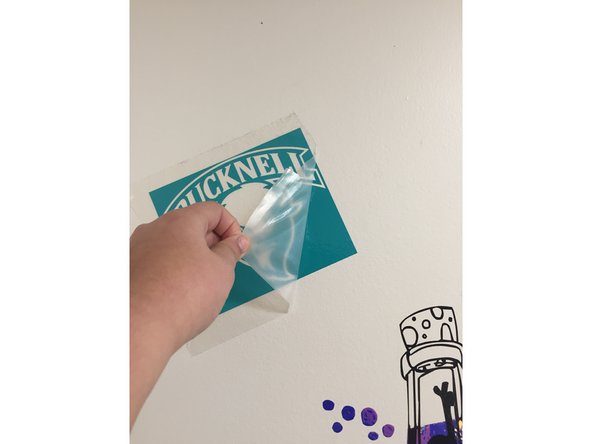
This step only applies to the sticker making process.
-
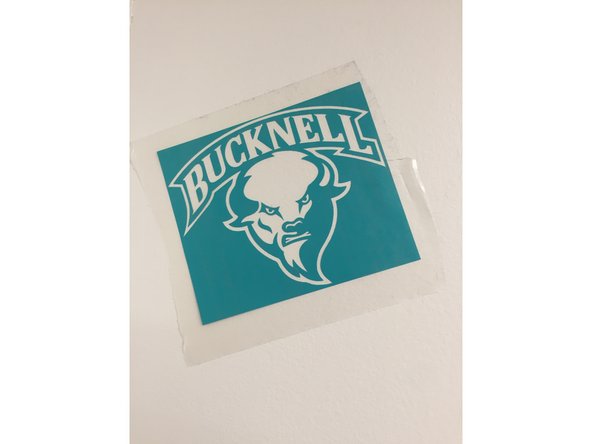
Now all you need to do is press the clear transfer paper onto the sticker vinyl and when you are ready to place it in its appropriate location, peel away the clear transfer tape and press the object.
-
-
-
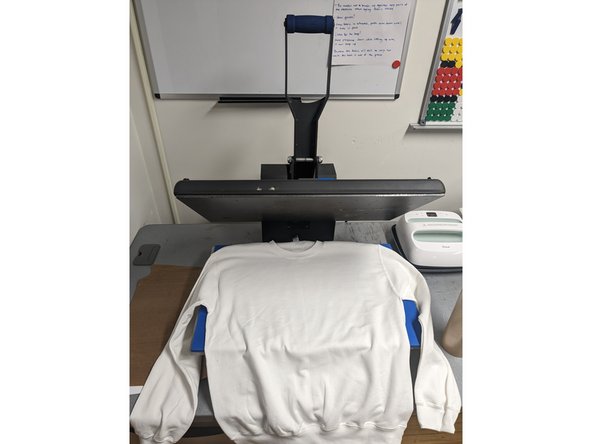
This step applies to the heat transfer process.
-
As you are finishing peeling your vinyl, turn on the heat press located next to the vinyl cutter computer. (If you are printing on something other than an apparel item, see a staff member for assistance).
-
The vinyl cutter will begin heating up so do not touch the machine.
-
Lay your apparel item down flat on the heat press bed.
-
Place your vinyl cut design on top of the apparel.
-
-
-
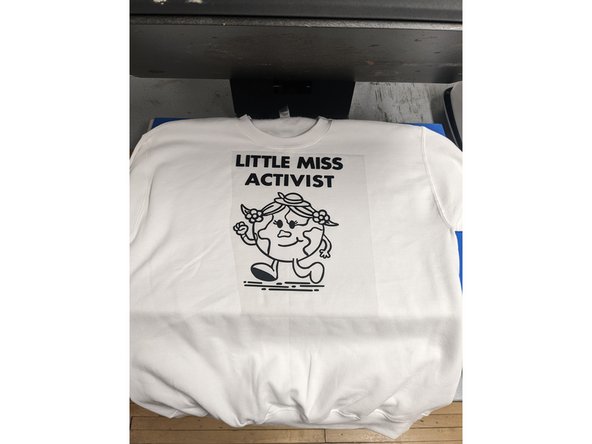
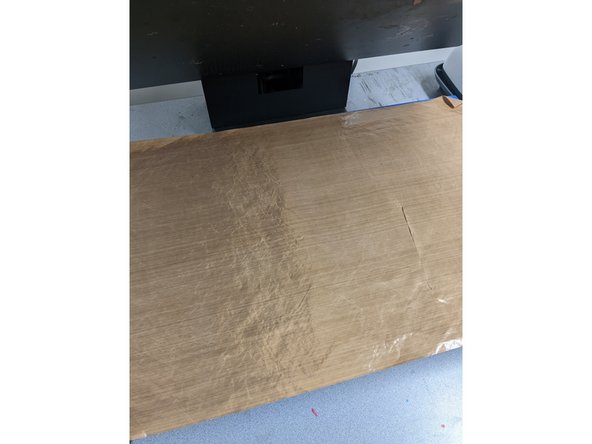
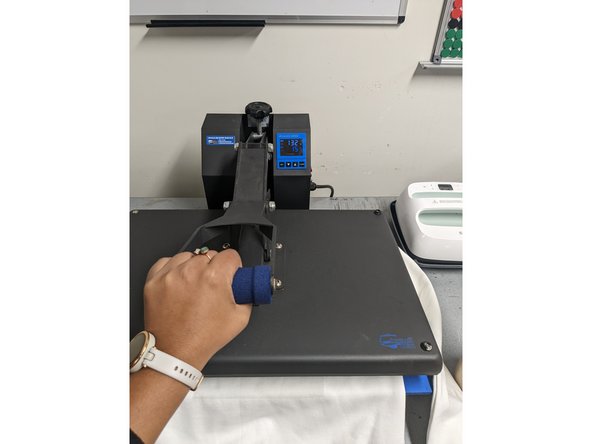
Once your design is aligned, place the brown sheet on top of your design. Then pull the lever at the top of the heat press down and push it until it locks in place.
-
The timer will begin counting down and will beep when complete. You should press your design for 20 seconds.
-
Once your design cool, peel the clear plastic off your vinyl. If you have a second color, you can lay it on top of your design at this point and repress.
-
Turn off the vinyl cutter and your design is complete!
-


Cancel: I did not complete this guide.
19 other people completed this guide.