Introduction
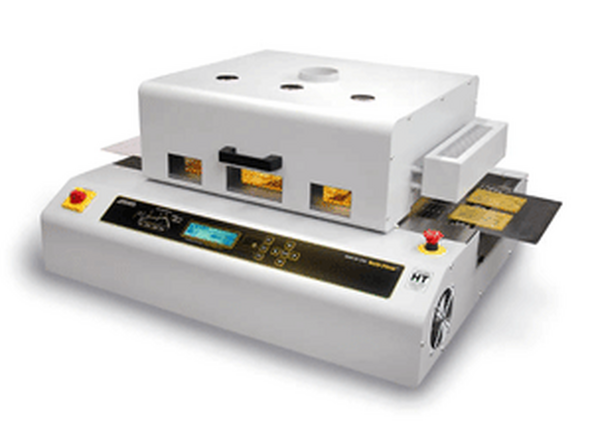
The NovaStar GF-12HT Benchtop Reflow Oven is used to solder surface mount components. It is a production-quality machine and operates very much like a regular kitchen oven, but it has three separate heating zones a printed circuit board moves through: preheat, thermal soak, and reflow.
-
-
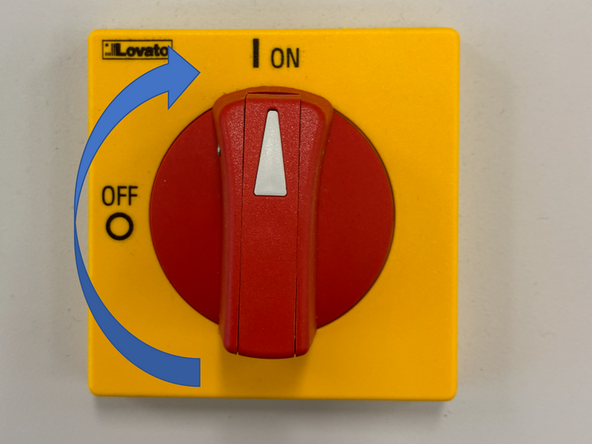
First turn on the machine by rotating the on switch on the left hand side clockwise.
-
Start by selecting the program for the type of solder you have on your board. We mostly use leaded solder paste in the Maker-E, but there is also a setting for unleaded solder.
-
Note that unleaded solder will run at higher temperatures, and may damage some components. Make sure your components are certified for unleaded solder.
-
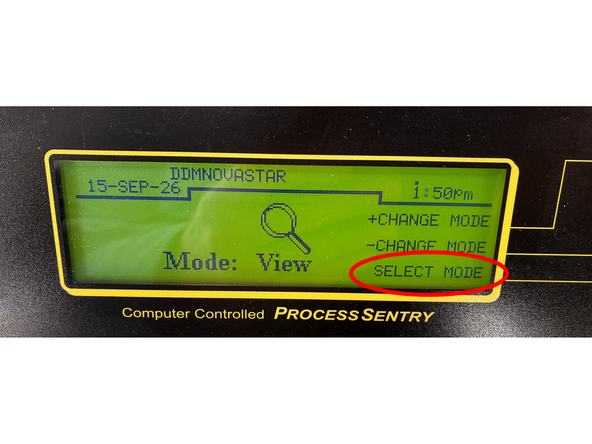
Use the F1 and F2 keys to navigate to the "View" menu then press the F3 button to select the View mode.
-
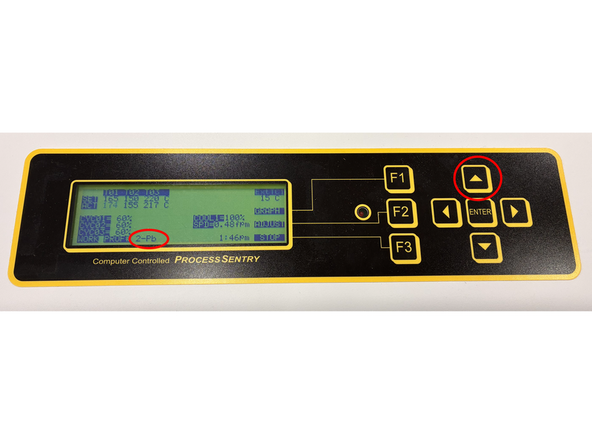
In View use the up arrow key to switch the machine from mode 1-Pb Free to 2-Pb to set the profile for leaded solder as shown in the third picture. If you are running unleaded solder keep the machine in the 1-Pb Free mode.
-
Hit F3 to return to the main menu then F1 or F2 until the Work menu is shown.
-
-
-
The next step is to begin a reflow profile and let the oven warm up.
-
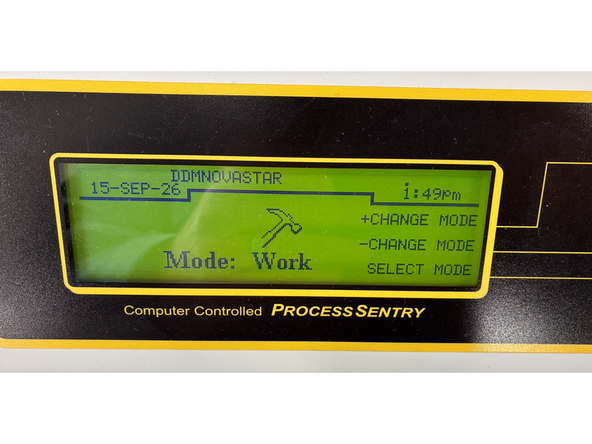
Go back to the main menu, use F1 and F2 to cycle through until you see the Work mode, then hit F3 to select it.
-
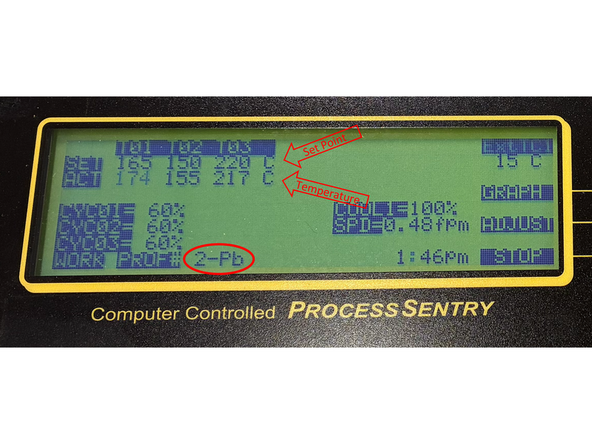
When you are in the Work mode double check that 2-Pb is the mode selected as shown in the second figure. Or mode 1 if you are running Pb free solder.
-
Hit F3 to start the machine. Preheating takes several minutes. You should see the chain belt slowly start to move. Keep your fingers clear!
-
There are two rows of three temperatures in the upper left corner. The top row is the set point for each of the three zones, and the bottom number is the current temperature. The bottom numbers will flash until each zone reaches the specified temperature.
-
It will take about 15 minutes for the SMT oven to heat up to temperature. Do not start your soldering job until all three zones are near that set temperatures, that is none of the temperatures are flashing. It will take longer for the oven to heat up for Pb free solder due to the higher temperatures.
-
DO NOT run anything through the machine that is not a PCB. The zones are quite hot and there is a fire risk. This machine might look like a toaster at a free hotel breakfast, but it is used for parts with lead, and if you don't want to get lead poisoning do not put food in it!
-
-
-
The board enters on the left side of the machine and moves through the three zones to the right. Place your board on the stainless shelf at the entrance then carefully push it until it is caught by the belt.
-
If you board is rectangular put it in so the long side is parallel to the direction of motion.
-
It will take about four minutes for the board to move through the three zones and emerge on the other side. If you want to watch your board's progress you can push the "Light" button on the right side of the SMT oven.
-
The board will move onto the stainless steel cooling shelf on the right side of the machine when it is done.
-
DO NOT pick up your board right away! It is very hot. Let it sit for a few minutes then stop the machine with the F3 button and turn it off by rotating the power switch counter-clockwise a quarter turn.
-
Go over to the microscope and inspect your board for bad solder joints and bridges. Get help to correct them, or if you have the skill do it yourself with a fine tip soldering iron.
-
Woot, you are done!
-
Cancel: I did not complete this guide.
One other person completed this guide.
