Introduction
The Test Resources 313 load frame can be used to perform tension, compression and three point bending tests. This how-to covers tension testing as that is the most common test performed with this apparatus. Please see your faculty research advisor, lab director, or laboratory technologies specialist for advanced training before performing other test procedures.
-
-
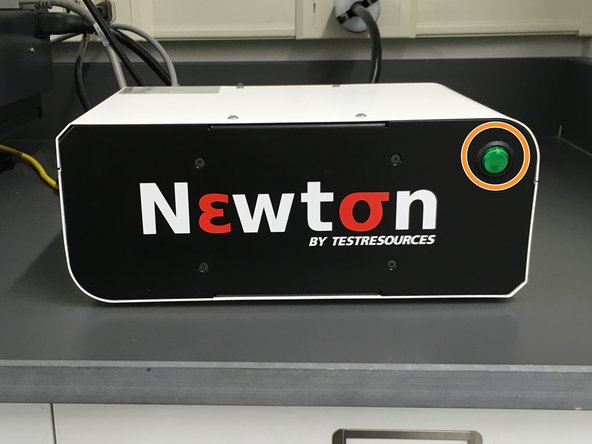
Before operating any machinery is it important to be familiar with its component parts. The Load Frame is configured for tension testing as pictured.
-
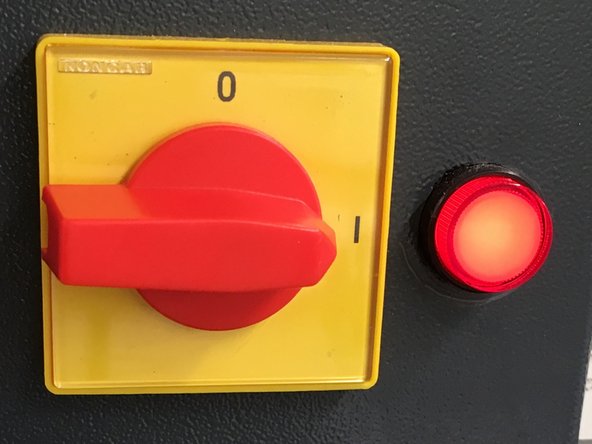
Load frame power switch
-
Load frame electronics aka "Newton Controller"
-
Cross head
-
Wedge type compression testing grips
-
-
-
During class and instructional labs we use well characterized samples with low risk of injury when breaking. However, load frames even when used correctly always have some if low risk of personal injury. Caution and Personal Protective Equipment (PPE) should be used accordingly.
-
When operating a load frame or being in the same space as someone operating a load frame, safety glasses must be worn.
-
As with all equipment safety guards must be in place during operation.
-
Gloves are recommended when working with the grips as they are lubricated with a copper grease which does not have any know health hazards but will stain anything it comes in contact with.
-
Always use the buddy system when performing machine maintenance or configuration. The grips are heavy.
-
ACET 001 when Bucknell's Test Resource 313 series load frame is located is a multipurpose lab space and other safety hazards may be present which may require additional precautions or even proscribe operation of the load frame. Always be aware of the other activities going on in the lab.
-
-
-
The Newton controller takes approximately a minute (60s) to start up before the software on the PC will be able to successfully connect to it. Turn on the Newton controller using the green toggle switch on its face. It will be lit when on.
-
Preconfigured test methods are setup for instructional and research use. For instructional purposes log on to the PC using the engr240 account. For research use please use the chegresearch account. If you have a need to use the machine under your own login additional configuration is necessary; Please contact the Laboratory Technologies Specialist.
-
After the Newton has had a chance to start up open the Newton software.
-
-
-
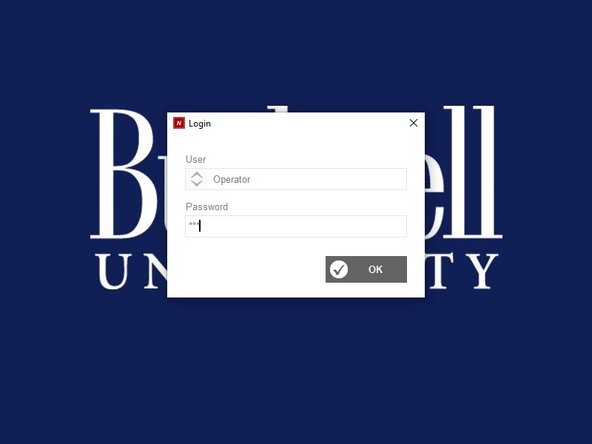
Upon opening Newton you will be prompted to login to the software. In an instructional lab please select the "Operator" user and enter "759" for the password then click "OK".
-
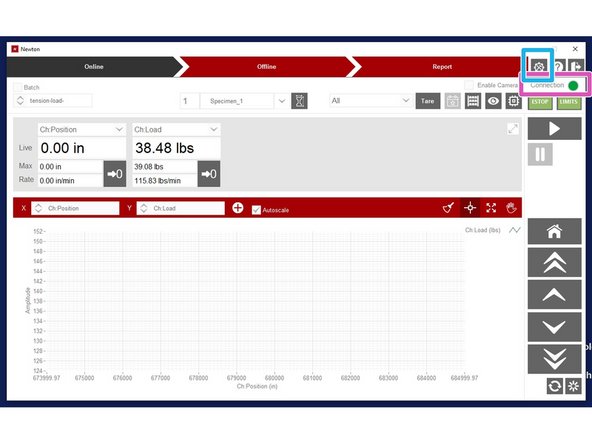
In an ideal world the Newton software will automatically connect to the Newton Controller As indicated by a green dot and the word "Connection" in the top right corner of the screen. The machine is ready to be operated if this is present and you can go on to the next step.
-
If the Newton controller is not connected, click the cog icon above the connection status area to open the hardware settings window.
-
In the "Hardware Settings" window, the drop down under the label "Controller should say refreshing. If not click on the drop down and choose refresh. Once the dropdown is refreshed, a controller should be listed in it: Newton-1908030-01C. Click on the controller to select it.
-
With the controller selected, click "OK". If the controller is not found: stop and ask your instructor, Lab Director or Laboratory Technologies Specialist for assistance.
-
-
-
The load frame motor is powered on using the rotary switch on the load frame itself. The motor must be on for the crosshead to be moved.
-
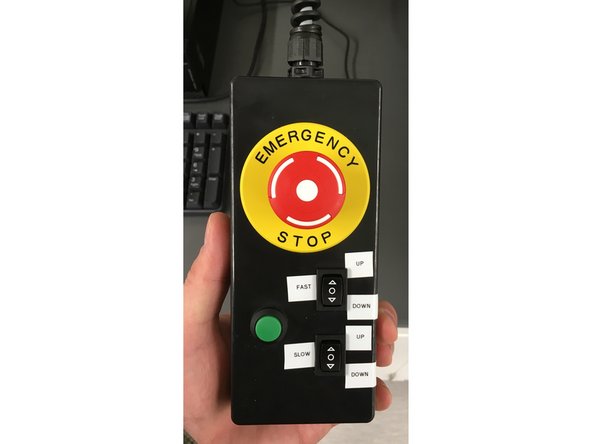
The position of the load frame crosshead can be controlled either using the software interface or the "pendant" control.
-
The Pendant control features an emergency stop button and it is recommended that the operator hold the pendant during a trial in order to be ready to stop the trial in an emergency.
-
If the Emergency Stop button is in the stop position (depressed) the controller will not move the crosshead in response to the pendant or the software.
-
-
-
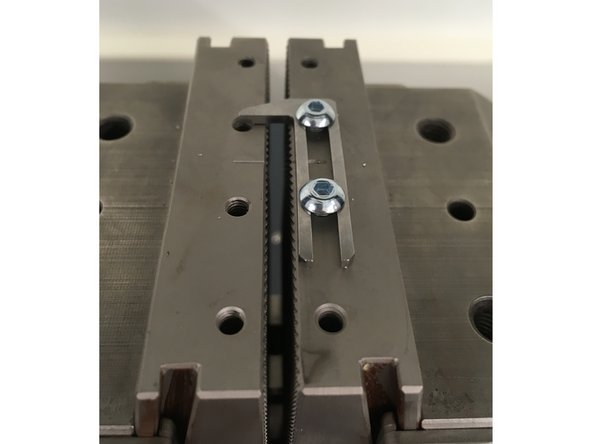
Tension test specimens must be secured in the upper (traveling) grip before the bottom (fixed) grip in order to prevent excessive preloading of the sample.
-
Remember to make all necessary measurements of your specimen before loading it into the load frame.
-
Using the software interface or to pendant, position the crosshead far enough apart that your sample when slid into the one grip is not within the other.
-
Use the provided allen wrench to adjust the specimen guide on both grips so that you sample is centered in the grip when slid in against the guide. For instructional laboratories, position should be checked but adjustment is typically unnecessary.
-
Next, position the crosshead so that the grips are roughly in place ie the gripping tabs at the end of the specimen are slot into the grip but not so far that the neck of the specimen is in the grip. Remember to handle your specimen with care, gloves may be necessary depending on the material you are testing.
-
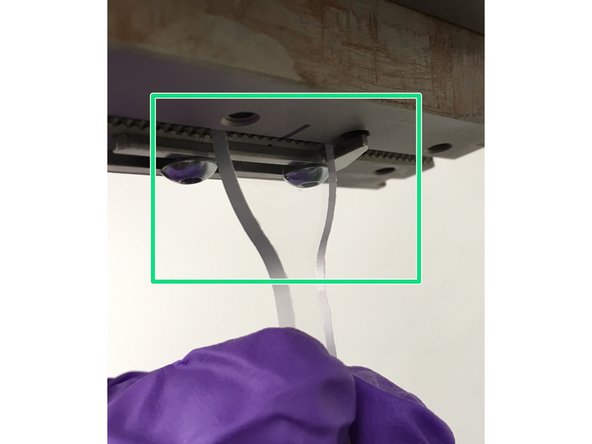
Position your specimen between the grips and again the positioning guides then use the spoked wheel on the top grip to close the grip on the specimen so most of the tab is within the grip while the neck is fully exposed.
-
-
-
Use the software controls or pendant to make any fine position adjustments now before the bottom grips contact the specimen.
-
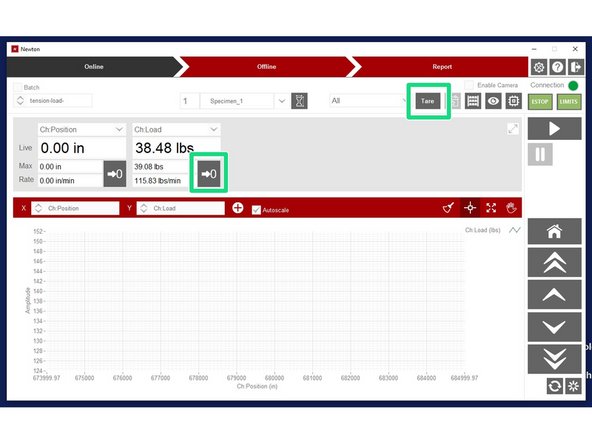
Use the "Tare" button or load zero button to zero the load cell reading now. Once the bottom grip contacts the specimen a small amount of preloading of the specimen may be unavoidable.
-
Use the spoke wheel to tighten your specimen in the bottom (fixed) grip.
-
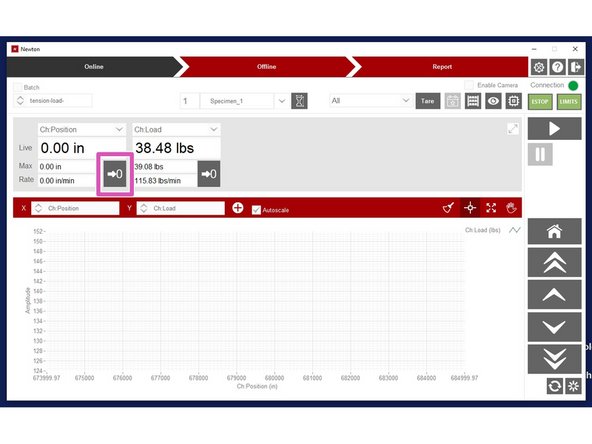
Use the zero position button to zero the position of the crosshead. Note this becomes the "Home" position. If you are testing a rigid sample you will need to remove it or its remnants from the machine before returning the machine to the "Home" position.
-
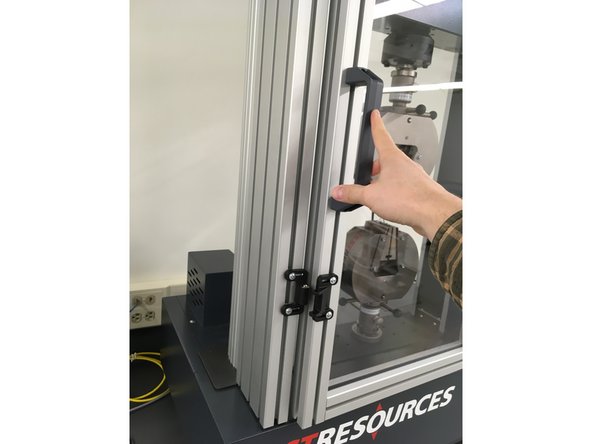
Close the safety guard.
-
-
-
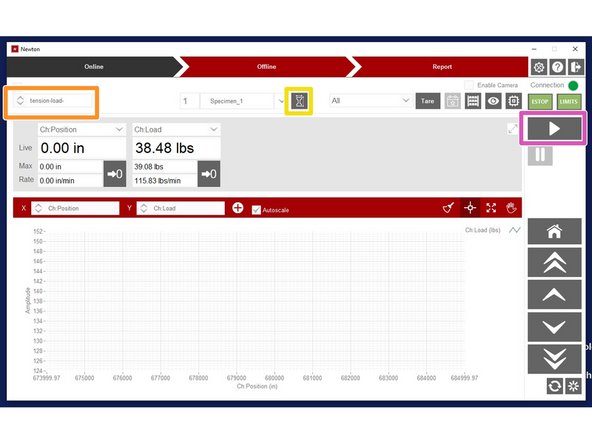
Choose your test method from the dropdown menu.
-
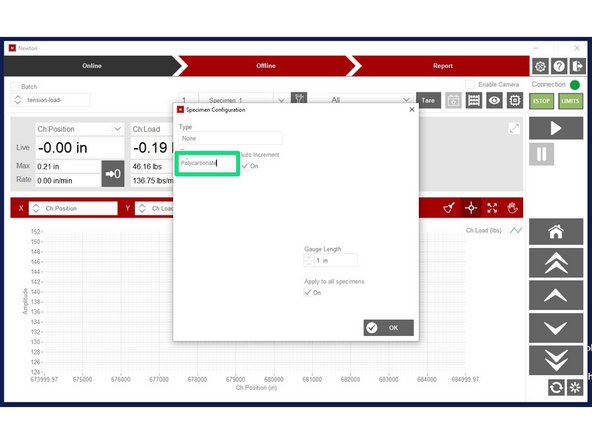
Click the dogbone icon to open the "Specimen Configuration" window.
-
Name your specimen and depending on test method enter specimen dimensions. A good name for a specimen would be: YYYY-MM-DD_username_material where YYYY-MM-DD is the date. You may also want to add a specimen id at the end.
-
You are now ready to run your trial. Do one last check that the safety guard is in place and everyone around the load frame is wearing safety glasses then click the run button and immediately pick up the pendant so you are ready to press the emergency stop button if necessary.
-
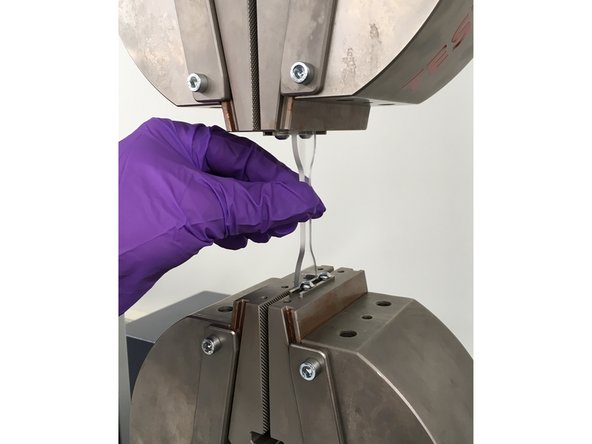
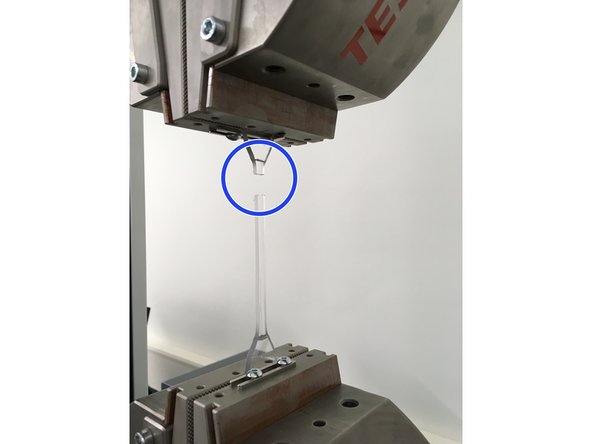
Some test methods will prompt for a comment after the specimen has broken. Note the type and location of the break. This break is a good break as it is horizontal perpendicular to the direction of load, and within the gauge length though it is towards the top of the gauge length.
-
-
-
Be courteous to the next researcher, by removing your specimen remains and properly disposing of them.
-
If you have run the last specimen of the day; turn off the load frame, close the Newton software and turn off the Newton Controller. Once you have moved your data off the control PC to your Google File Stream, netspace, or a USB storage device log off the PC.
-
Test data is purged from the PC during regular maintenance. If your data is not moved off the PC before you log off it may be be lost.
-
Each trial will produce four or five file depending on your test method. By default they end up in a folder called "Unnamed" in the "Newton Reports" folder of the desktop. If you entered a good name for you specimen in the Specimen Configuration window they should be easy to find.
-