Introduction
This guide will teach you how create a custom tee shirt using the Heat Nation press. It requires you already know how to use the vinyl cutter.
The heat press gets dangerously hot so please use caution!
-
-
The heat press gets very hot, exceeding 300°F. Left unattended, this could pose a safety risk to users who accidentally come in contact with it. It can also start a fire. The heat press should NEVER be left unattended when powered on!
-
As the heat press takes a significant time to warm up it is likely you will want to begin heating the press prior to using it. This is OK. However, you may not leave the Maker-E while the heat press is powered on.
-
-
-
The press takes some time to warm up so turn on the orange rocker switch on the back, left side of the press first.
-
Caution! The press gets hot and the bottom side of the upper plate can give you serious burns. Be careful!
-
-
-
Every type of vinyl has a particular temperature and press time. We stock Sizer Easy Weed vinyl which has a set temperature of 305 F.
-
Read the green numbers on the display to see the set value (SV) for the temperature. If you are using a different vinyl or it is not 305 you need to set it for the vinyl you are using. In this picture the setting is 330 F.
-
While the time for Sizer Easy Weed is 15 seconds we find a time of 25 seconds works better which should be the default setting for the press. Here the time is 18 seconds as shown in the green numbers on the right.
-
The actual temperature of the top plate and time left are shown in blue numbers with the labels PV for process value.
-
If the settings are not correct the next step shows how to change them. Otherwise skip ahead.
-
-
-
Skip this step if you don't need to change the settings of the heat press.
-
To change the settings press the OK button.
-
The first thing to set is the temperature units. Make sure F is selected.
-
Press OK.
-
Now set the Set Values (SV or green numbers) for the temperature using the up an down arrow keys for the vinyl you are using.
-
Press OK.
-
Do the same for the time using the arrow keys then press OK
-
Remember standard Easy Weed vinyl is 305 F for 25 seconds.
-
-
-
Unless you are doing thick or thin fabric you should skip this step!
-
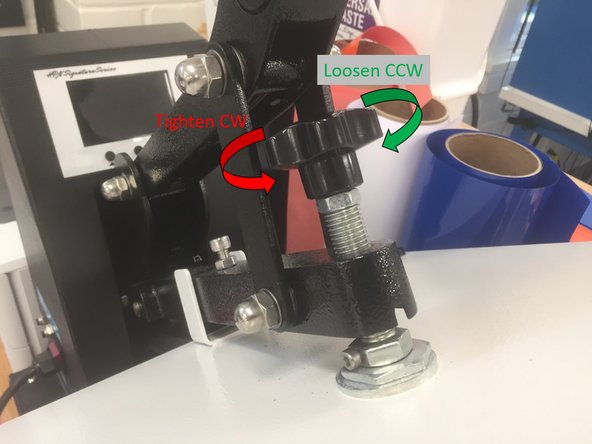
The screw knob on the top plate is used to adjust the pressure. Too little and the vinyl won't stick. Too much and you can't close the press.
-
If you need to adjust the pressure put a piece of paper on the bottom plate and close the press.
-
It should be hard, but not impossible to pull the paper out without tearing it.
-
If it is easy to pull the paper out then turn the know clockwise to increase the pressure. If the paper can't be pulled out turn the knob counter-clockwise to reduce the pressure.
-
Repeat the above step until you get the pressure right.
-
-
-
While the press is reaching its correct temperature you'll need to prepare the vinyl.
-
The vinyl cutter is used to cut shapes just as in making decals. See the vinyl cutter tutorial.
-
DO NOT use sticker vinyl to make shirts. A special shirt vinyl that has a shiny backing layer is used instead.
-
When you are cutting tee shirt vinyl make sure the shiny side (which is the backing) is facing DOWN on the vinyl cutter and the dull side is facing up.
-
The first image shows the reflection from the shiny side and the second from the dull side.
-
Images and text MUST be mirror imaged (flipped left to right) to show up properly on a shirt. You can do this with the original image or do it on the vinyl cutter.
-
The cutting settings used for decal vinyl should work just fine for tee shirt vinyl.
-
-
-
Use tweezers or a sharp object to remove the vinyl you don't want.
-
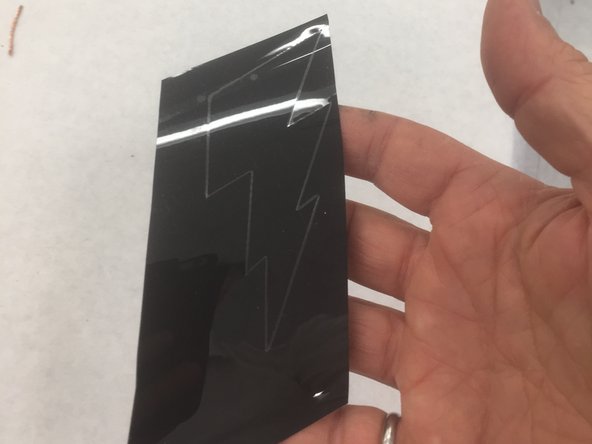
When you are done you will have the shape to put on the shirt attached to a transparent sheet as shown.
-
The sticky side of the transparent sheet will go face down on the shirt or other object you are making.
-
Make sure the dull side is down and the shiny side is up on your shirt!
-
-
-
Make sure the press has come to the set point - the green SV and blue SV values are the same.
-
Pull out the bottom sliding stage.
-
Carefully put the shirt on the bottom stage, being careful not to touch the hot top plate.
-
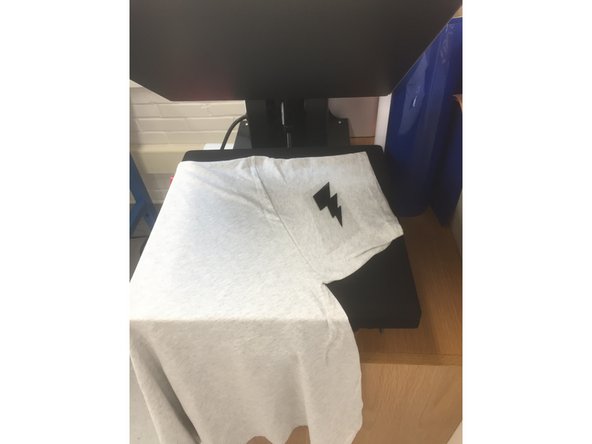
The second image shows the shirt on the bottom plate with the lightning bolt vinyl arranged on a shirt sleeve.
-
Make sure the cloth is flat with no wrinkles, especially under the vinyl!
-
-
-
It is better to put all the vinyl pieces that fit in the 16" x 16" area of the press on the shirt at once rather than do them one piece at a time.
-
Make sure that the vinyl pieces are well aligned to the shirt and each other before going to the next step.
-
Pressing is permanent, you can't easily pull the vinyl off once you make the shirt so take the time to get it right before moving on.
-
-
-
When you have the vinyl aligned put one of the brown protective films over the top of the shirt to protect it from the hot press.
-
DO NOT PRESS WITHOUT THE PROTECTIVE SHEET!
-
Slide the drawer in.
-
Press down HARD but gently on the handle until the press locks into place. You will hear a loud snap.
-
As soon as you move the top handle the timer will start, so push down fairly quickly and don't hesitate.
-
-
-
As soon as you start to lower the handle the green PV timer will count down and start to beep with three seconds to go.
-
When the timer reaches zero pull up firmly but gently on the handle to unlock the top plate. Raise it up fully.
-
Before removing your shirt slide out the drawer for safety.
-
The shirt is hot so wait a few seconds before taking off the shirt.
-
-
-
Peel off the transparent backing layer when the shirt is cool enough to do so.
-
Your shirt is done!
-
If the vinyl peels up while removing the clear adhesive film first check the settings to make sure they match your vinyl. If they are right then press the design a second time.
-
Now that you have some vinyl on the shirt you can layer it for an applique look or add new designs to the back or the sleeves
-
The next steps describe how to put vinyl on the back of a shirt or how to layer designs.
-
-
-
The process of putting vinyl on the other side of a shirt is exactly the same except there is one more important step.
-
Before putting a tee shirt with vinyl on the bottom stage you MUST put one of the brown protective sheets on the bottom, cloth stage!
-
This keeps the vinyl from sticking to the cloth on the bottom stage and ruining the stage and your shirt.
-
-
-
If you want vinyl on top of vinyl you have to do it in two steps.
-
First press the bottom vinyl to the shirt.
-
Remove the clear protective layer then place and align the second vinyl image on top of the existing vinyl.
-
Otherwise the process and settings are exactly the same.
-
-
-
The image shows some common temperature settings and time settings for vinyl.
-
Note it generally does not hurt to increase the time by about ten seconds.
-
-
-
When you are done making shirts make sure to turn off the press using the switch on the side.
-
Clean up your mess putting the extra vinyl pieces in garbage rather than recycling.
-
Report any damage to the machine or difficulties to the MakerE techs.
-
-
-
You can buy shirt vinyl in small quantities at Michaels down in Shamokin Dam.
-
For larger quantities at much better prices we order from Heat Press Nation.
-
We typically useSizer Easy Weed vinylwhich comes in many colors.
-
But manyspecialty vinyls such as glitter, metallic, or fluorescent can be ordered.
-
We have had good luck buying shirts from Tee Shirt Wholesalers.
-


At the end of this tutorial you will be able to make custom tee shirts.
At the end of this tutorial you will be able to make custom tee shirts.
