Introduction
Learn to make a lamp that will turn on when you wake up! The cost for this project is between $30 to $40 dollars. You'll need to be able to use a 3D printer and a soldering iron before starting this project
-
-
For this project you'll need:
-
A QT Py and matching NeoPixel driver
-
-
A JST PH 3-pin plug to female socket cable and a USB-C cable
-
Male header pins and basic wires
-
You'll also need a wifi connection and Mu Editor
-
You'll need to be able to use a 3d printer and the soldering irons
-
-
-
You'll need to find lamp you'd like to use for this project. https://www.thingiverse.com/ has tons of free models
-
The lamp has to have a place for the NeoPixels and microcontrollers, and a place for the USB-C cable to feed out!
-
You can download the lamp I modified and used here.
-
After you've found a suitable lamp, print it.
-
Any part that lights up should be printed with a light colored PLA, such as white or yellow
-
While the lamp prints, move onto the next steps
-
-
-
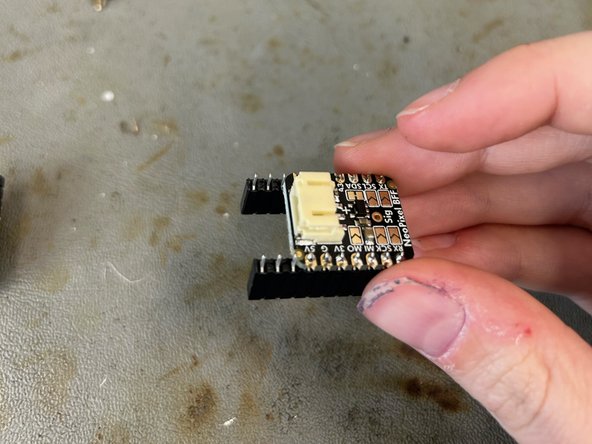
Solder male header pins onto the QTPY and female header pins onto the NeoPixel driver.
-
Solder male header pins onto the NeoPixel stick or ring. On the stick, make sure to solder the pins to the side with DIN.
-
Attach the QT Py and driver together using the soldered pins.
-
Plug the JST cable into the NeoPixel driver and connect the black wire to GND, the red wire to 5VDC, and white to DIN/Data In
-
-
-
Go to this adafruit page to learn how to get started using the QT PY
-
After you've installed Circuit Python, visit adafruit's internet test guide and download the project bundle.
-
After updating the libraries, run the code.py example code given in the project bundle.
-
The QT Py won't connect to the internet right now, but we'll deal with that in the next step!
-
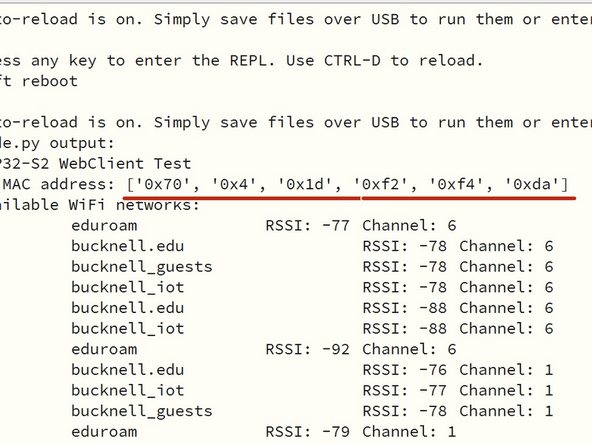
Open the REPL and find the mac address of your board. Copy the mac address with Shift + Ctrl + C.
-
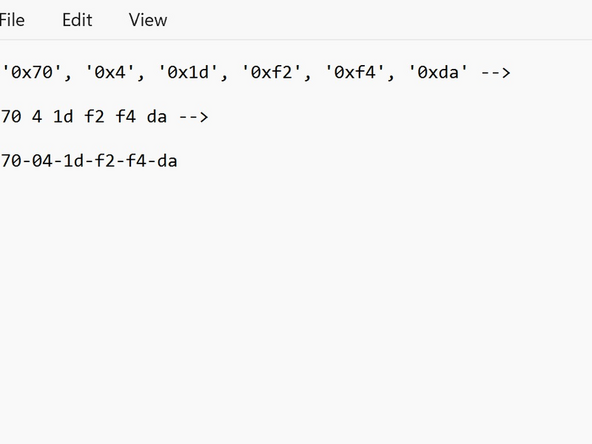
Paste the mac address somewhere else and remove the commas, quotation marks, and the 0x. If there's a single number, add a zero infront of it. Add dashes between the remaining numbers.
-
-
-
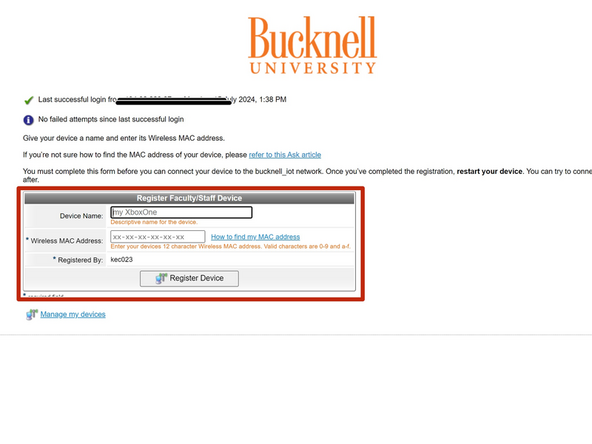
Go to https://mydevices.bucknell.edu/ and log in with your Bucknell username and password. Register a new device.
-
Add the mac address of your QT PY and register it to bucknell_iot.
-
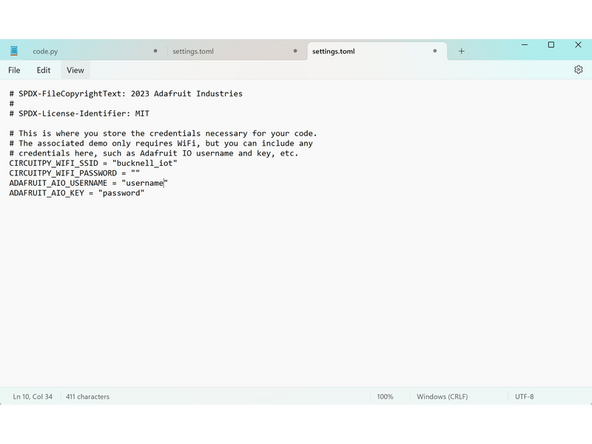
In settings.toml, the wifi SSID should be bucknell_iot and the password will be left blank, as the iot network has no password
-
After registering the device and updating settings.toml, reload the code and run it.
-
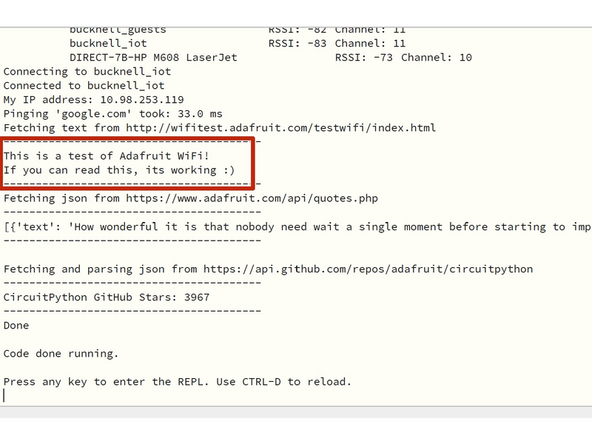
In the REPL, you should see "This is a test of Adafruit WiFi! If you can read this, its working :)"
-
This means that the board has connected to the wifi!
-
If the wifi doesn't work, double check that the wifi credentials in settings.toml are correct, then reset the board.
-
-
-
After registering the device and updating settings.toml, reload the code and run it.
-
In the REPL, you should see "This is a test of Adafruit WiFi! If you can read this, its working :)"
-
This means that you are good to continue onto the next steps!
-
If the wifi doesn't work, double check that the wifi credentials in settings.toml are correct, then reset the board.
-
-
-
To fetch the sunrise and sunset times, you'll need an adafruit.io account.
-
Navigate to https://io.adafruit.com/ and create an account. If you already have an account, log in.
-
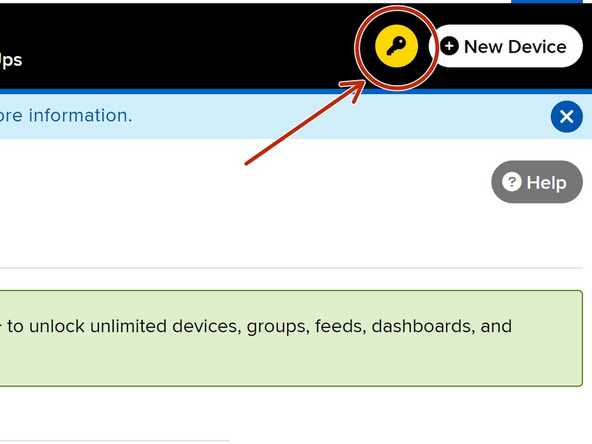
Find the small key icon. It'll show your adafruit IO key. Copy the key and username and paste it into settings.toml. Save settings.toml
-
-
-
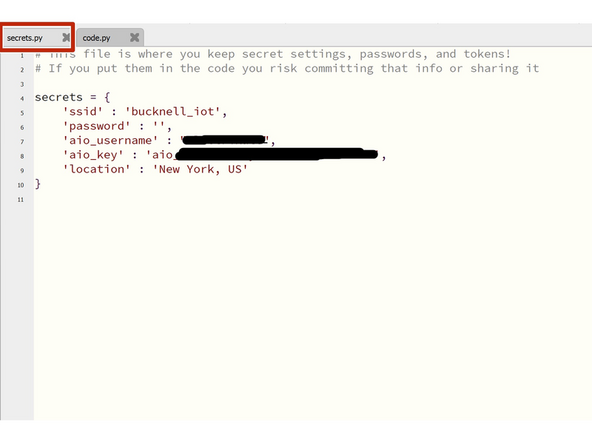
For the code to access the necessary data, you'll have to create secrets.py.
-
secrets.py may already exist! if so, just edit it in Mu
-
Create a new code file in Mu and copy the code from this adafruit guide.
-
Replace the data with your own and save the file as secrets.py
-
-
-
Download the project bundle from adafruit. Copy the libraries over and save code.py to the QT Py
-
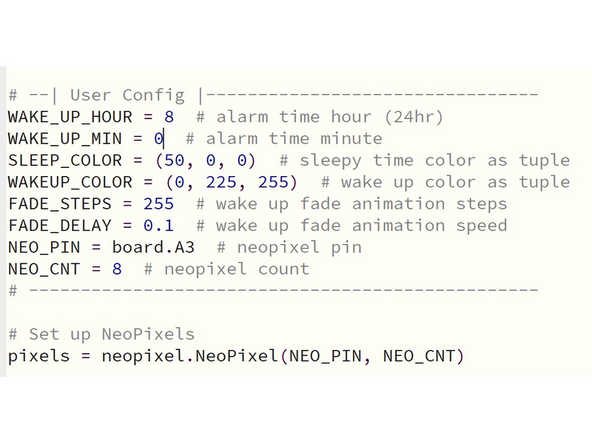
In the user config section, change NEO_PIN to board.A3 and NEO_CNT to the amount of neopixels you're using
-
Adjust the color of the pixels, the wake up time, and animation speed to your liking.
-
(0, 0, 0) turns the pixels off!
-
The lamp needs to be reset to replay the sunrise animation. You can do this with code (see below) or by unplugging and replugging the lamp in.
-
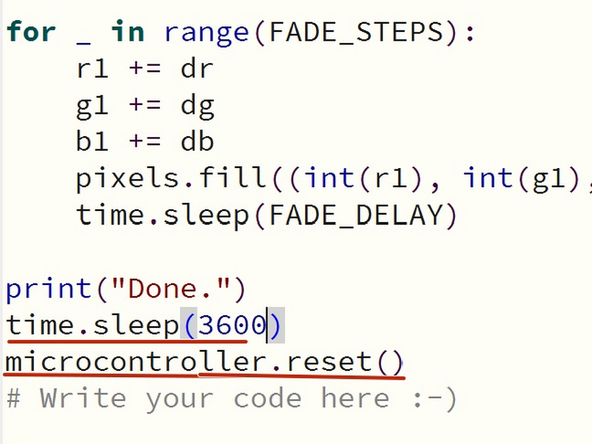
To make the lamp turn off after a period of time, I added code that would reset the board after 1 hour.
-
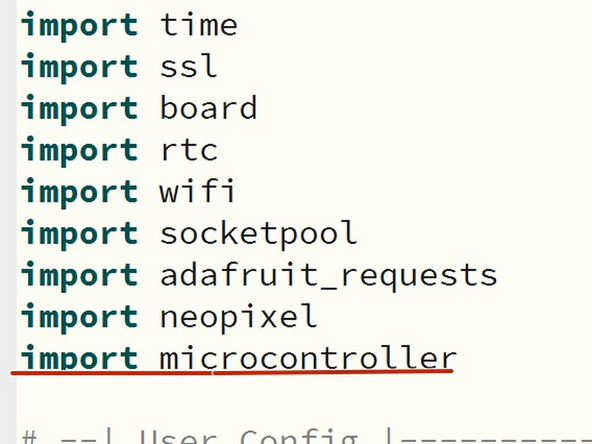
At the top of the code import microcontroller. At the very bottom add a time.sleep(seconds) and microcontroller.reset()
-
If you want a challenge, change the code so that the lamp changes to a different color during the day and then switches colors at night! You could also add a rotary encoder or pushbutton to create different modes!
-
-
-
Insert your NeoPixels and microcontrollers into the lamp.
-
You may have to tape the neopixels to hold them in place!
-
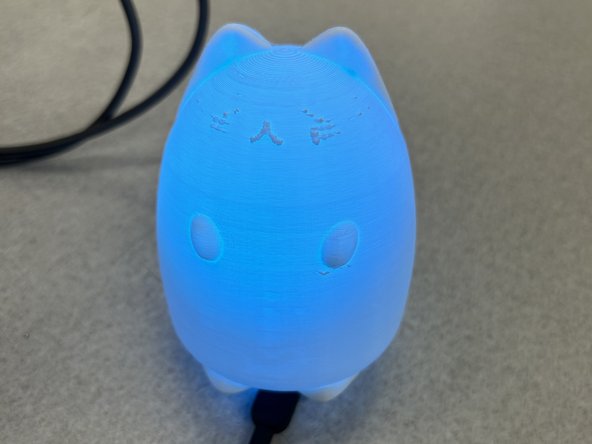
You've now completed your sunrise lamp!
-