
-
-
-
Next click the icon shown in the first image to bring up your list of courses.
-
Click on the course you want to make a portfolio for.
-
If the course is not listed then you'll have to click on the blue + sign and search for your course name or number.
-
-
-
Note- you may not see this screen depending on the role you are assigned (faculty, student, etc.). If you don't jump to Step 4.
-
You will leave the modern looking screen and see a much smaller screen.
-
The tab you want is near the top and labelled "ePortfolios". Click it to view the ePortfolios in the course.
-
-
-
Again, you may not see this screen depending on your role. If you don't skip ahead to the next step.
-
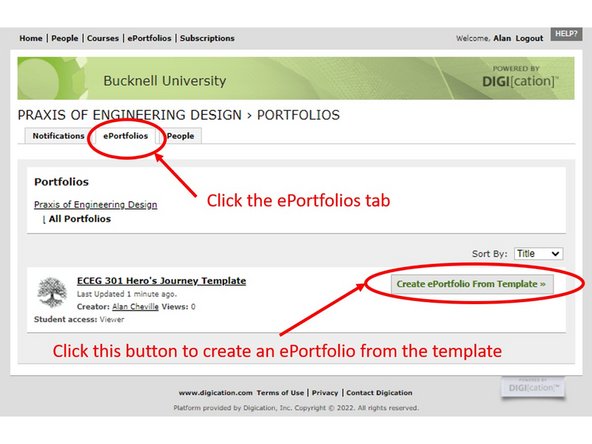
The ePortfolios tab takes you to a screen where all the portfolios that have been created are listed.
-
You will most likely create an e-portfolio based on a template created for the course. The first image shows an ePortfolio that is in the course and a template you can use to create your ePortfolio.
-
Just click on the button that says "Create ePortfolio from Template"
-
Also make a note of the name of the template, you will need it in the next step.
-
The remainder of this tutorial will show how to create an e-portfolio from a template. The steps for blank portfolios are similar.
-
-
-
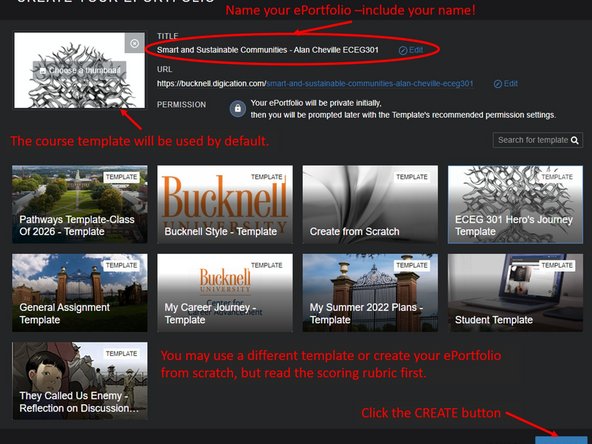
Digication wants to give you an option to choose a different template, so it will take you to a screen listing available templates.
-
The default will be the class template so choose it. If you want to use a different template you can, but understand how it will affect your score first!
-
Name your portfolio as shown in the image. Make sure you use your full name in the name of the portfolio so it is easy to find and grade.
-
When you are done click the CREATE button.
-
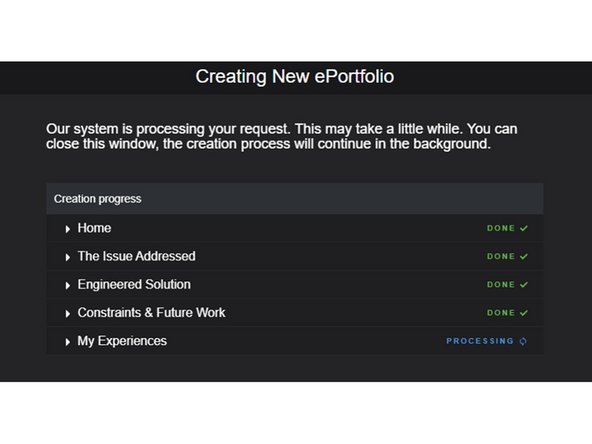
You should immediately see a processing screen (2nd image) and after a few minutes your ePortfolio will be ready to edit.
-
-
-
Now we get to the basics of setting up your ePortfolio.
-
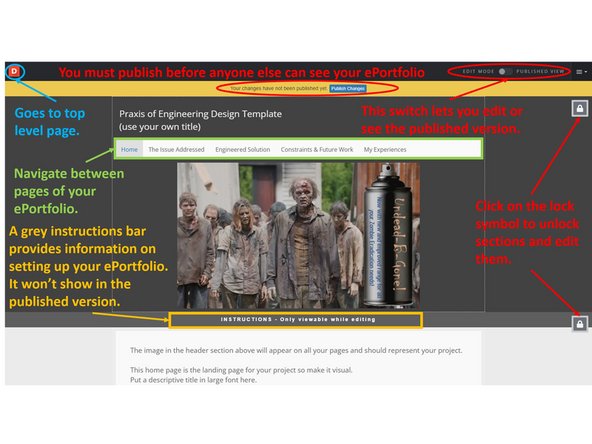
The first image shows some major sections of the top of the ePortfolio screen.
-
You can switch between viewing and editing using a switch on the top right.
-
The yellow bar at the top tells you that you have not yet published this page. The blue Publish button will make the page visible to viewers.
-
The navigation bar takes you between different pages in your portfolio. Because this portfolio was created from a template, this was set up by the person who made the template.
-
The grey bar at the bottom of the header that says "Instructions" was added by the template author. The text that appears in that section is only viewable in edit mode (not when published) and provides instructions for that page of the ePortfolio.
-
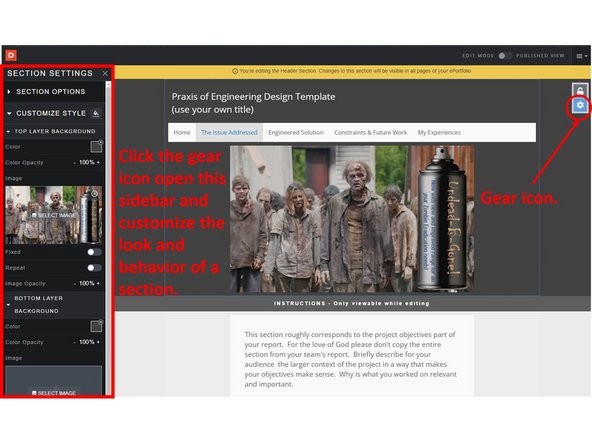
Lock symbols on the right of the screen determine whether you can modify the properties of each section of the ePortfolio. Click the lock to edit properties of the page (discussed next).
-
If you click the lock icon to unlock a section, a gear icon appears as in the second image. Clicking on the gear opens up a sidebar on the left that will let you modify how a section looks.
-
-
-
By starting with a template you have a structure for your ePortfolio (and perhaps some instructions). But it is up to you to add content.
-
Content is organized by sections. A section is indicated by faint dashed blue line in Digication for the selected section, and a grey dashed line for unselected sections.
-
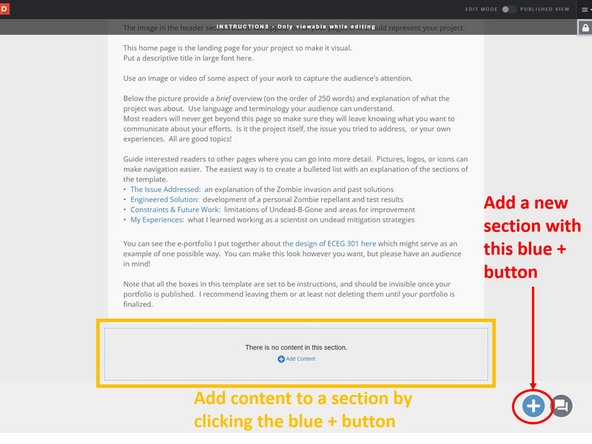
You can add content to a section by clicking on the small blue + symbol in a section that says Add Content, this is discussed in the next step of the tutorial.
-
You can add a new section by clicking on the large blue + symbol in the lower right corner.
-
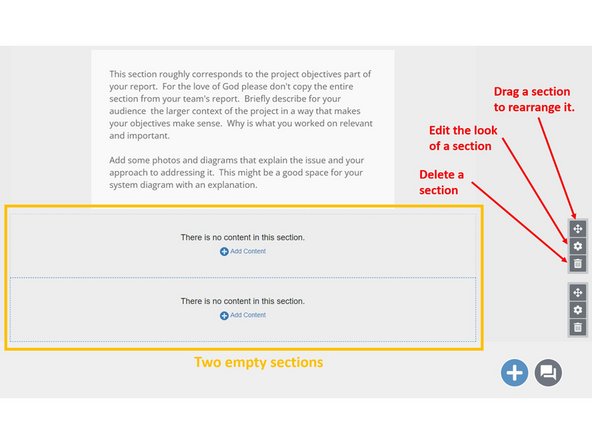
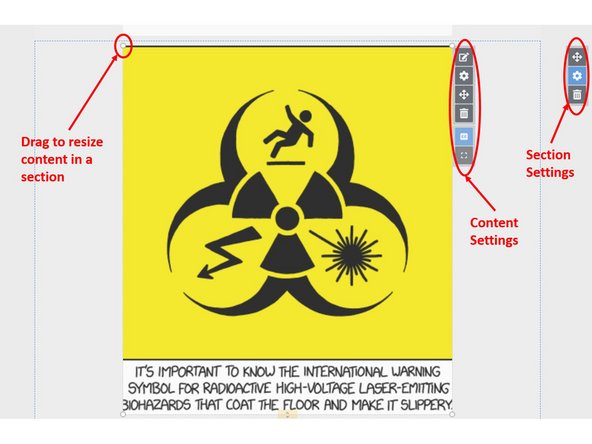
There are three icons to the right of each section as shown in the second image.
-
The top icon lets you drag a section to rearrange it.
-
The middle gear icon lets you change the look of a section by opening up a settings pane on the left of the screen.
-
The bottom garbage can icon lets you delete a section.
-
-
-
Content in Digication is added into sections by clicking the small blue + button that says Add Content.
-
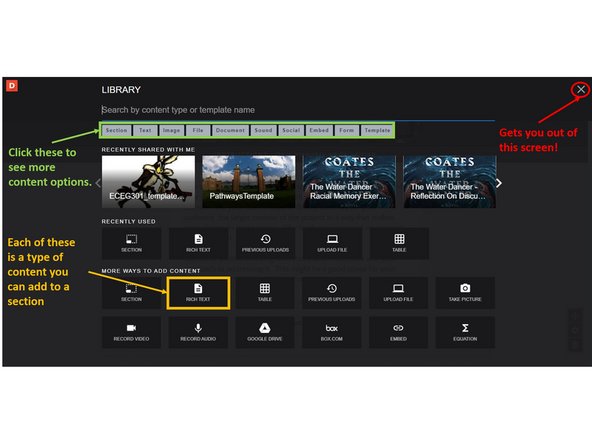
When you click on this button you'll be taken to the add content screen shown in the first image.
-
Note that the browser back button doesn't work to get you out of this menu so you need to exit using the grey X in the upper right corner.
-
Click on one of the dark boxes to add that type of content to the section. For example RICH TEXT will add a text box for you to type. UPLOAD FILE will let you pick an image or video to upload to the section.
-
There are other forms of widgets to add different types of files which can be accessed through the grey buttons right under the search area. Clicking a grey button opens a screen with new forms of content to add.
-
Explore these and practice adding different types of content to the section.
-
Note that because of the way Digication works it is better to keep sections short and add new sections for new content. This make is much, much easier to change the look of your ePortfolio.
-
-
-
Digication operates hierarchically. A page is divided into sections. Sections can be moved and edited.
-
Content is added to sections, and each piece of content has its own settings you can change. You can also move content around within a section.
-
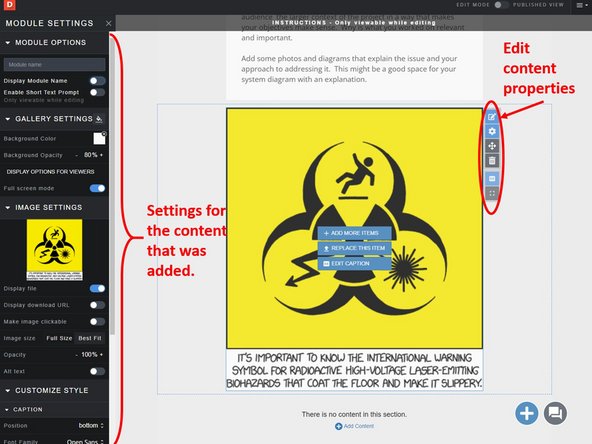
How to change the look of your content shown in the first image. Clicking on the content brings up a set of icons you can use to modify the look of the content. Play around with the settings on the left pane to experiment with how this works.
-
The second image shows the section setting icons and the content setting icons - the look of a page, a section in a page, or content in a section can be customized through the sidebars opened through these icons.
-
When you click on a piece of content in a section, four white circles appear on the four corners. Grab and drag these to resize the content in the section.
-
Remember to go to the switch icon in the upper right and set it to PUBLISHED VIEW if you want to see what the changes you have made look like.
-
-
-
As you create your ePorfolio you'll go through each of the pages of your ePortfolio, adding sections and content and then changing the settings so you get the look you want.
-
Be creative, you can set partially transparent images as a background, add videos and links to many social media feeds, and much more.
-
When you are ready to publish check the look of the page using the switch in the upper right to set to PUBLISHED VIEW. If it looks good press the blue "Publish Changes" button near the top of the page.
-
This will publish only that page, not the full e-portfolio. Pages need to be published individually!
-
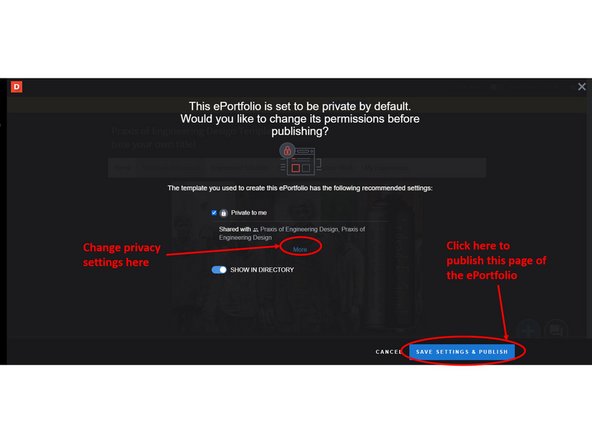
Clicking the publish button brings up the dialog screen shown. Here you can set privacy settings. If you are using a template the course instructor probably set the privacy settings, but feel free to change them if you want. Just make sure not to deny the professor access!
-
Click SAVE SETTINGS & PUBLISH in the lower right
-
-
-
There are a lot of other features Digication offers, but these are the basics of creating an ePortfolio.
-
Always check with your professor to see if there are any special instructions for the ePortfolio in your class.
-
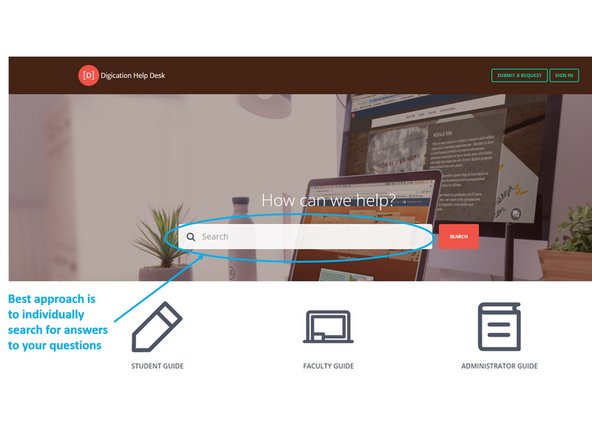
Until I played around in Digication some I found the user interface a little hard to figure out. If you need help the best advice is to search in the Digication Help Portal, shown in the figure.
-
Remember that Digication has a hierarchical structure. Portfolios are divided into pages, pages have sections, and sections have content. Each of these have settings can be edited individually
-
Use these levels wisely to separate your material. Don't treat the ePortfolio like a Google Doc and dump everything on one page.
-
You can change the privacy settings to let anyone see your ePortfolio. This may be useful if you want to highlight your work when finding a job, internship, or simply to let friends and family know what you've been doing.
-


Cancel: I did not complete this guide.
One other person completed this guide.
