
Tools
No tools specified.
Parts
-
-
First do a visual inspection that the gas line is connected and undamaged.
-
Laboratory staff have set the pressure regulator to 5psi. Do not attempt to adjust on your own.
-
Turn on gas using knob at top of cylinder
-
Check that pressure is between 2 and 10 psi, nominally 5psi. If pressure is out side this range; stop and report to laboratory staff.
-
-
-
Turn on Vacuum Pump using toggle switch near power cable.
-
Turn on Sputter Coater using switch on back of device
-
-
-
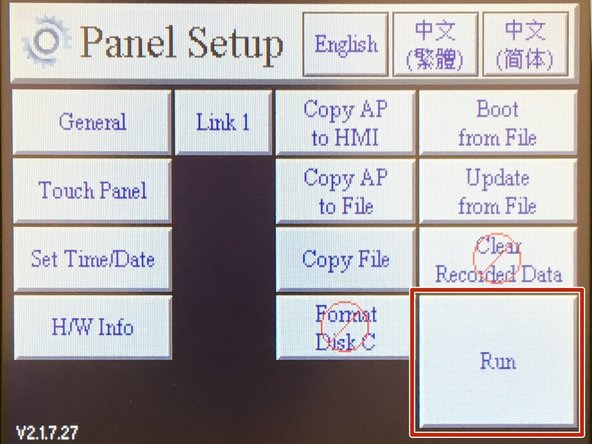
Upon powering up the "Panel Setup" screen will appear on the sputter coater touchpanel. Tap the "Run" button to proceed.
-
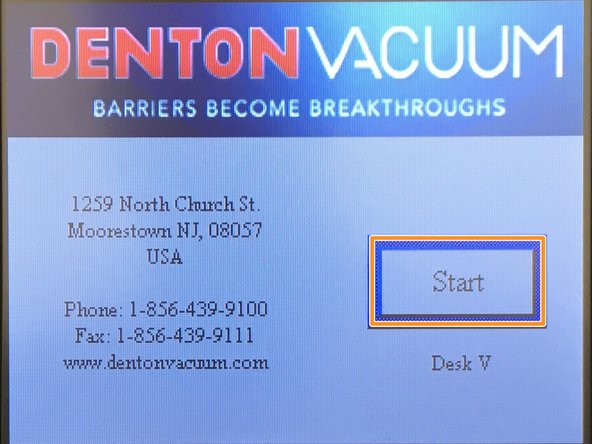
Next, the sputter coater software splash screen will appear. Tap the "Start" Button to proceed.
-
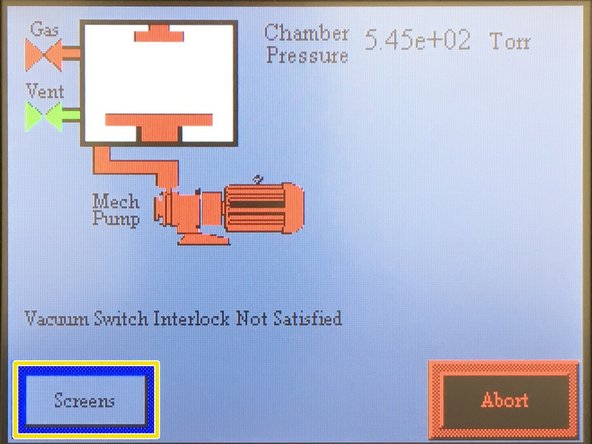
Next, a system overview screen will appear. Tap "Screens" to proceed.
-
-
-
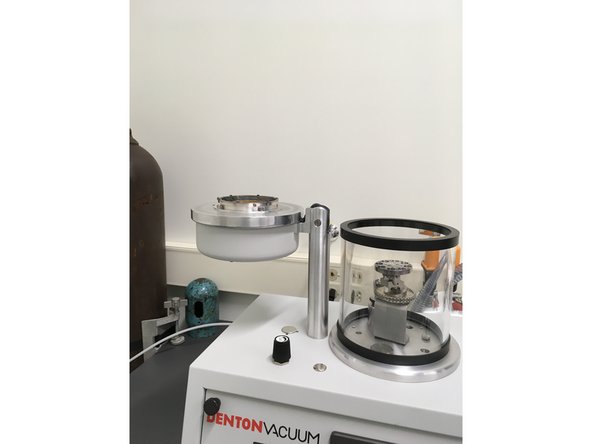
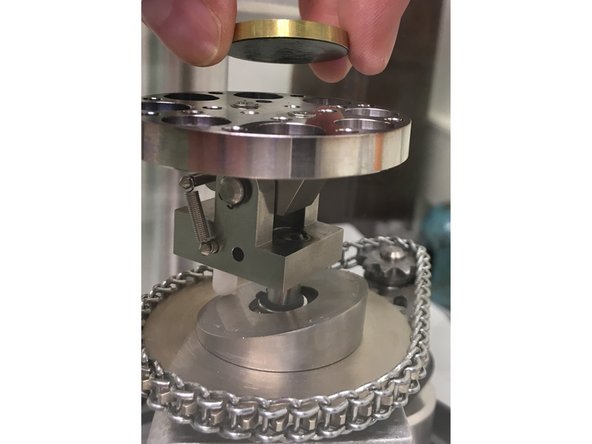
When the software has reached the "Modes" Screen, carefully lift and tilt the top of the chamber.
-
Adhere your specimen, mounted on a brass disk to the stage using a carbon tape dot.
-
Carefully close the chamber. Be careful not to pinch the cable between the top and the wall of the chamber.
-
-
-
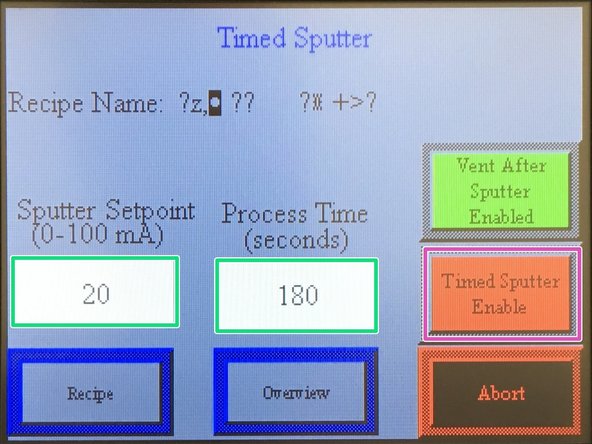
On the "mode" Screen tap the "Timed Sputter" button.
-
Next, tap the "Vent After Sputter Select" button to select it, (will turn green). this way the chamber will vent after sputter coating.
-
You now have the choice of "Sputter Setpoint" (current) and "Process Time" 20mA and 180s have worked for sample we have tried. Your specimens may need different settings. Talk with your research advisor and the Laboratory Technican to determine the best settings for your research.
-
You are now ready to sputter coat. Tap the "Timed Sputter Enable" button to begin sputter coating. Note You may not see anything happen for a minute or two while the chamber pressure is reduced and argon gas in introduced.
-
-
-
Once the sputter coating time expires, the sputter coater will automatically stop deposition and return the chamber to room pressure. Carefully remove your specimen. If you are coating more specimens you can repeat steps 4 and 5.
-
When done, remember to turn off the sputter coater, vacuum pump, and the argon gas at the valve on the cylinder. Please also leave the top on the chamber to reduce the accumulation of dust in the chamber.
-


Cancel: I did not complete this guide.
2 other people completed this guide.
