
Introduction
This tutorial is only for basic data acquisition and is not for data analysis. If further training or techniques are required, please ask the administrator for additional training before modifying current setup.
-
-
The user agrees to use the Rigaku PXRD according to how they were trained and/or under the direction of the Instructor/Lab Director.
-
It is assumed for this tutorial that you come with the sample in a dry non-toxic powder or solid form. If this does not describe your sample, inquire for additional protocol.
-
-
-
Prior to using the Rigaku PXRD, a review of Bucknells X-Ray training is required since this instrument produces potentially harmful radiation.
-
-
-
Confirm water circulation cooler (Under bench) is on. You will know it is on because the fan will be on along with a temperature displayed in the front.
-
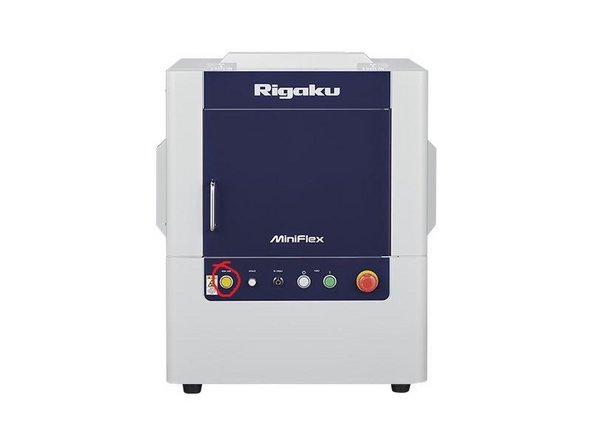
Turn on the instrument by pushing the green button on the front panel.
-
Log into PC.
-
-
-
Open SmartLab Studio II Software.
-
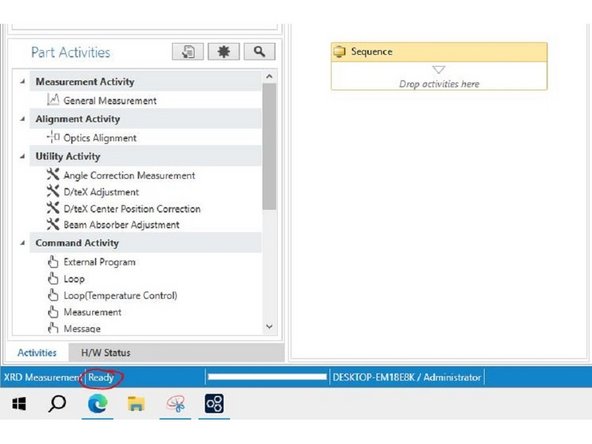
Identify if software has connected with the Rigaku PXRD. This is done by looking at the very bottom left of the window and seeing the status change to 'Ready'.
-
If the software is not connecting for some reason, close the software and reopen it.
-
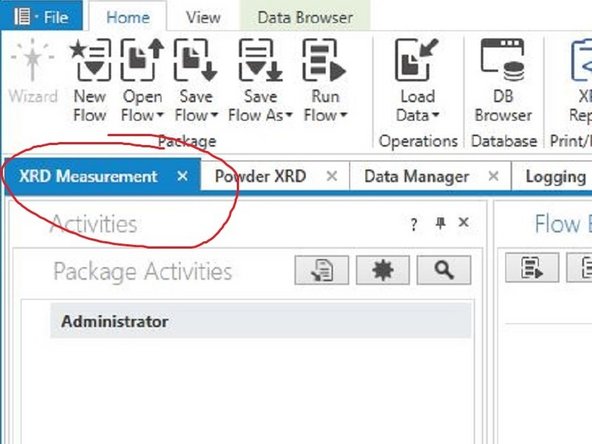
Verify you are in the XRD Measurement tab.
-
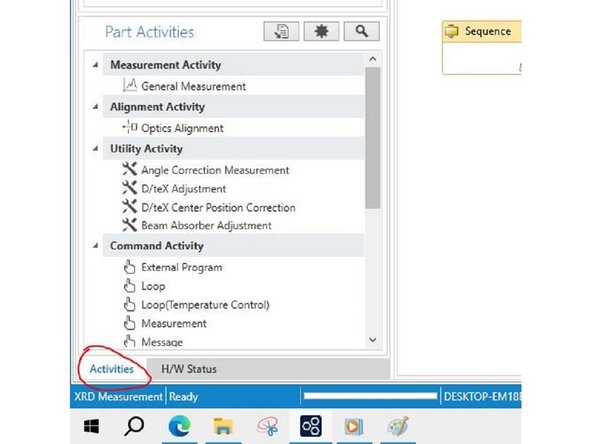
Verify you are in the Activities tab.
-
-
-
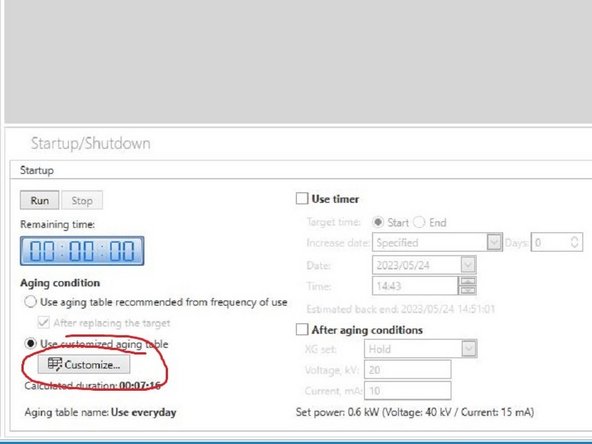
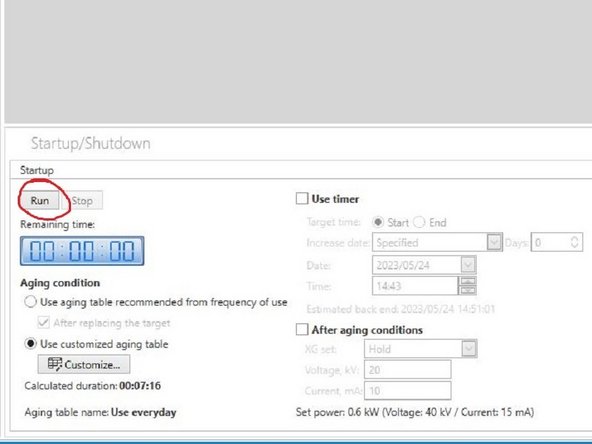
Under Startup, click customize to select the correct aging (or how long it's been since instrument was last used).
-
When in doubt of last used date, select a longer startup.
-
Select Run. This startup will take 7-15 minutes. You will notice the indicator light labeled 'X-Ray on' will illuminate.
-
-
-
Do all sample loading in main area next to the sink and not in the room where the instrument is located
-
Choose a sample holder that is appropriate for your purposes. If your sample does not fit in the available sample holders, ask the administrators for alternate options.
-
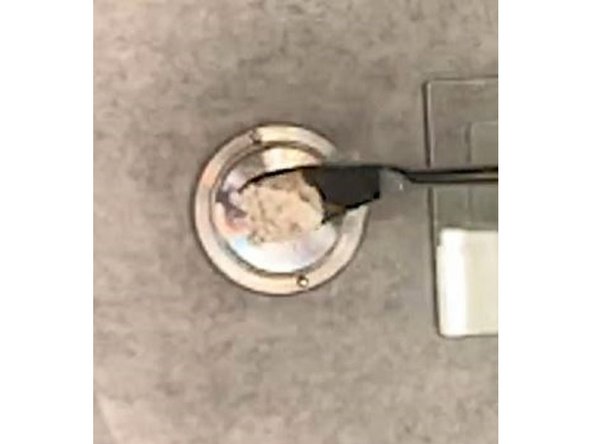
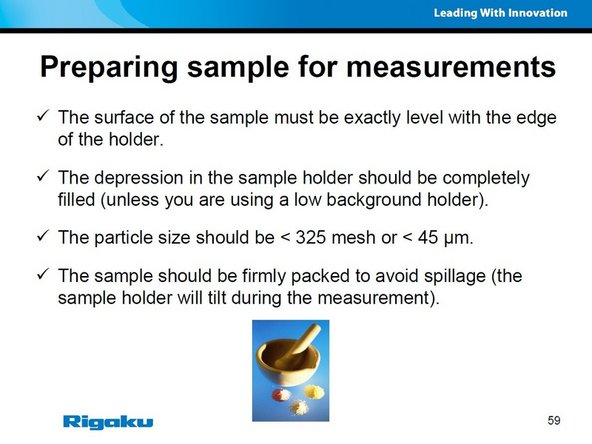
Fill sample holder with enough sample material to overfill top edge of well in preparation for the next step.
-
Flatten/pack sample material such that there is minimal deviation from well brim. Deviation will cause error in data collection.
-
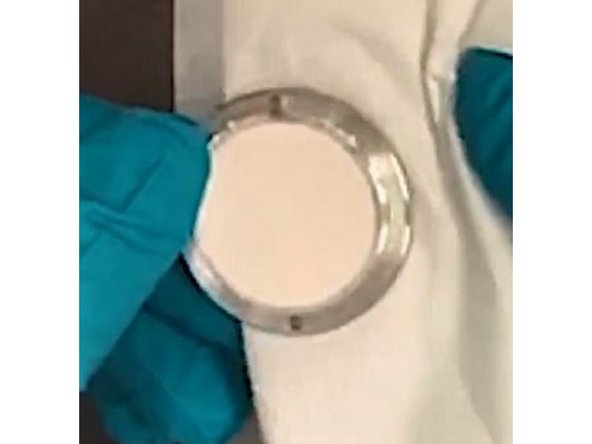
Furthermore, the sample will be spun and tilted while data is collected which means the sample material needs to be securely within the sample holder.
-
Discard any extra powder and wipe the bottom of the sample holder to avoid contamination.
-
-
-
Press yellow button on the instrument. Wait until the button flashes. When it starts to flash the door is unlocked.
-
Do NOT attempt to manually rotate the Automatic 8-position sample changer.
-
Open door and place sample in one of the positions of the automatic 8-position sample changer. Take note of the numbered position and avoid placing in position #1 for ease of loading.
-
Close door
-
-
-
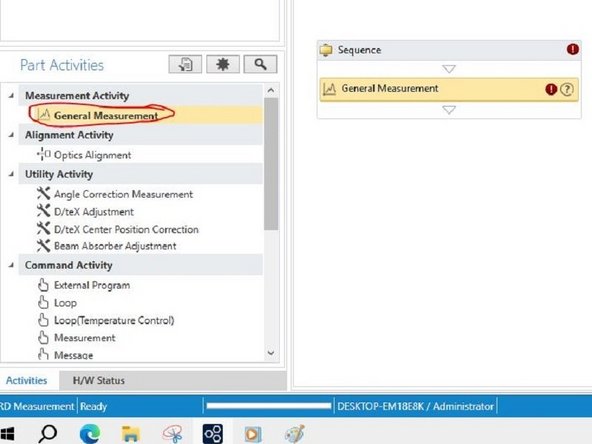
Double click ‘General Measurement’ which will load it into the Sequence (Flow editor).
-
Select 'General Measurment' within the sequence to modify.
-
-
-
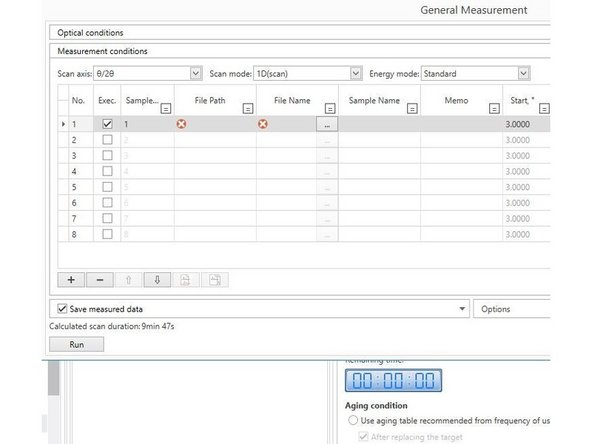
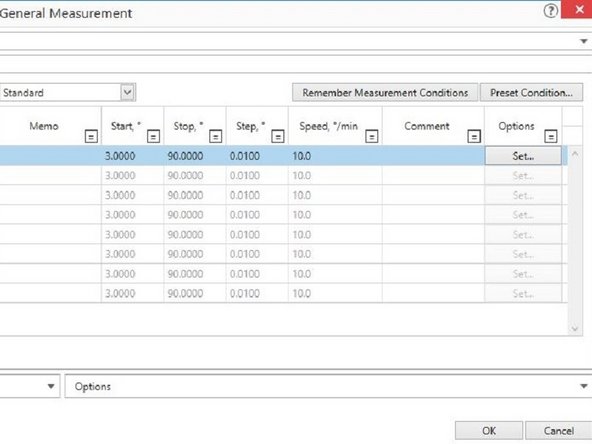
Within the General Measurement, run sequence (chronological sample measurement) is represented in the column labeled simply as ' No.'
-
Select the number of check boxes under 'Exec.' according to the quantity of sample holders that you have loaded in the instrument and modify sample location according to your needs.
-
The Sample location can be modified under the column header 'Sample..'.
-
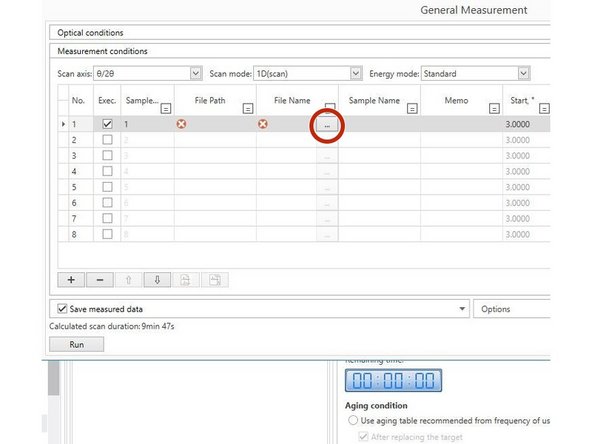
Select the 'File Name' button '...' to specify file storage location and name. If you do not have a folder currently, please create a folder named with your Bucknell username within the Documents folder.
-
The Sample Name and Memo columns are optional.
-
-
-
Start/Stop/Step/Speed columns are used to specify your measurement conditions.
-
In general, the full 3 to 90 deg range is not necessary. The start and end angles are usually known from previous research. If you don't know, setting the stop angle to 50 deg is a good starting place
-
Step typically does not need to be changed and can stay at 0.01 deg.
-
Speed is the main variable for controlling how long it takes which directly influences your signal to noise. 90 deg/min is good for a very quick scan with slower rates increasing signal to noise.
-
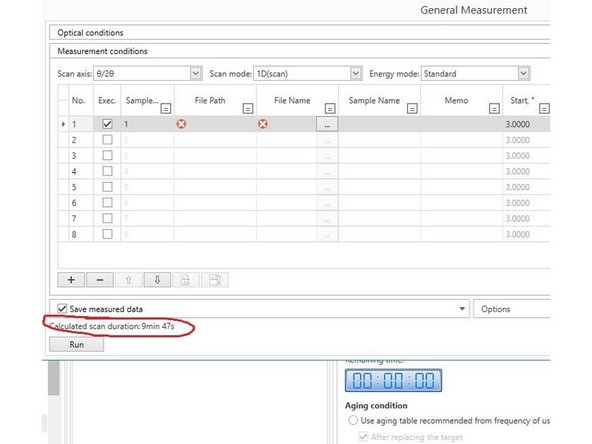
You can see the estimated scan time in the bottom left of the window next to 'Calculated scan duration' for all executed runs.
-
-
-
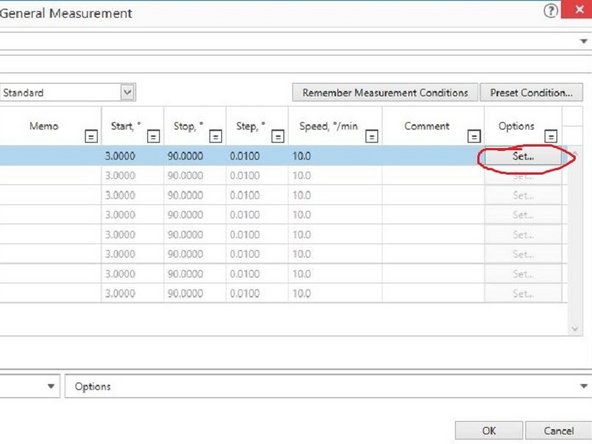
Default sample spinning speed during measurement can cause your sample to spill during measurement if it is not packed well enough.
-
It is recommended to select 'Set...' and choose a slower rotation speed such as 20 rpm, however this depends on your specific application.
-
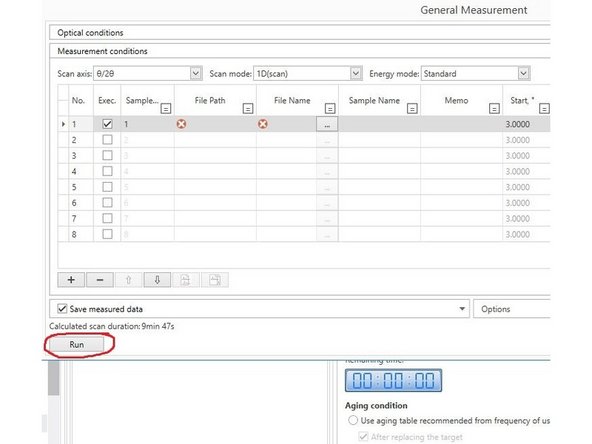
Once General Measurment settings have been completed, select 'Run'. The General Measurement window can be closed to see the data being acquired in real time. Runs will be saved as they complete.
-
-
-
We will not address data analysis in this tutorial.
-
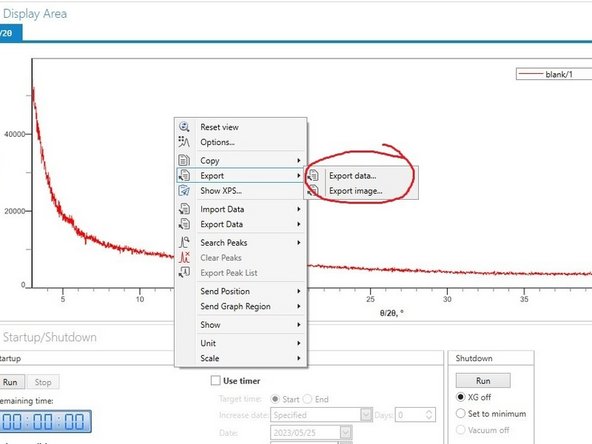
To export data in a csv file and/or plot image, right click the scan data window and choose export.
-
Another window will appear where you can then select file type and so forth.
-
Save any data and/or images in your user folder and not on the desktop.
-
-
-
Open door. Note that flashing light = unlocked
-
Remove all sample holders and then close door.
-
Clean sample holders. This may involve tissue wipes and/or an isopropyl alcohol wipe.
-
-
-
If a user is scheduled right after you, leave everything on.
-
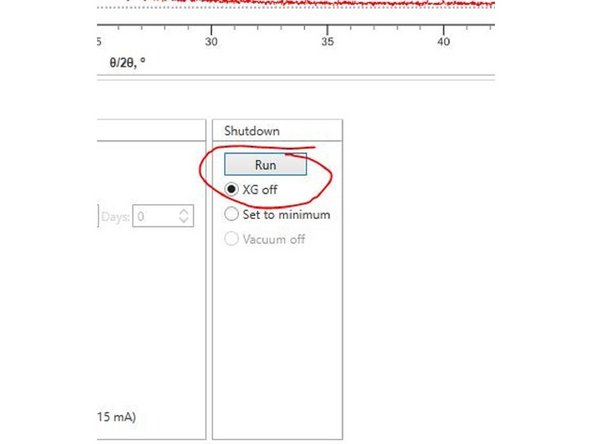
If you are the last user of the day, turn off the X-ray source by selecting 'Run' under Shutdown with 'XG off' selected.
-
Close the software.
-
Log off the PC.
-
Shut down the instrument by pressing the white O button.
-
The water cooler is to be left on at all times.
-
Questions or issues, please email egpxrd@bucknell.edu
-


Cancel: I did not complete this guide.
3 other people completed this guide.