
Introduction
This guide explains how to edit the software of the gaming tables. This includes adding/deleting roms and configuring the controls.
-
-
Image the SD card of the Raspberry PI with the following image: https://drive.google.com/file/d/1IGM8Xcn...
-
It is helpful to use Win32DiskImager (you can search for it online) with the format type as "full(overwrite)" and the adjust size option set to "on." Unzip the image before adding the file.
-
Here is a link for additional help with installing an image: https://www.raspberrypi.org/documentatio...
-
-
-
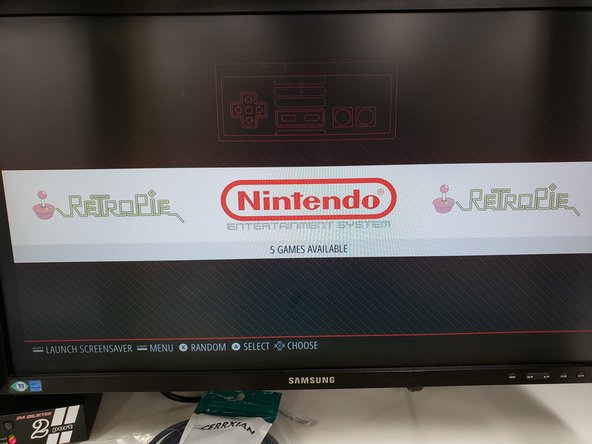
Plug the SD card back into the Raspberry PI and plug the gaming table in. Let the gaming table boot and you should see the retropie logo load onto the screen.
-
-
-
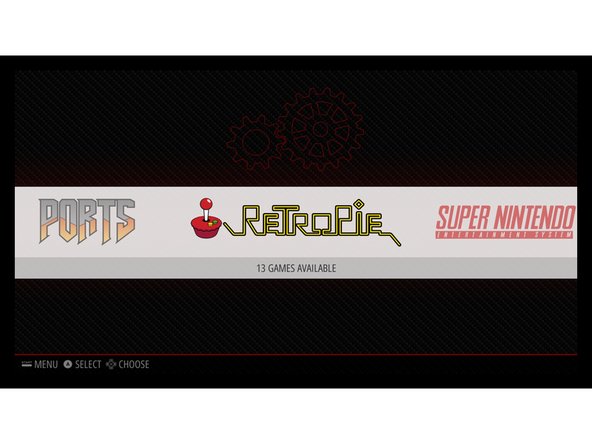
Find retropie on the start menu; press "A."
-
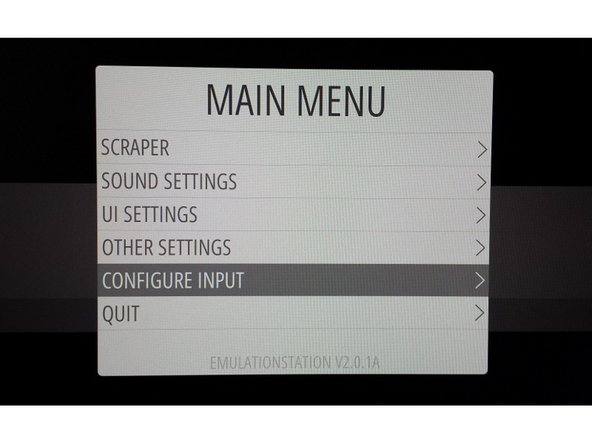
Go to "configure input" on the main menu; press "A."
-
When asked, "are you sure you want to configure input," choose yes.
-
-
-
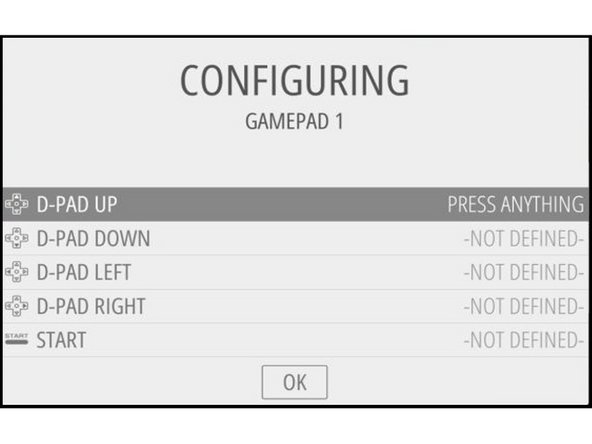
Use the joystick to scroll down the list and press and hold the button that coincides with each function. (the blue button is "start," black is "select," yellow is "A," and red is "B." If no button corresponds to the function, then skip the option and leave the function as "not defined."
-
-
-
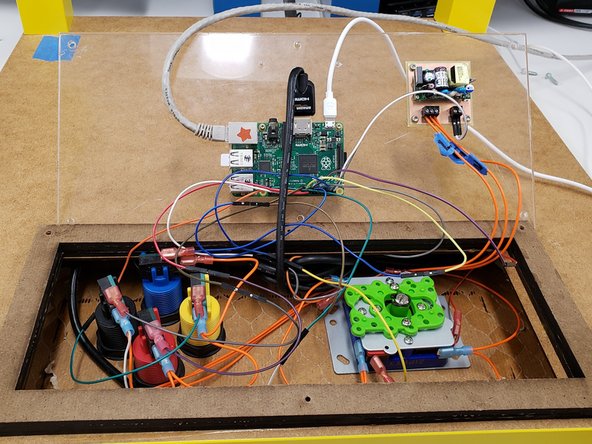
Unscrew the back panel of the gaming table. Unplug the HDMI table
-
Connect the PI to the HDMI cable connected to the external monitor at one of the computers at the CAD station.
-
Connect the ethernet cable at the CAD station to the port on the PI.
-
Connect the keyboard to the PI.
-
Connect the micro USB cable to the PI, with the small end connected to the PI.
-
-
-
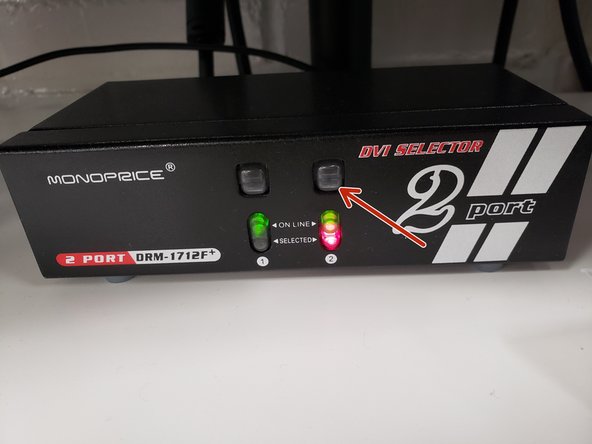
Press the button to change the screen of the external monitor to the Retropie interface.
-
Press F4 on the Raspberry PI keyboard.
-
Type sudo raspi-config on the PI keyboard and press enter.
-
Select "interfacing options," and then SSH.
-
Select "yes," and then "ok" to enable SSH.
-
Then choose "finish."
-
Download WinSCP software from this link:https://winscp.net/eng/download.php
-
-
-
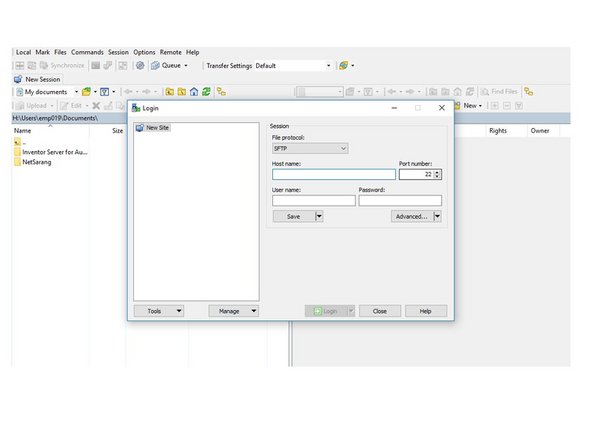
Open WinSCP.
-
Type sudo ifconfig, then enter on the PI keyboard.
-
Enter the IP address (the numbers following "inet" under " eth0 flags," ex. "134.82.135.27" ) into the "host name" of the WinSCP window.
-
Type "pi" for the username and "raspberry" for the password.
-
Select the "login" button, the "yes."
-
-
-
Select the "retropie" folder and then the "roms" folder on WinSCP.
-
Select the folder that corresponds to the type of games that you want to download. In this tutorial, we choose "nes."
-
Drop your game files into the folder.
-
Turn off the Raspberry PI by typing sudo shutdown, then enter on the PI keyboard.
-
Once the PI turns off, unplug the cables you attached in step 5 and plug the HDMI cable from the table back into the PI. Attach the back panel.
-
-
-
Go to the nes menu on the table, find the game you want to delete and press "select".
-
In the options menu, go to "edit this game's metadata," and press "A".
-
Choose delete at the bottom of the menu.
-


Cancel: I did not complete this guide.
One other person completed this guide.