
Introduction
Published by Matt P. Lamparter with contributions from Ryder R. Nance.
-
-
This tool uses heat to melt solder. Consequently, it gets very hot. Hot air is forced out of a small nozzle at high speeds. Use extreme caution when handling the tool.
-
Do not touch the metal end of the tool.
-
Only point the end of the tool at your PCB. Avoid blowing hot air on the bench, other equipment, people, etc.
-
Keep the air flow on the tool at the minimum value when you are not actively using it.
-
-
-
You want to ensure your PCB will not move while you are working on it. You should secure it via one of two methods:
-
Firmly clamp your PCB in one of the vices on the soldering bench. This method is preferred as it avoids heating the bench. It works well for components located away from PCB edges.
-
Alternatively, you can place your PCB on the heat resistant mat which protects the soldering bench. You should then tape down your PCB to the mat using blue painter's tape found in the DeWalt cabinet. This method is good for working on components along the edge of a PCB.
-
-
-
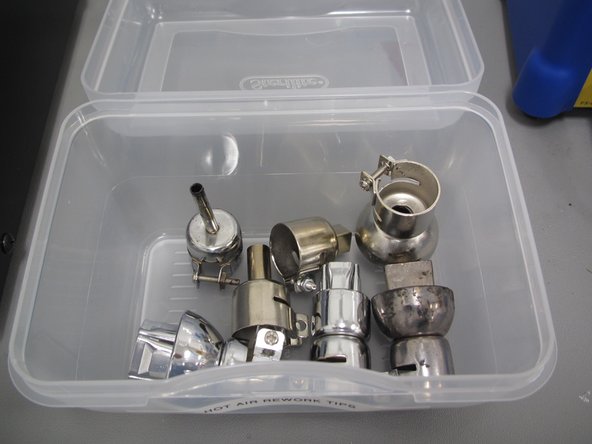
With the tool turned off, choose the correct nozzle for your application.
-
Choose a nozzle that will just cover the part of your PCB you wish to solder. In this example we will use an 0805 resistor, so we have chosen the smallest nozzle which will cover the resistor.
-
Nozzles are located in a plastic container beside the rework tool.
-
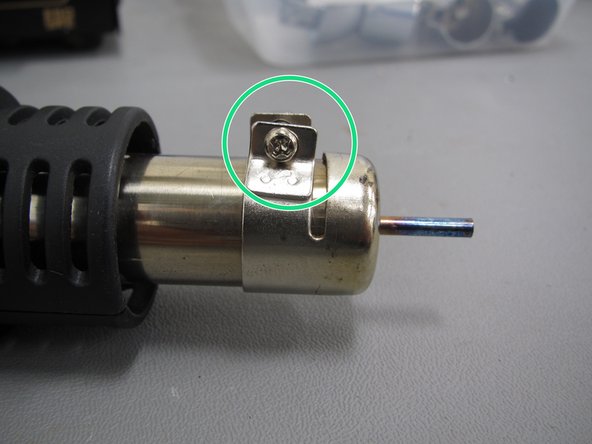
You can use a small screwdriver to exchange nozzles.
-
-
-
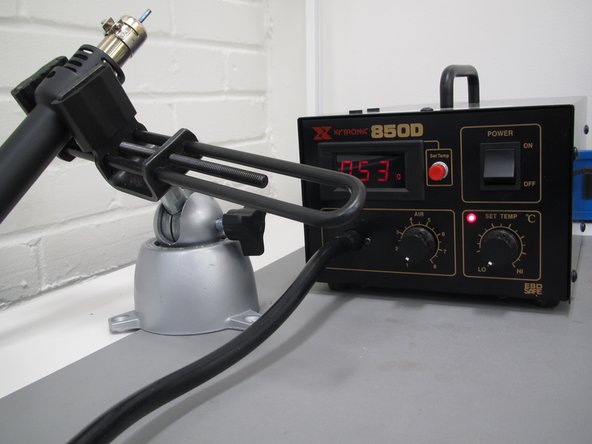
Place the tool in a vice, or have a friend hold the tool pointed away from yourself.
-
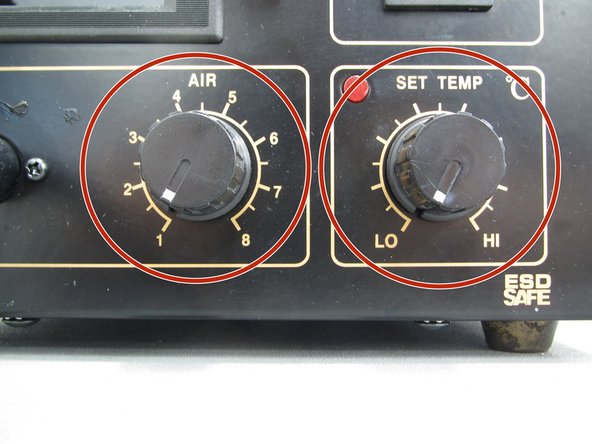
Turn the AIR and SET TEMP controls to their minimum values, then turn on the tool.
-
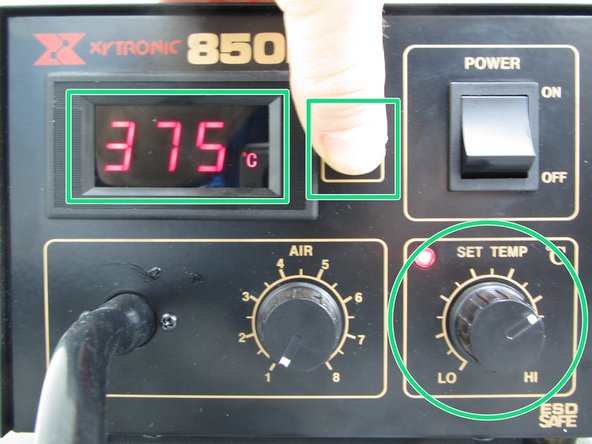
Being careful to avoid the airflow of the tool, push and hold the red Set Temp button while adjusting the SET TEMP knob. This will allow you to view the desired set temperature. Configure the tool to 375C for the solder paste used in the Maker-E.
-
When you release the Set Temp button the real-time, current output temperature of the air will be displayed.
-
-
-
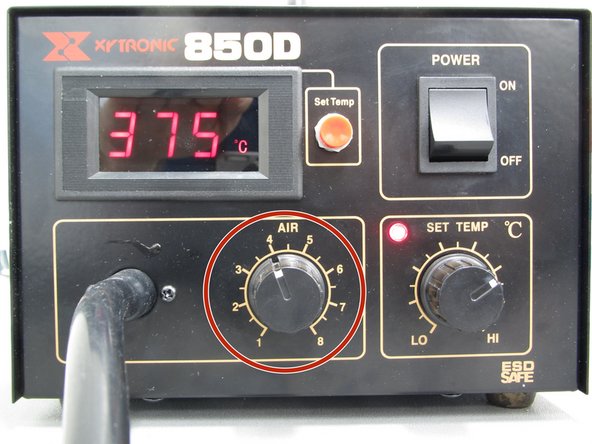
Now increase the airflow rate. A value of 4 should be a good starting point.
-
A temperature of 375C and airflow of 4 are suggestions. If you find that these values do not work for your application, you may adjust them. However, use caution as too much heat can damage parts or delaminate your PCB. Additionally, too much air can literally blow components off of your board!
-
Be Patient. Solder will not melt immediately. If solder is immediately melting, the temperature is too hot. Additionally, if you have to heat a part for more than ~15 sec, the tool is probably not hot enough. Allow part to cool, increase the temperature, and try again. Overheating parts could cause board damage.
-
-
-
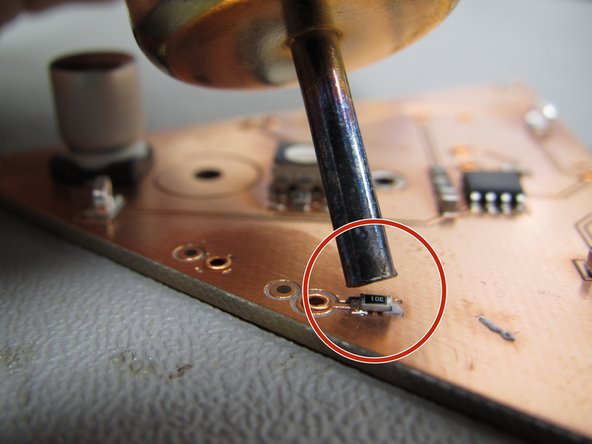
With temperature and airflow set, and your board securely held in place, you can apply heat to your PCB.
-
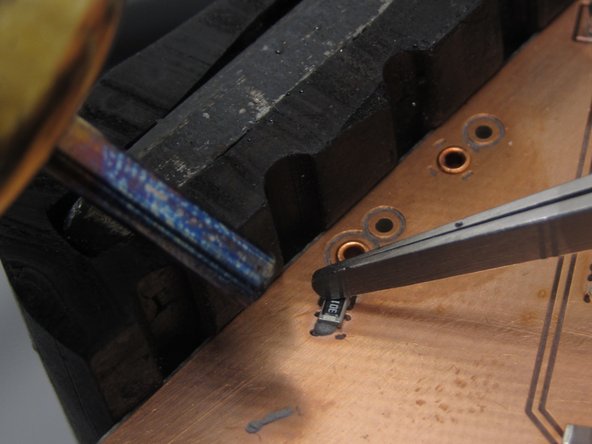
Because the airflow is so strong, components will want to shift. To prevent components from moving, use a metallic tool, such as tweezers, to firmly hold the component in place.
-
DO NOT USE PLASTIC TOOLS AS THEY WILL MELT.
-
Move the nozzle as close to the solder pads as possible without touching the component. Hold the tool in place for several seconds, keeping an eye on the solder. When it reflows and becomes shiny you should remove the heat but keep the metallic tool in place.
-
After a moment or two the solder will harden and you can remove the metallic tool as well.
-
-
-
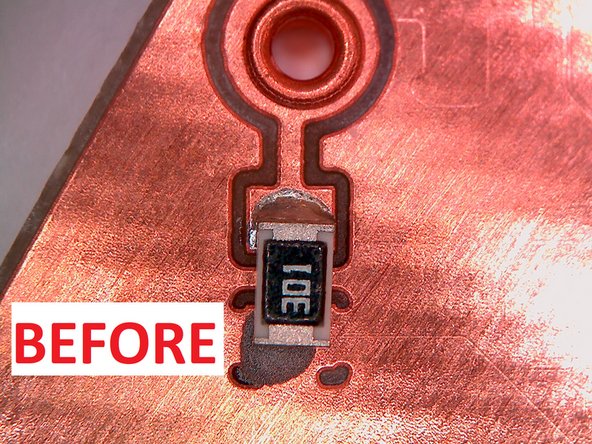
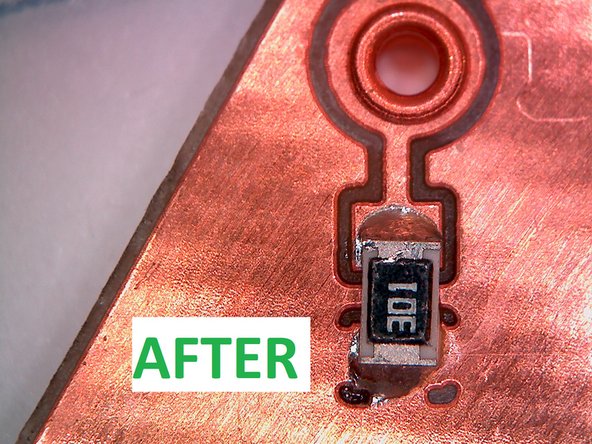
Inspect the solder pad you just reflowed. Confirm that the solder is no longer dull, but is now shiny and making contact with both the component and the copper pad.
-
-
-
Remember to turn off the tool when your done.
-
Note that when you first turn off power to the tool, the air will continue to run. This behavior is normal. The heating element has shut off and the air continues to run. Once the output temperature drops below 100C the air pump will shut off.
-
As long as the tool is not point at the benchtop, equipment, etc. you may leave the tool while it cools down.
-


Cancel: I did not complete this guide.
5 other people completed this guide.