
Introduction
This tutorial will walk you through the steps of using a document camera in a Dana classroom to record a video lecture. Topics covered will include using the document camera, launching and configuring Zoom, recording and saving your video, and uploading the video to a web server.
Your lecture video will include input from two separate sources:
- video will come from the document camera located in the classroom, or input from the computer. The camera will allow you to use physical media such as printed lecture notes, text books, or other physical formats. You can also include digital content directly from the computer such as PDF files, websites, videos, etc.
- audio will be provided either from a smartphone running the free Zoom app, or from a USB microphone available from the Dean's office.
Published by Matt Lamparter with contributions from Wendy Wright.
-
-
This tutorial is based on the hardware found in Dana 134 and the Samsung SDP-960 document camera. The same general steps should apply to all Dana classrooms.
-
Begin by turning on the document camera. The power button is located on the front right side of the camera. Press and release the button. The camera will take about 30 seconds to turn on.
-
Once powered on, you should see the camera output appear on the integrated LCD screen.
-
You can turn on the camera's integrated light source by pressing the Lamp button on the camera's platform.
-
Wendy Wright put together a very useful set of tips for working with document cameras, which will help with student comprehension and give your video a more professional look. You can access those tips in a PDF document here.
-
-
-
You will need to provide an audio capture device to record your lectures. If you have a smartphone you can install the Zoom app which will allow your phone to act as your audio capture device.
-
After installing on your phone, launch Zoom and choose to sign in using a Google account. If you have a personal Google account, be sure to use your Bucknell account and authenticate through CAS.
-
Once you are logged into Zoom on your phone you will wait to join a meeting until we initiate a meeting on the computer. This will happen in a later step.
-
Alternatively, you can borrow a USB microphone from the Dean's office. Be sure to connect this device to the computer prior to launching Zoom. If possible, connect the microphone to the USB ports on the front of the computer and avoid using any USB ports in the room's podium.
-
-
-
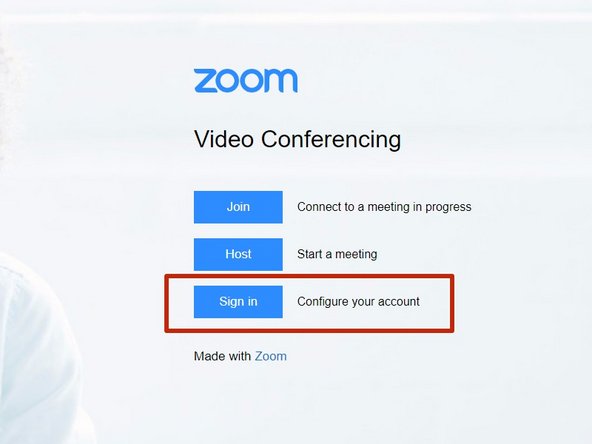
Log in to the classroom computer. Visit the Bucknell Zoom website: bucknell.zoom.us.
-
Click on the Sign In button at the bottom of the screen. You will be required to enter your Bucknell credentials and then authenticate via CAS.
-
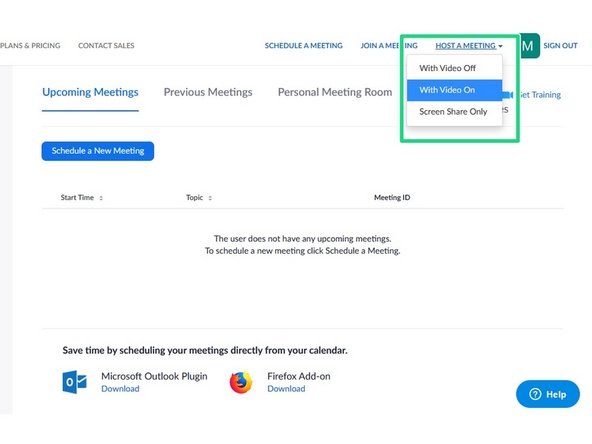
Once you are logged into your Zoom account, click on Host a Meeting in the top right and then click With Video On.
-
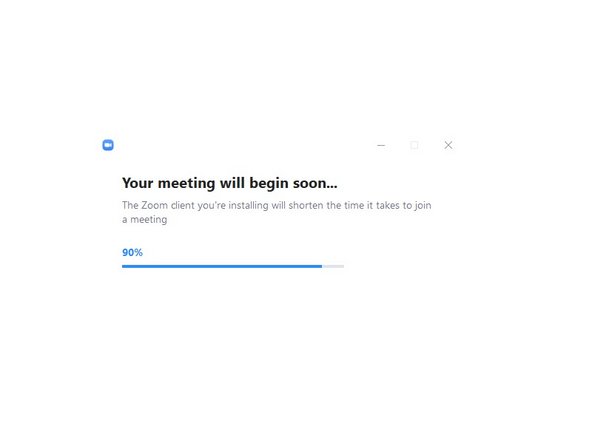
You will be prompted to download an installer. Choose to launch this file, or save it and then launch it. Zoom is now installed on this computer and will open and log you in automatically.
-
-
-
Zoom will launch and alert you that there was a "Failure to detect your microphone." You can ignore this message and close the alert box. You should see the output from the document camera displayed in the Zoom window.
-
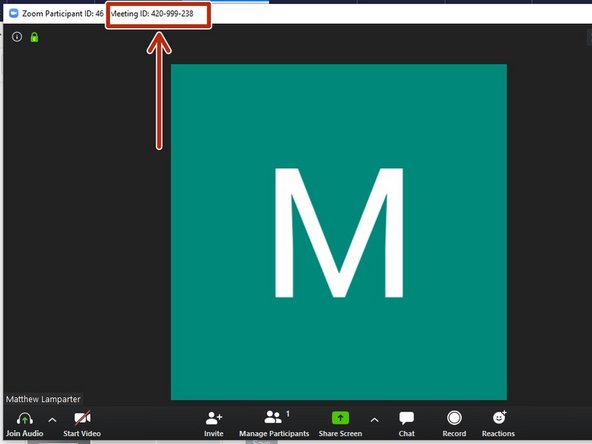
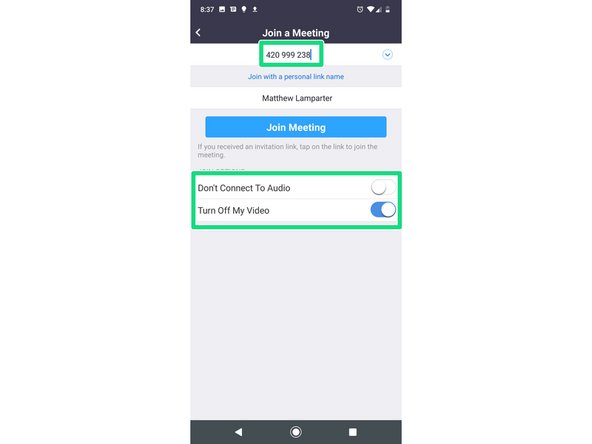
Now you need to join the meeting using your phone. Your phone will act as a microphone and allow you to record audio. Locate the meeting ID in the top left of the computer's Zoom window. If this ID number has disappeared, you may need to move the mouse to display the number.
-
Switch to the Zoom app on your phone. Tap Join and type the meeting ID you found in the previous step. Be sure to set the slider for Don't Connect To Audio to the left, and the slider for Turn Off My Video to the right.
-
Tap Join Meeting.
-
-
-
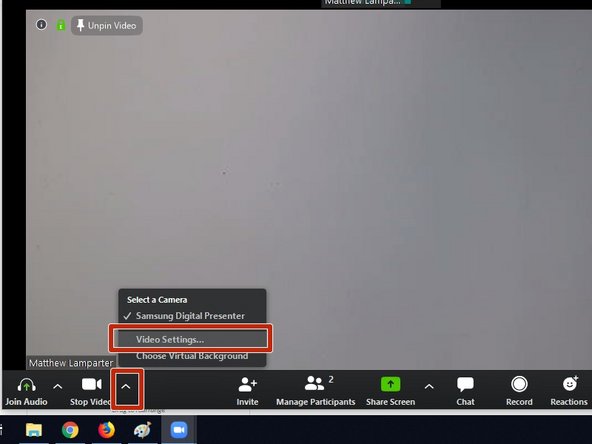
Some computers will mirror video by default. To prevent this, click on the arrow to the right of the Stop Video button. Then click Video Settings.
-
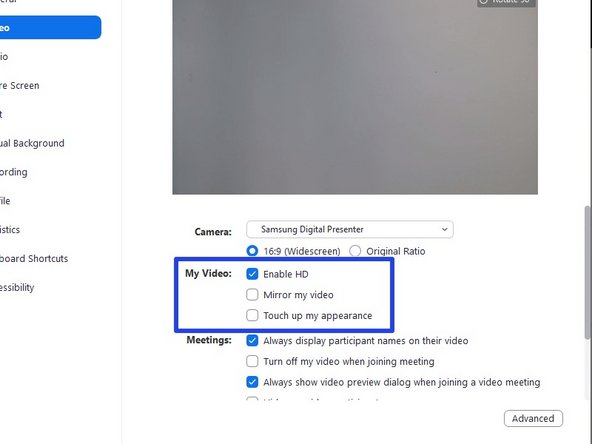
Within the video settings window, be sure to uncheck the box for Mirror my video. You should also check the box for Enable HD.
-
-
-
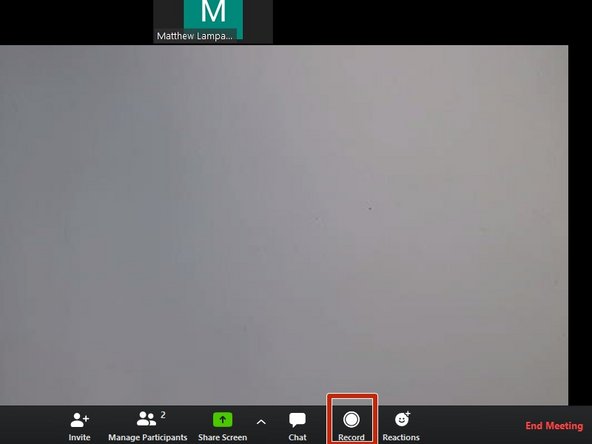
You are now ready to begin recording your lecture. Within Zoom, click on the Record button in the bottom right corner.
-
Run a test to confirm everything is working properly. Wave your hands or draw some notes under the document camera. You should see these motions reflected on your computer screen.
-
Place your phone somewhere reasonably close to you and be sure to speak a few sentences.
-
-
-
In addition to capturing video from the document camera, you also have the option of sharing documents or videos from your computer during lecture recording. Open any documents, videos, websites, etc. that you wish to share.
-
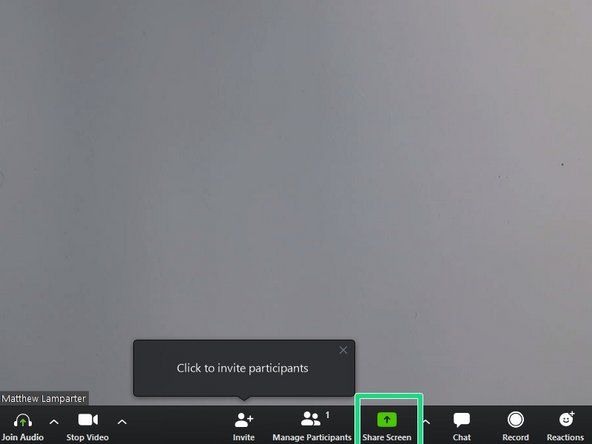
With this content open on the computer, click on the green Share Screen button in the bottom of the Zoom window.
-
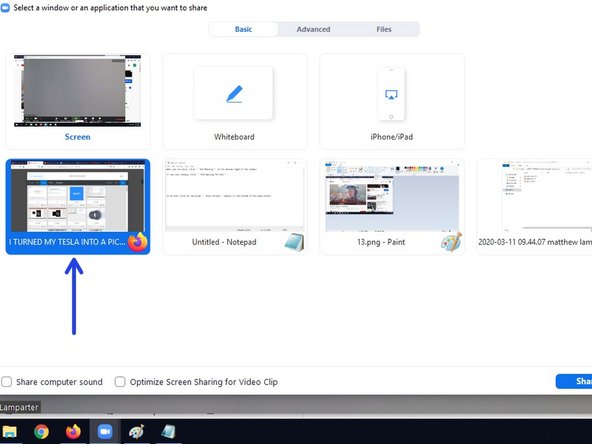
In the next window you can choose whichever source or document you wish to share. In this example we are sharing a YouTube video from Firefox. After selecting your source, click the blue Share button in the bottom right of the window.
-
Note: if you are sharing a video, be sure to check the Share computer sound box in the bottom left of the Screen Share window.
-
When you are done sharing your screen, click on the Stop Share button in the Zoom control bar at the top of the screen. This will return you to the main Zoom conference window where your document camera will again be the video input source.
-
-
-
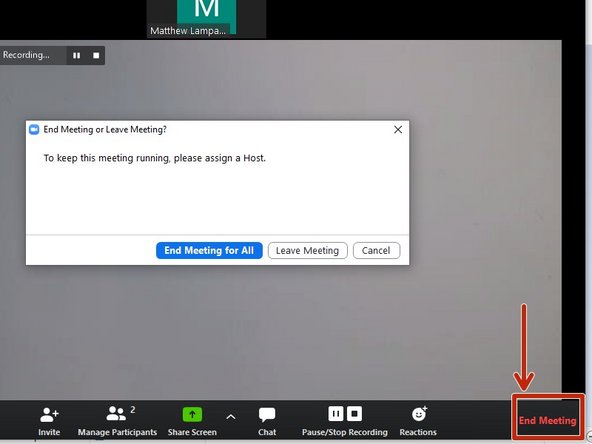
When you are done, click End Meeting in the bottom right of the window.
-
In the next window, click End Meeting for All.
-
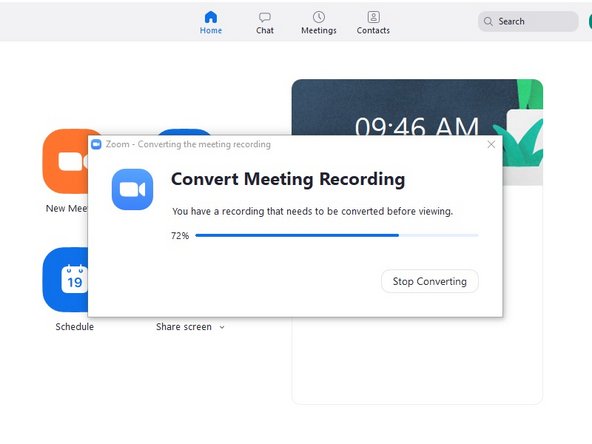
Video content from your lecture should now be processed and saved as an MP4 file on the computer. You may see a brief progress bar appears as compression occurs.
-
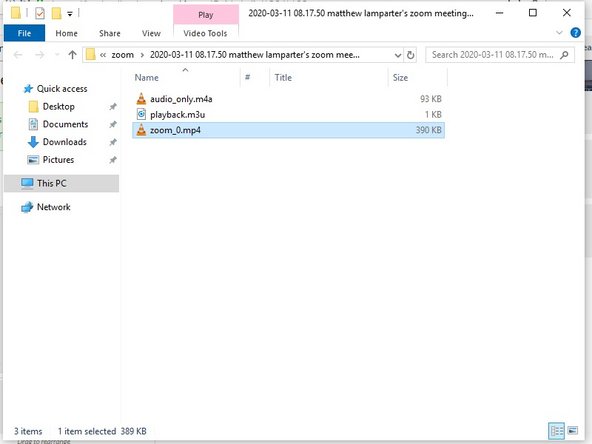
When file creation is complete, a Windows Explorer window should appear showing you your lecture as a file named zoom_0.mp4.
-
-
-
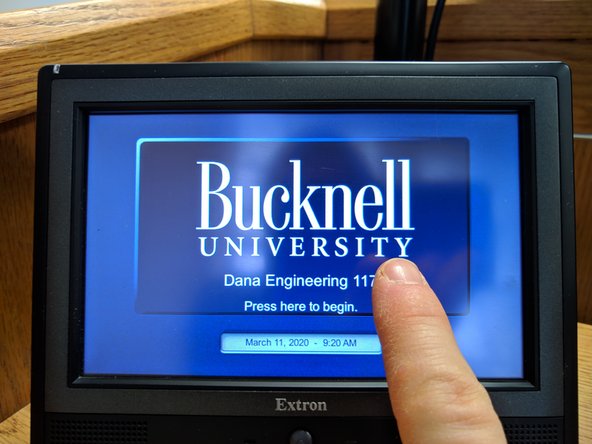
Before playing back your test video you will need to turn on the AV system in the Dana classroom so that you can hear audio. Tap the Extron screen to turn on the system.
-
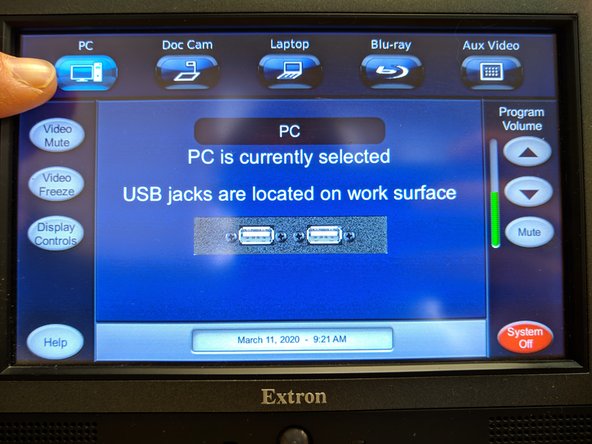
Next, press the PC button in the top left of the Extron screen to choose the computer as the playback source in the room. You should now able to open your test lecture video and confirm playback.
-
Double click the zoom_0.mp4 file to launch VLC Media Player and play back your recorded test lecture.
-
Confirm that the video and audio are both present. If you encounter problems with either of these items please contact Matt Lamparter.
-
If everything went well, you can go back to Step 6 and repeat this process to record your lecture.
-
-
-
With your lecture recorded and saved as an MP4 file you should adopt a naming convention for the files to easily identify your lecture videos. We suggest the following:
-
Coursename_Spring2020_Lecture#
-
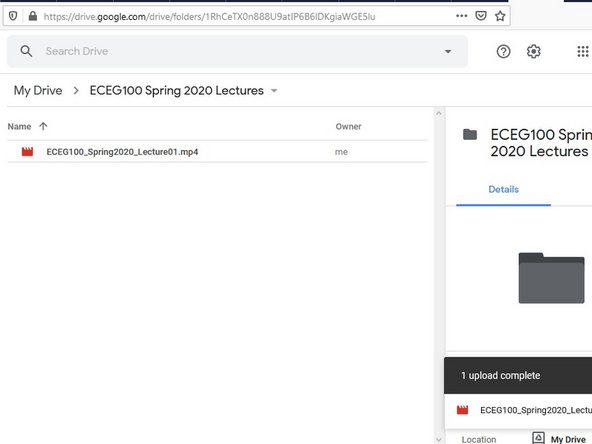
Be sure to upload your lecture video files to an easily accessible location. We suggest using your Bucknell Google Drive, Moodle, or Bucknell's Mediaspace. Once files are uploaded, configure them to be shared appropriately and then share the linked content with your students.
-


Congratulations! You have successfully recorded your lecture.
Congratulations! You have successfully recorded your lecture.