
Introduction
The Pulse XE printer is a printer capable of printing both common printer filaments, such as PLA and ABS, as well as more exotic materials such as TPU (flexible filament), nylon, and carbon fiber filaments. This tutorial is based on printing in PLA. If you need to print in another material, please see a Maker-E technician.
The Pulse XE has a max print volume of 10 x 9 x 8.5 in.
Written by: Graeme Bazarian, Ryder Nance, & Matt Lamparter
-
-
Insert card into the white Portal box on top of the printer enclosure.
-
The Portal box should illuminate green and the printer will power on. To confirm printer power is on, check to see if the printer's LCD screen is illuminated.
-
-
-
Log into the 3D printer computer using the following credentials:
-
Username: .\MakerGear
-
Password: BucknellMakers2019
-
Launch MatterControl from the Desktop.
-
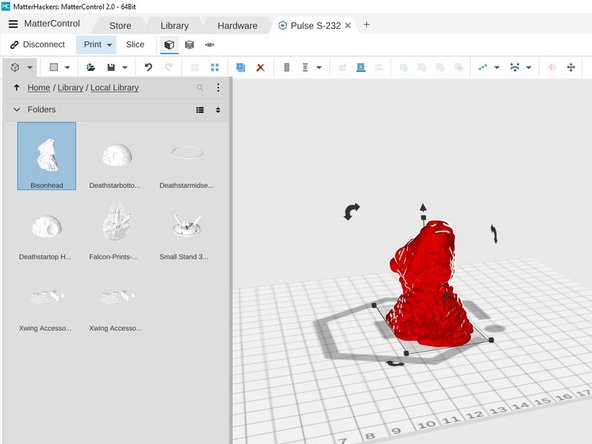
Click the Add Content icon in the upper left corner of the window. Navigate to the path Home/Library/Local Library.
-
Now click the ellipsis dots and choose Add. Navigate to the STL file you wish to print and click Open.
-
If you do not already have an STL file you may use the Bison Head file found at the bottom of this tutorial.
-
-
-
The STL file you just imported will appear in the top left of the library. Double click this object to add it to the print bed on the right side of the screen.
-
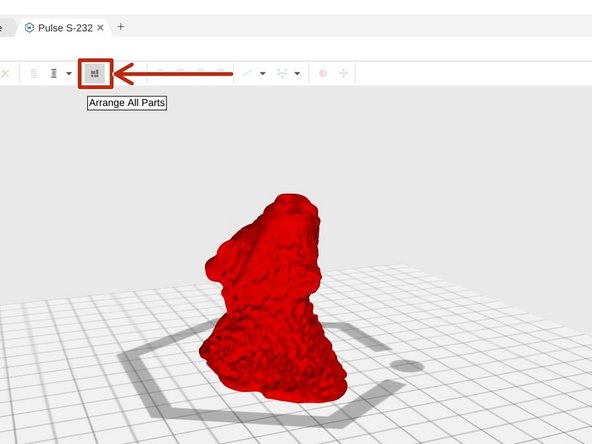
Click the Arrange All Parts button to center your object on the print bed.
-
-
-
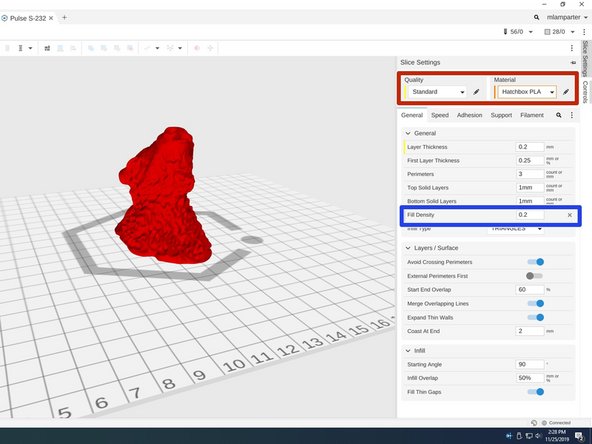
Click on the Slice Settings tab on the right side of the screen to display Slice settings.
-
Enter your desired quality. For most parts, Standard is fine. Be sure to choose Hatchbox PLA as the material.
-
Next, choose an Infill density. This parameter controls how dense a part is. For decorative objects, an infill of 20% is generally sufficient. An infill of 100% results in a completely solid object, while infills less than 100% are partially hollow.
-
Infill density should be entered as a decimal (25% = 0.25)
-
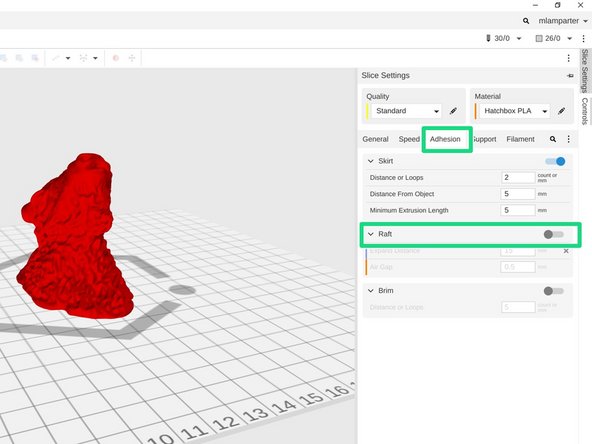
If your object has little contact with the bed, or the base has a lot of sharp corners, you'll need to add a raft to your print. You can enable a raft by clicking on the Adhesion tab, then turning on the Raft option.
-
Note that the bison head example has a solid, flat bottom which makes good contact with the print bed and does not require a raft.
-
-
-
If your model has an overhang, it might need support. Think of the letter T: the top bar will require support "pillars" to be printed underneath the arms to prevent them from falling. In our example, the bison's horns will require support.
-
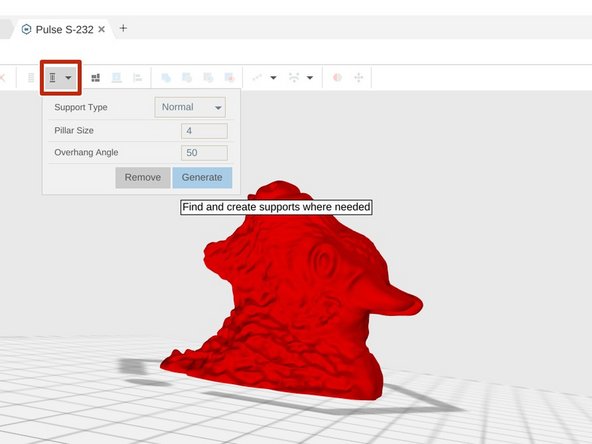
Select the Generate Support button in the upper toolbar. This will bring up the Support dialog window.
-
Enter your desired support pillar size and overhang angle:
-
Higher overhang angles support the model more (0° = no support, 90° = full support)
-
Support spacing should be set between 2-5mm depending on the size of your print.
-
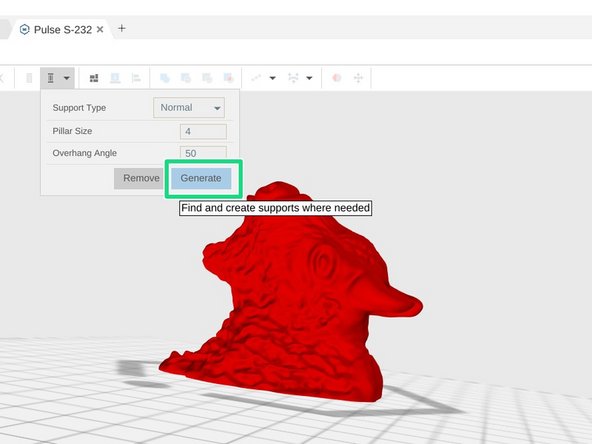
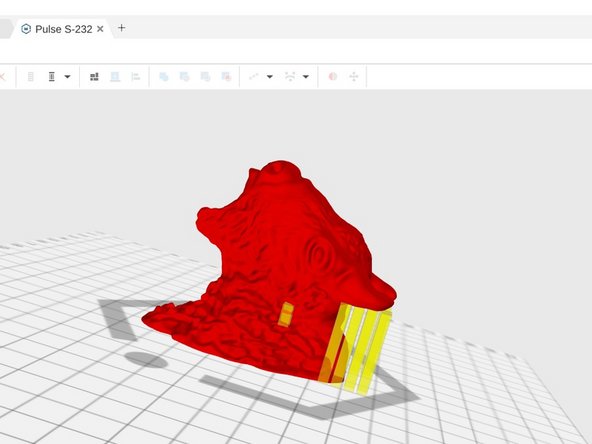
When you are satisfied with the support settings click the Generate button to add support to your print. The support pillars will appear in yellow.
-
Additional settings can be found under Slice Settings on the right toolbar.
-
-
-
Now click the Slice button in the upper toolbar. MatterControl will generate the toolpaths necessary to print your object. Depending on the size and complexity of your object this may take up to several minutes.
-
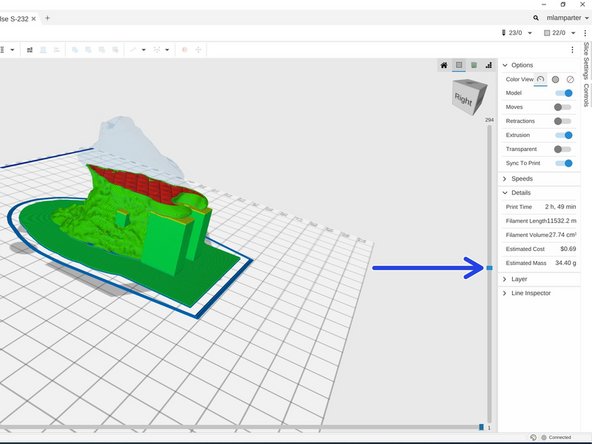
When slicing is complete you will be presented with a view of the exact path that the printer will follow to create your part. You can use the vertical slider on the right to step through the print process.
-
Scroll through the layers of the print to make sure there isn't anything noticeably wrong.
-
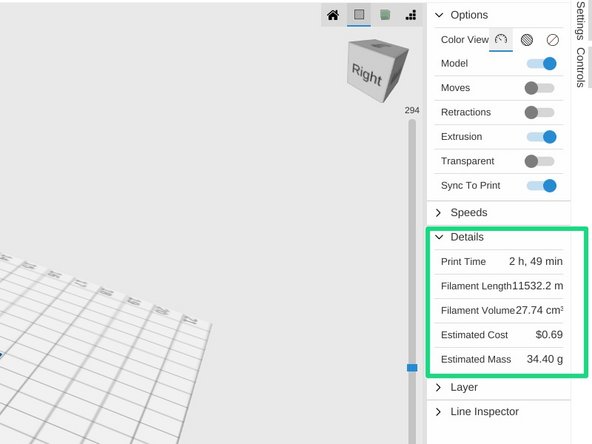
Once sliced, MatterControl will provide an estimate for the print time on the right toolbar.
-
-
-
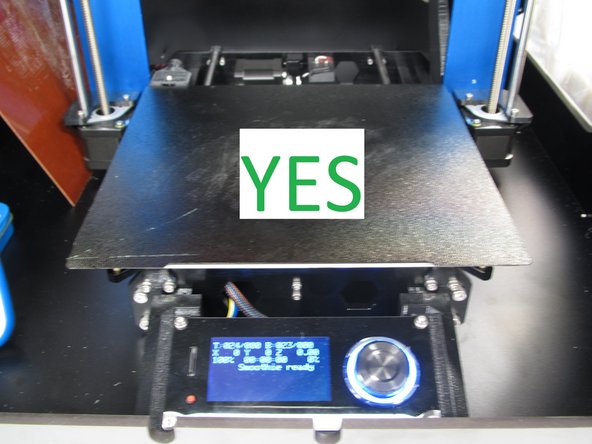
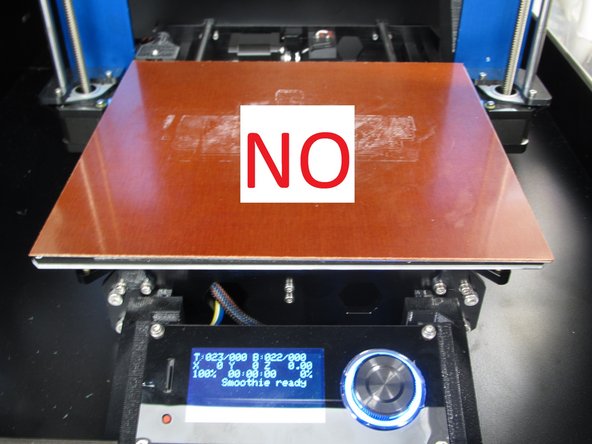
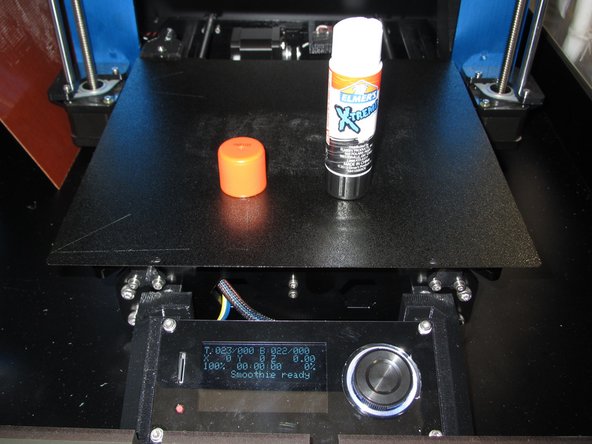
If printing with PLA, make sure the black print surface is installed.
-
If the black print bed is not installed, get a technician to help you install it.
-
Make sure the print surface is centered on the magnetic bed.
-
Use a glue stick to apply a thin layer of glue on the areas you are printing on to improve adhesion.
-
-
-
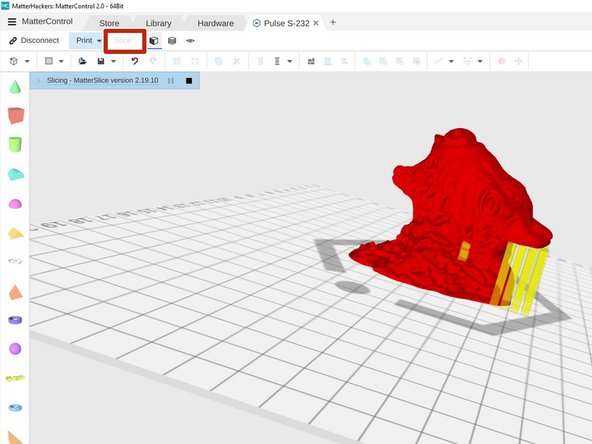
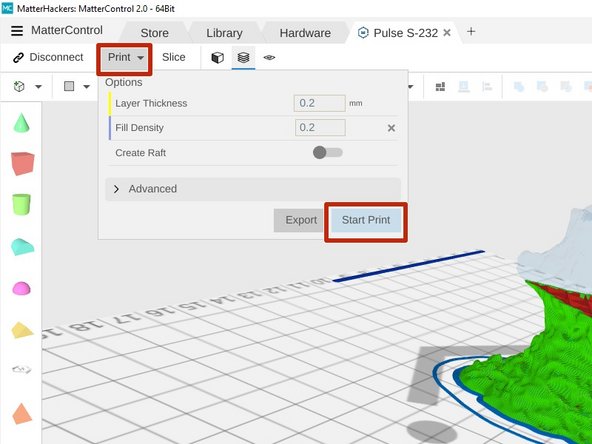
Click the Print button in the upper toolbar. Then click Start Print.
-
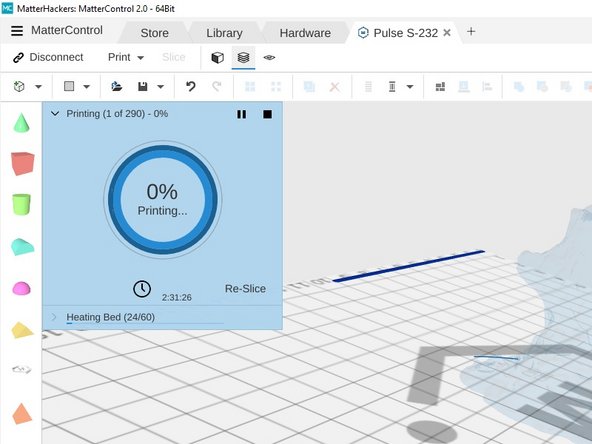
MatterControl will present a dialog window that will update in realtime as the print process begins. At this point the bed and nozzle will heat up. When both reach their respective set points the printer will begin to create your object.
-
Make sure not to close out of MatterControl or disconnect from the printer in any way. Doing so will cancel your print!
-
Wait for the first layer or two to print before leaving your print unattended. Most failures will occur during these first few layers.
-
-
-
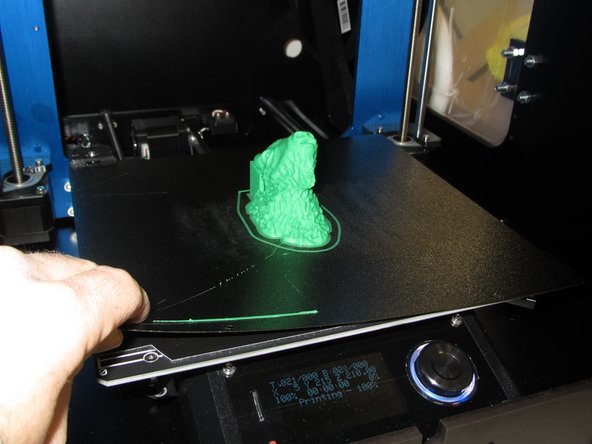
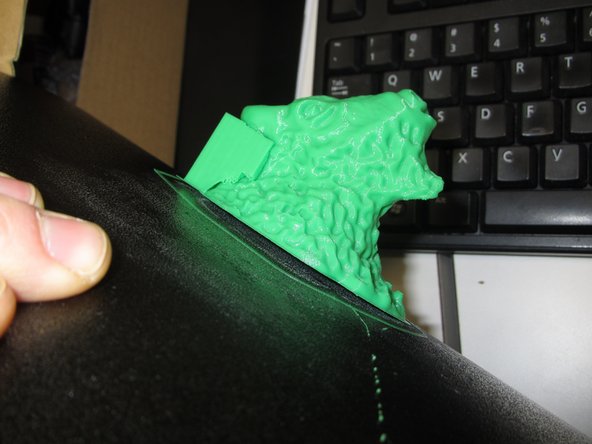
When your print completes the print head will move to the top of the printer and the print bed will move forwards. Gently lift up on the metallic print surface to completely remove it from the magnetic base.
-
With the metal print surface removed from the printer, carefully bend the surface to free the print from the plate.
-
Be sure to remove any remaining filament from the print surface, such as the thin skirt printed around your object, or the nozzle wipe area near the front left of the bed.
-
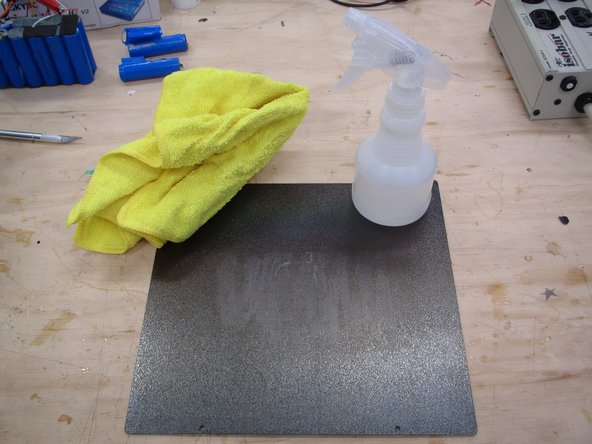
You should also use a micro fiber cleaning cloth, and water from the spray bottle, to thoroughly clean the print surface. Remove all remaining glue and then dry the print surface.
-
-
-
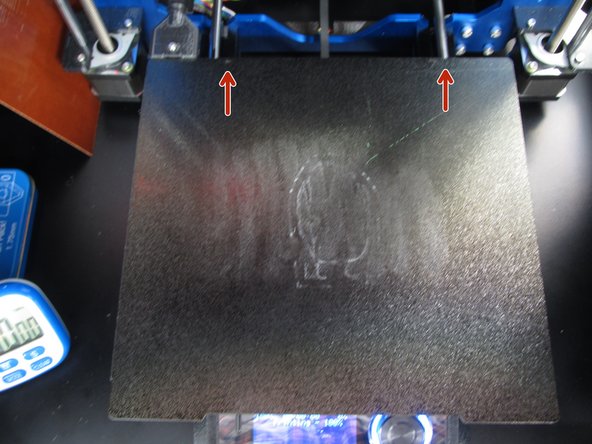
Once the print surface is clean, please replace it on the metallic print bed. Orient the surface so that the two holes in the surface are located towards the back of the printer and the cutout is located towards the front.
-
Quit MatterControl and log out of the computer.
-


Cancel: I did not complete this guide.
7 other people completed this guide.