Introduction
This guide assumes you have already read the PrusaSlicer tutorial. If you have not yet completed that tutorial and quiz, please begin there. Once you have passed the PrusaSlicer quiz then you can continue with 3D printer training.
-
-
Confirm PLA filament is loaded in the printer. Because two rolls can be mounted on top of the printer it is important to confirm which roll is currently fed into the extruder. See green arrow in the image. You should also note the manufacturer of the filament. In the example here, Overture PLA is loaded.
-
Confirm there are no prior prints, debris, or filament residue on the print bed.
-
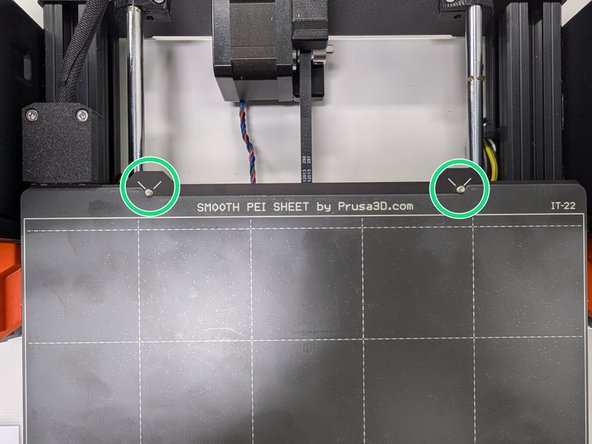
If there is a completed print on the print surface you are welcome to carefully remove the print and set it aside. Remove the magnetic surface from the printer, flex it to remove the part, and then return the bed to the printer. Be sure to line up the bed with the two alignment pegs at the back of the printer (shown in red in the example image).
-
If you need to remove filament from the print bed you may use one of the plastic scrapers. Be sure to remove the print bed from the printer before you use the scraper. NEVER USE METAL TOOLS ON THE PRINT BED OR YOU WILL DAMAGE THE BED!
-
You should also remove any existing makerspace cards or Proxy cards from the the Portal box. Press the green button and then wait for the box to return to blue before you proceed.
-
-
-
Locate the flash drive on the right side of the printer interface. Remove the drive, connect it to the computer where you used PrusaSlicer, and save the gcode file to the drive which you exported in PrusaSlicer.
-
Reinsert the flash drive into the printer interface (the MK4 label should face you). Your print should appear in preview form on the screen. If not, you can use the black knob to select Print on screen, then press the knob in to enter the Print menu. Locate your file by name, rotate the knob to highlight your file, then press the knob.
-
Confirm that the filament type and estimated print time, shown on the bottom of the display, agree with what PrusaSlicer listed.
-
Using the black knob, press the Print button when you're ready to start your print.
-
The printer will now run through some calibration steps as well as a multi-point bed leveling process. Once these steps are complete your print will begin.
-
-
-
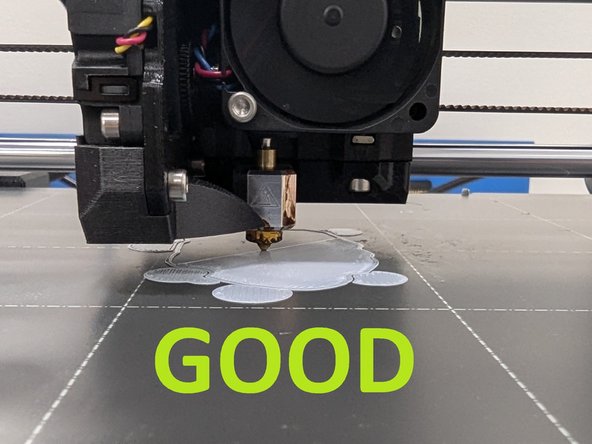
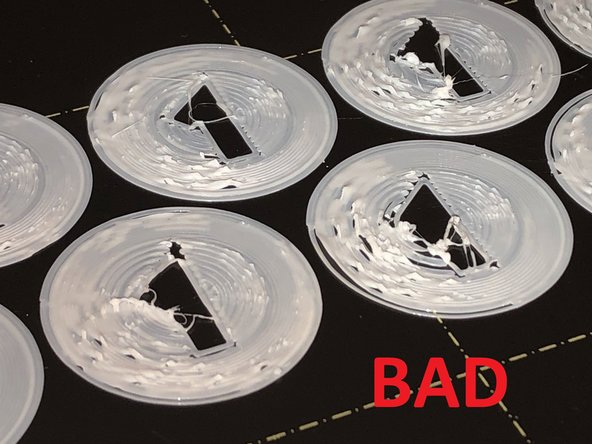
3D prints fail most frequently during the printing of the first layer. You should always stay and watch the first layer of your print. Look for the following:
-
Is extrusion of filament inconsistent? Is it wider or more narrow in some places than others?
-
Does the first layer appear wavy, bumpy, or uneven?
-
Is there any curling?
-
Is there any filament that did not adhere to the bed?
-
If you answered YES to any of the above questions, please pause the print and get a tech!
-
-
-
When your print is complete the printer will move the bed forward and move the print head up out of the way. You should carefully lift a front edge of the metallic print surface to completely detach it from the magnetic bed.
-
Never remove parts while the print surface is still attached to the printer. This can throw off calibration, causes errors with bed leveling, or otherwise damage the printer.
-
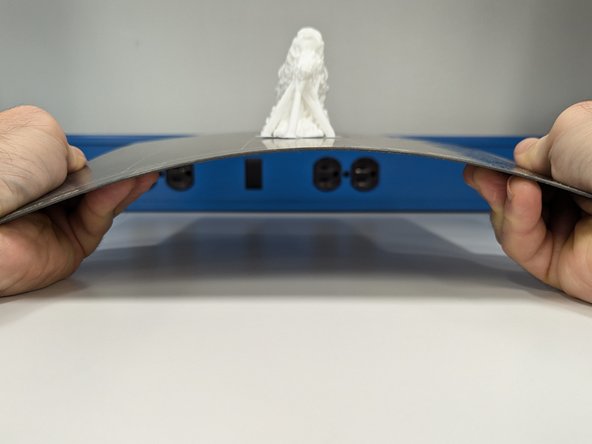
Once you've removed the print surface you can flex it (don't be afraid to apply a good deal of pressure/flex) to detach your print from the surface.
-
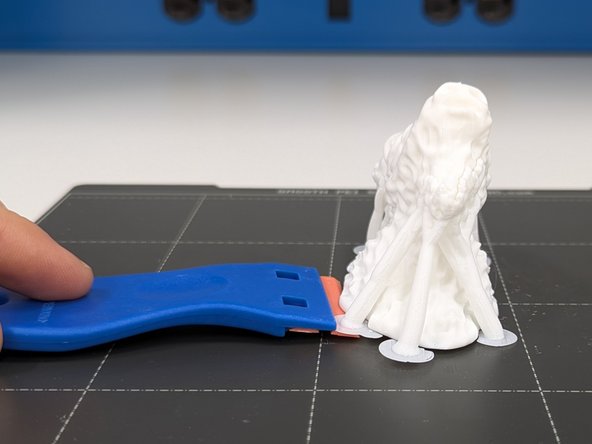
If your part will not release, or filament is left stuck on the print surface, please use one of the orange and blue PLASTIC scrapers to remove filament from the print sheet.
-
NEVER USE METALLIC TOOLS ON THE PRINT SURFACE! METAL TOOLS WILL DAMAGE THE PRINT SURFACE.
-
Make sure the print surface is completely clean before returning it to the print bed.
-
-
-
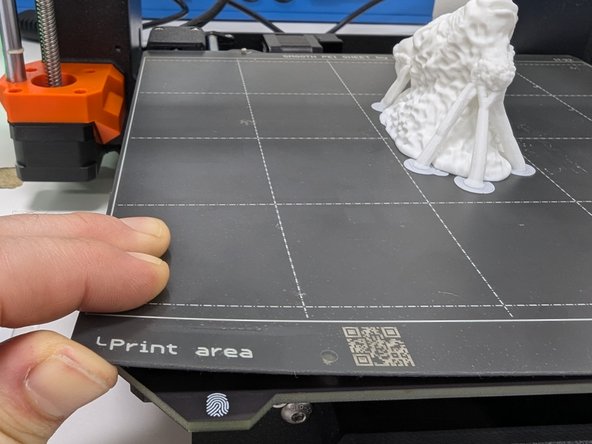
Once you have removed your print and all remaining filament from the print surface you should return the print surface to the printer.
-
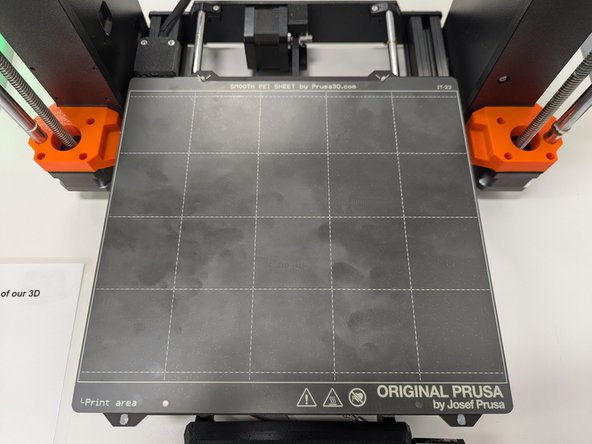
Confirm you have the print surface oriented as shown in the first photo here.
-
Be sure to use the two alignment pegs at the rear of the printer to properly replace the print surface. The print surface should sit flush against these pegs.
-
-
-
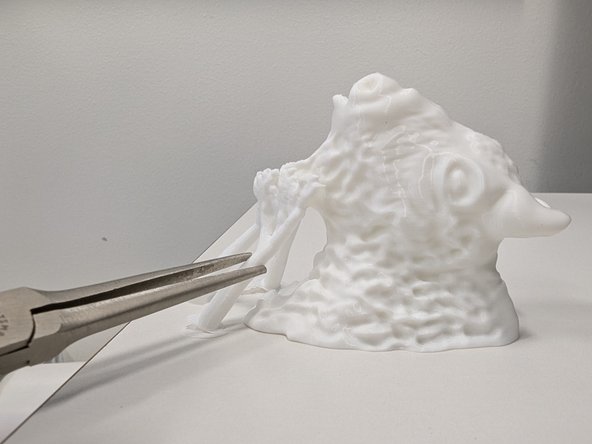
If your part had support material you should be able to remove it using your fingers. Sometimes a pair of needlenose pliers are helpful as well.
-
Be careful removing support material! It is easy to slip when applying pressure to tools and prints. A tool slip can lead you to injure your hands. Use caution and think about where tools will travel when applying pressure!
-
NEVER use tweezers to remove support material! Tweezers are delicate tools meant for gentle lifting. The force required to remove support material would damage tweezers.
-
Be sure to throw out all loose filament and detached support material. Look around the printer and clean up any filament or debris. You should leave the printer clean and ready for the next maker!
-
-
-
When you're done, be sure to remove your makerspace card from the Portal box so the printer is ready for the next maker.
-
If you were using a Proxy card, please return the card to proper location.
-
Prusa MK4 - Basic use: Quiz


