Introduction
This is a guide on how to install the database and website for the Portal Box.
-
-
The management site software runs on Linux
-
There is an install script that will install and configure most of the software for you. This install script has been tested on Raspbian OS and Ubuntu. It should also work on any Ubuntu based distributions.
-
If are you doing a manual installation use whatever Linux distribution you are comfortable with.
-
-
-
You will need a way for your computer to connect to the website through a domain name. If you just use an IP address you will not be able to login and the site may not be served correctly.
-
Setting up DNS can be done many different ways. If you have a network administrator ask them for help. Your router may also allow local DNS. It is up to you to find the best way for your network.
-
The easiest and simplest way to associate a server with a domain name is to add the server's IP address to your computer's host file. This method is the easiest but also the least useful because it will only work for the computer with an edited host file.
-
Here is a guide on how to edit your hosts file.
-
The image is a picture of a Windows hosts file edited to include to make the server accessible at www.makerportal.com
-
-
-
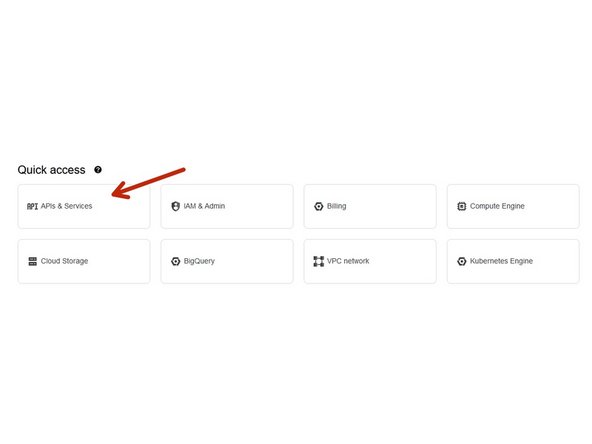
The Manage site uses Google's OAuth2 API so you will need to get an API key for the Management site to work. Here is a link to google's page on using OAuth2 for more information.
-
-
Naviage to APIs & Services
-
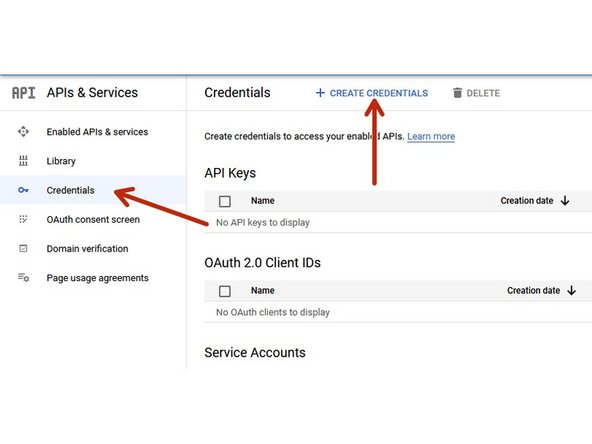
Go to the credentials tab and click Create Credentials. Select OAuth ClientID
-
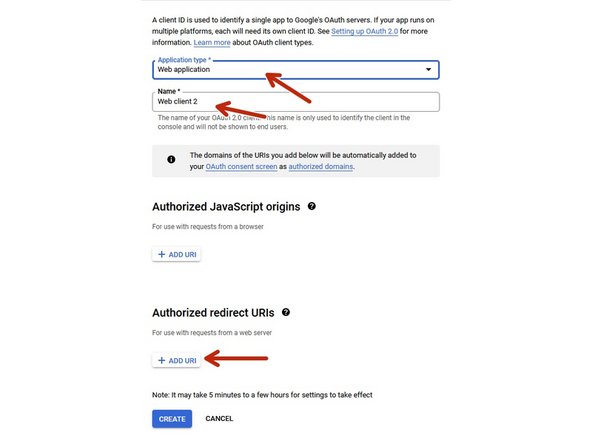
The application type is a web application. Name the application.
-
Add the authorized redirect URL. This is the name of the site you have chosen. Make sure you have a following slash.
-
Click create and take note of the client ID, you will need this later.
-
-
-
You can manually install the software or use the install script here.
-
For manual installation the github repositories are
-
-
-
If you are using the script download it, open the file and set the variables at the top of the file.
-
Make sure that there are no other web servers already installed. On most Ubuntu based distributions Apache server is installed. This will need to be removed or disabled.
-
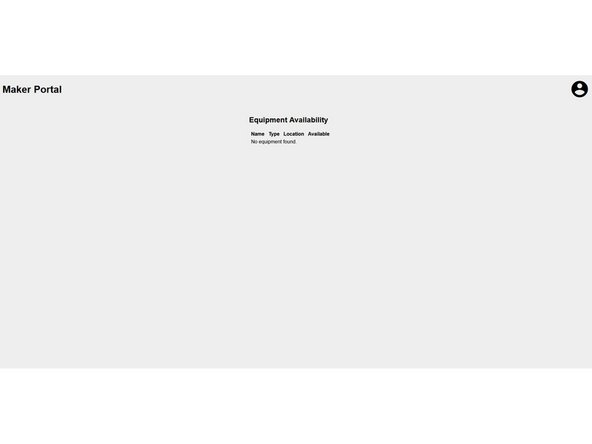
Run the script as root. After the script is complete visit the site and you should see the homepage.
-
If you did everything correct you should be able to login using your google account.
-