Introduction
This tutorial walks you through several software tools (Polygonia, Paint.Net, Inkscape) that are useful in converting images to outlines which can be laser cut. In this example we'll make a snowflake shape, but the ideas can be applied to other image files as well.
-
-
For this tutorial we'll make our own shape, copy the image, then turn it into a vector file that can be cut on a laser cutter. The same steps will work with any high contrast image, however.
-
In a browser window open the Polygonia software.
-
The MakerE has a free account you can use if you don't want to go through the hassle of making your own account. This free account allows you to create designs but has a very limited number of downloads:username: MakerE password: Bucknell#L8serPattern
-
If you want to create your own account you will have the option to download a .svg which will allow you to skip ahead to step #6.
-
When you open the software, the screen should look something like the image.
-
-
-
In polygonia you can change settings to design repetitive shape from a variety of primitives like triangles, squares, and hexagons. There is also a gallery of premade shapes. The image shows a shape I created as an example.
-
There are several good tutorials on using Polygonia here and here.
-
By changing the frame, adding lines, and modifying the line thickness you can make some pretty cool patterns easily.
-
I recommend you change both the line color and fill to black since that will make things easier later.
-
-
-
If you create your own account you get a very limited number of .svg downloads on Polygonia that can be directly imported into the laser cutter. Otherwise you have to pay a monthly charge that is based on the number of downloads you get.
-
A somewhat clunky workaround is to maximize the size of the pattern on the screen, take a screen shot, and then turn the image into a high contrast bit map.
-
Once you download the screen shot import it into the graphic editing program of your choice. I use Paint.Net which is free, so I will show you how to convert the image using that software.
-
-
-
Note that by judicious use of line and fill colors in Polygonia and managing screen icons this step can be skipped. The techniques used, however generally apply to cleaning up images before laser cutting.
-
Download then open paint.net and open the screenshot you took. If you are familiar with other software feel free to use that instead.
-
The video goes through each of the steps below...
-
The first step is to remove the extraneous features from the screenshot by using the selection box then hitting delete.
-
Once the image has extraneous features removed, change the color to black and white and adjust the brightness contrast so you have a clear black and white image with no grey.
-
Next save the file as a bitmap (.bmp) which we'll load into Inkscape on the next step.
-
You can also save the file as a .png image which might be helpful if your result looks pixelated. A broken line will not be cut well in the laser cutter.
-
-
-
This step converts an image file into a vector file for the laser cutter. You can etch images with a laser cutter, but not cut out shapes. For that you need to convert an image file to a vector file. This YouTube video walks you through the steps below. Play the video while you read through the steps...
-
Once you have a high contrast image we'll open it in Inkscape and trace the edges then convert them to vectors. First open Inkscape and use Cntrl-Shift-D to set the size of the material you will be cutting. In this case I am cutting a 2' x 2' board (24"x24"). Your image can be any size the laser cutter can handle.
-
Import the image then use Path - Trace Bitmap to create a trace. The trace will sit on top of the original bitmap so drag the trace to the side and delete the bottom image.
-
Cntrl-Shift-F to open up the fill menu and turn off the fill and turn on the line color. This should leave you a nicely traced image.
-
Now go to the Path menu and select Change Stroke to Path. This converts the drawing to a vector file.
-
Zoom in and examine the quality of the lines. If they look broken up or pixelated as in the second image you may need to go back, import a .png file rather than .bmp and do the procedure again.
-
If they look ok save it as a .svg file and you are ready to laser cut your image.
-
-
-
Insert wisdom here.
-
-
-
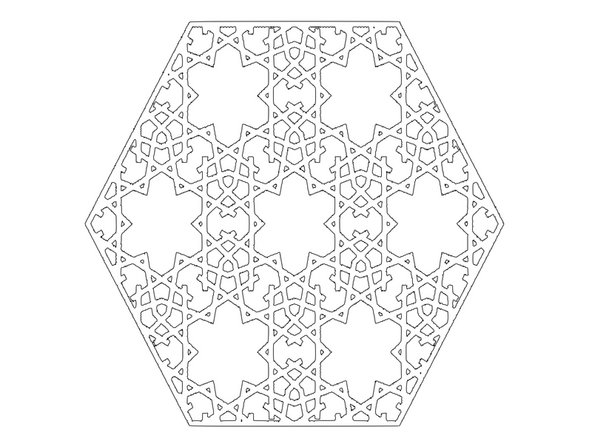
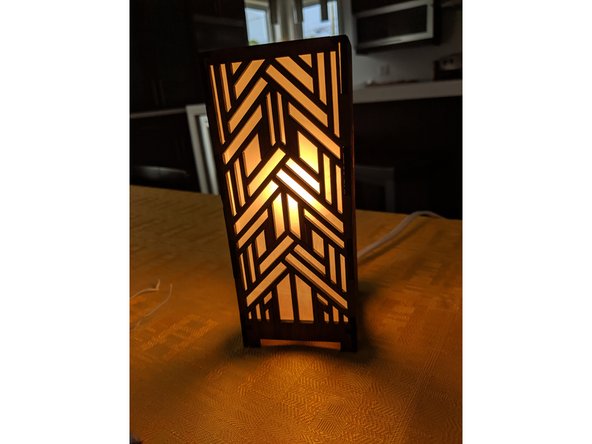
You may want to create a "reverse image" where whatever shape you create is cut out of a sheet of material. This is often done if you want light to shine through the shape as the first image shows.
-
After you have created the outline but before you save the image as a .svg file use the eraser tool in Inkscape to erase the outer perimeter line. This will connect the shape to the piece of material you are cutting out.
-
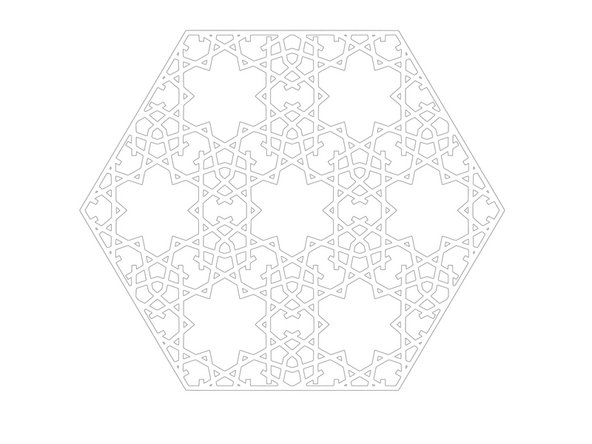
The second image shows the shape with the outer perimeter line, and the third image the shape with the line removed.
-
Note that if any part of your overall shape is disconnected from the rest that will be a separate piece after you do the laser cutting.
-