
-
-
Turn on the 3D printer you intend on using. 7th Street Studio & MakerSpace has 3 Lulzbot Minis and a Lulzbot Taz 6.
-
On your desktop open the web browser that corresponds to your 3D printer. Each 3D printer has a gold number on it.
-
-
-
Log into Octoprint: Username: makerspace Password: octoprint
-
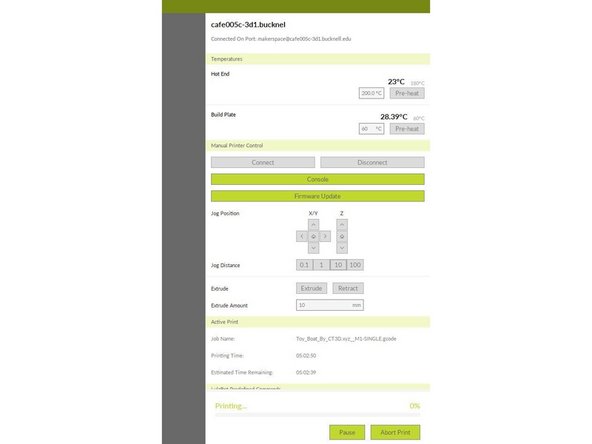
Click “Connect” on the left side of the screen.
-
The “State” will then turn operational after about 30 seconds
-
Minimize the Octoprint web browser.
-
-
-
Do not open Cura immediately after logging into the computer if you have not used it before. The settings for the printers need some time to load properly.
-
Go to the search tab in the bottom left corner of the computer and search Cura.
-
Select the application with the lime green logo and open the software.
-
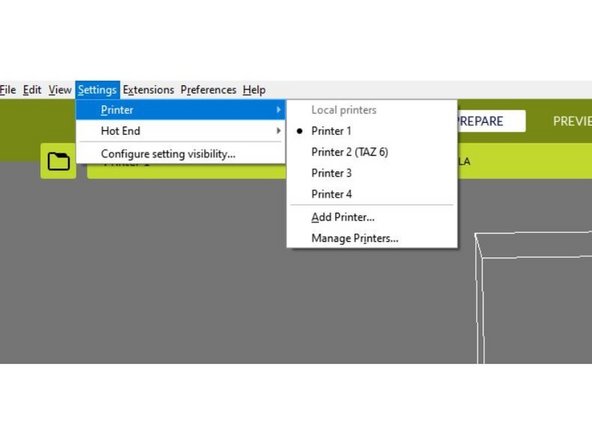
Once Cura is open, click the settings option in the top left corner and hit Printers, select your printer number.
-
-
-
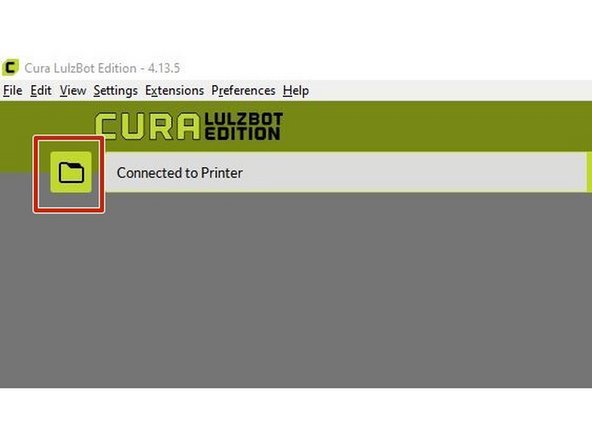
In the top left corner of the screen, click on the folder icon.
-
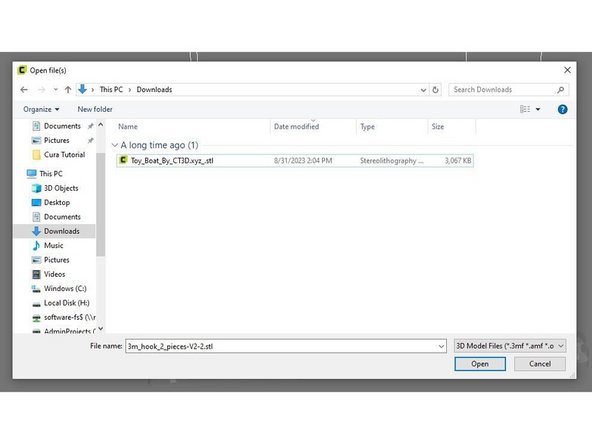
Select the file you wish to 3D print. If you do not have a 3D print file yet, proceed to the next step otherwise skip to step 6.
-
-
-
3D print files can be created in a CAD software such as SolidWorks, Rhino, SketchUp, AutoCAD, etc.
-
Pre-made files can be found on websites such as thingiverse.com or yeggi.com.
-
When downloading your files, download them as individual items, not as a folder.
-
-
-
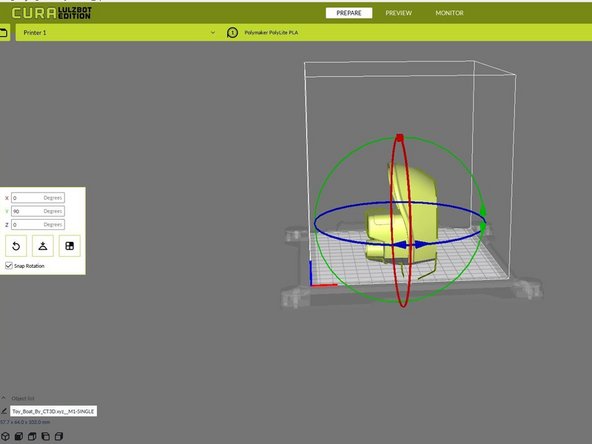
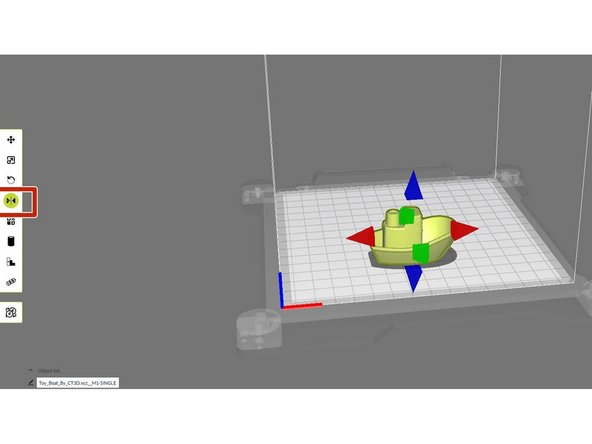
Once your model is uploaded, you may need to reconfigure the size or positioning. This means you want the flattest area that covers the greatest amount of surface area to be level with the 3D printer bed.
-
Click on your object.
-
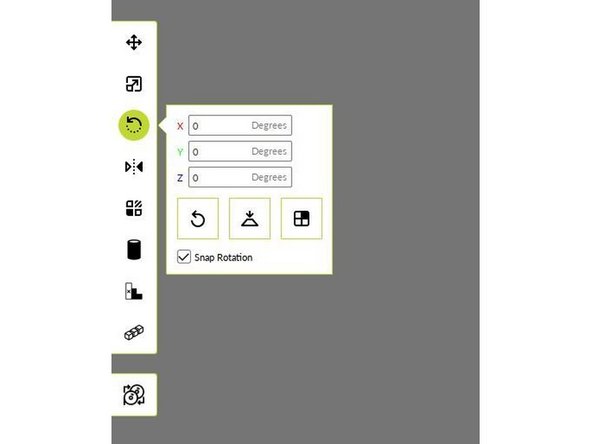
On the left side of the screen, select the rotate button (arrow in a circular direction)
-
Now you can change the orientation of the object by clicking and dragging on the arrows around the object itself or by typing in the degree of rotation under the X, Y, or Z.
-
Tip: Changing the orientation by 90 degrees in one or two directions typically creates the proper alignment.
-
-
-
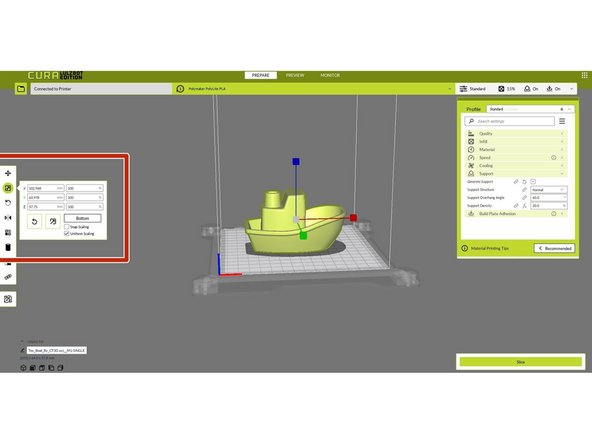
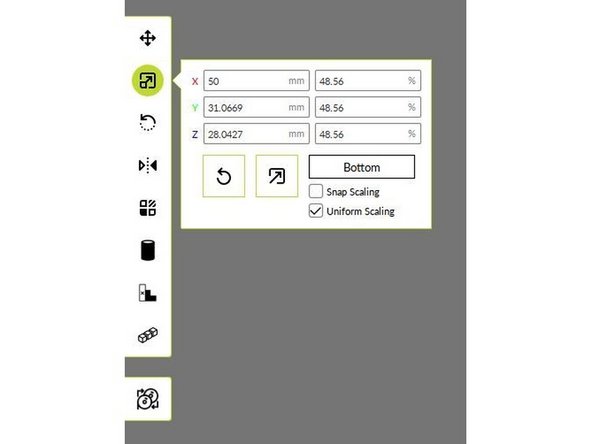
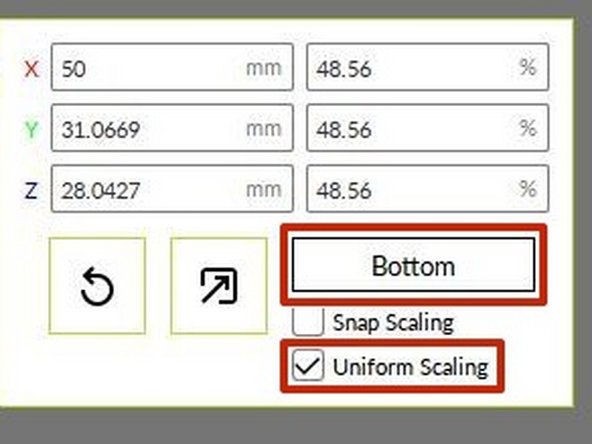
You can scale the object by clicking and dragging the red, blue or green icons coming out of the object depending on how you want to shrink or enlarge the file.
-
On the left side of the screen, click on the button with the arrow expanding inside the square box (second button from the top) .
-
Ensure the “Uniform Scaling” button is checked (unless you do not want to scale your object uniformly - then uncheck it).
-
Finally click “Bottom” to ensure your object is placed back on the 3D printer bed and not floating in the air.
-
-
-
Use the center roller of your mouse to zoom in and out of the screen.
-
Left click and hold down shift to be able to look at your object from different angles.
-
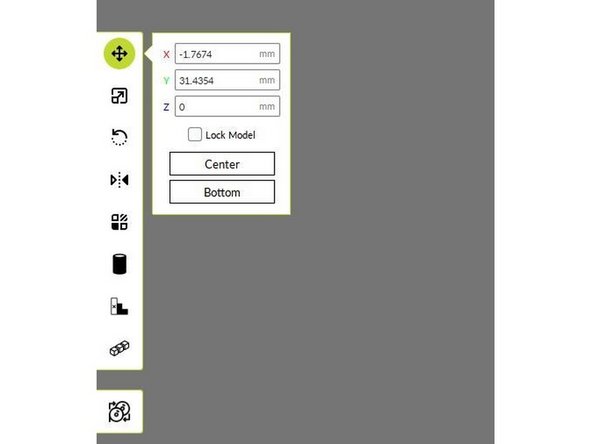
To move your object around, click on your object, then click on the four directional arrows in the top of the left toolbar.
-
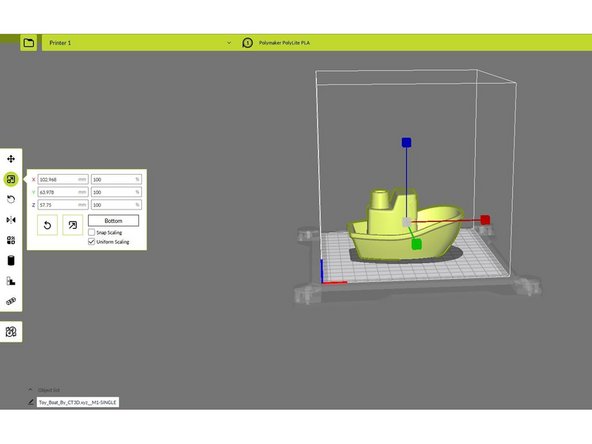
Scale your object using the second icon. - ALWAYS make sure you click “Bottom” under this feature before printing.
-
Rotate your object using the third icon.
-
-
-
Mirror the orientation of your object with the fourth icon. Click on the arrows to set how you mirror your object.
-
-
-
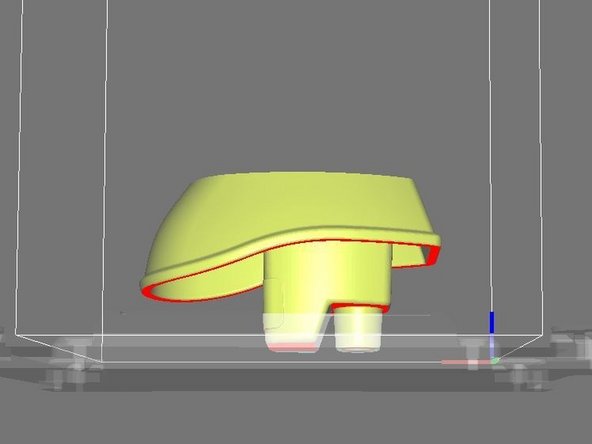
Supports are added to help the object stay stable when printing. These supports are easy to pull off once the print is complete.
-
If your object needs supports Cura will recommend adding them to areas that are highlighted red.
-
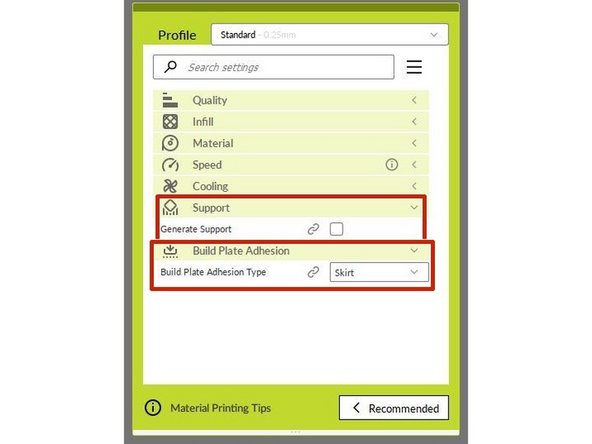
On the right side of your screen, click “Support” to reveal the drop down. Check the box next to “Generate Supports”. Supports will automatically be added when you slice your design in the upcoming steps.
-
These settings can be left the same but if you have a longer print, you can change the support to 8% to save time.
-
Build plate adhesion helps your object adhere to the 3D printer bed. If your object has anything but a completely flat bottom (ie. curved bottom, tiny pieces adhering to the bed), you should select “Raft”.
-
-
-
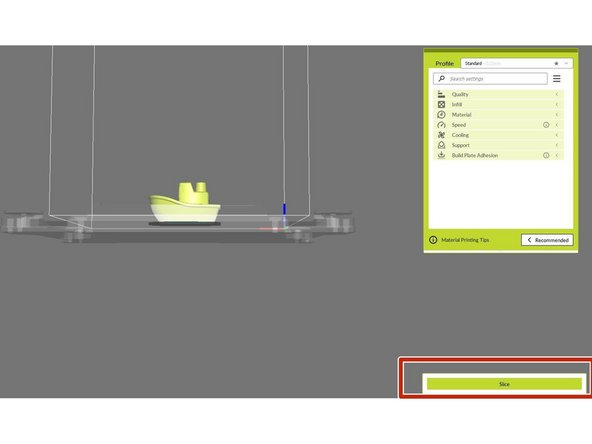
The rest of the print settings are pre-configured to print your model using ABS filament. If you have specific questions or your file needs specific settings, please contact a staff member and proceed to “Advanced Print Settings” at the end of this tutorial.
-
Once your object is ready to print, click “Slice” in the bottom right corner of the screen.
-
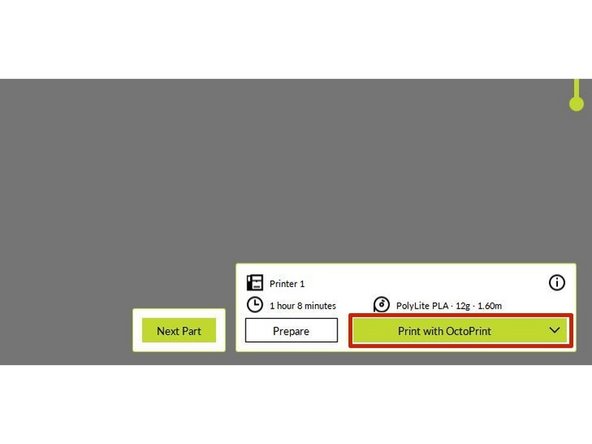
Click “Print with Octoprint”.
-
You will hear the printer start to move as it resets itself and begins to prepare to print.
-
We strongly recommend that you wait with your print until the first 10 layers of the design are printed. If the print were to fail, it will happen at this point. Please contact a staff member if the print fails.
-
You can log out of the computer and come back when the print is complete.
-
-
-
When your print is complete, you can use your hands or one of the provided chisels to help remove the print from the 3D print bed.
-
Remove the raft and supports (if added) and discard any scraps.
-
-
-
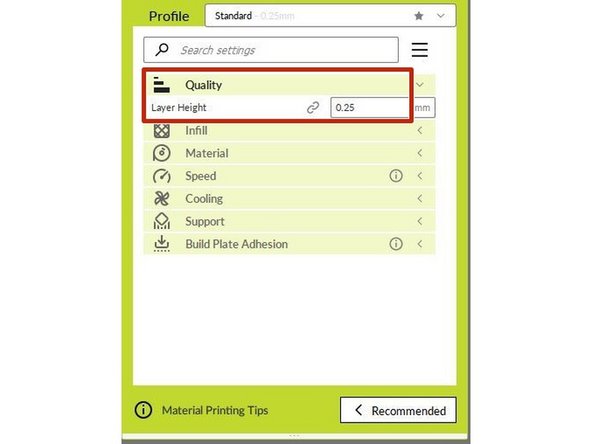
The right side of your screen contains advanced printer settings. Click on each tab to option the editable options.
-
Quality: Standard quality (layer height) is 0.25mm
-
For a higher quality print change the settings to anywhere between 0.15mm and 0.25mm (this will make the print take longer).
-
For a lower quality print change the settings to anywhere between 0.25mm and 0.35mm (this will make the printing time shorter, but not as detailed) .
-
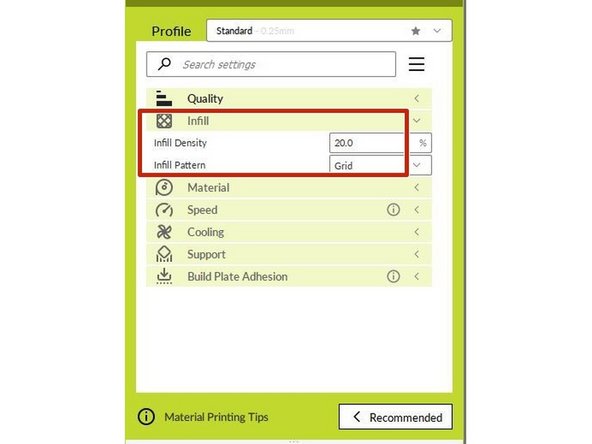
Infill: This is the amount of material inside of the object. 20% is the standard.
-
If you want to prioritize speed over strength you can set it as low as 10%
-
Do not go above 20% infill without speaking to a student employee first.
-
-
-
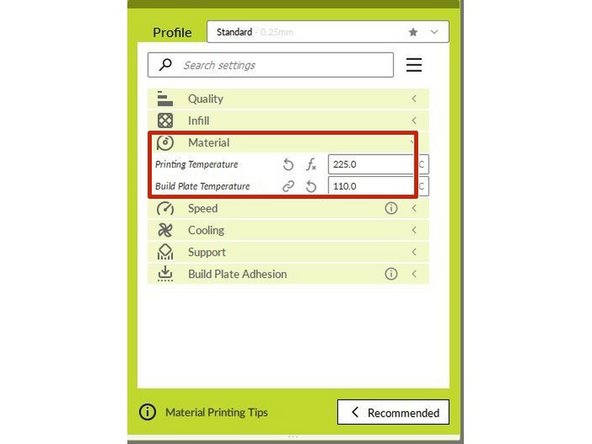
Material: This refers to the type of 3D print filament we are working with.
-
ABS Filament should be set to: Printing Temperature: 225; Build Plate Temperature: 110.
-
PLA Filament should be set to: Printing Temperature: 200; Build Plate Temperature: 90
-
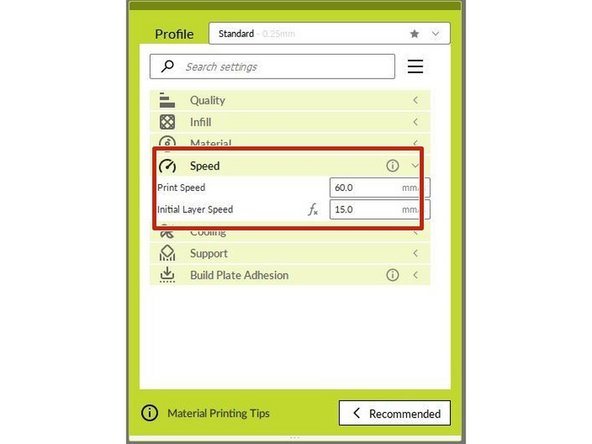
Speed: Speed should almost always be set to 60 mm/s, the only exceptions are:
-
If the model is small/has a lot of detail, you can set the speed as low as 40 mm/s
-
If the model is large and may take a while, you can set the speed as high as 70 mm/s
-
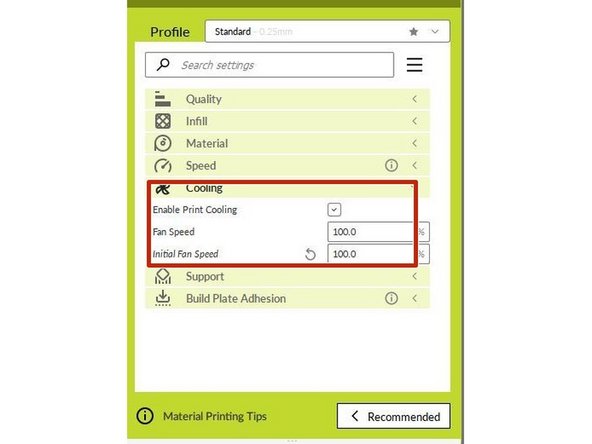
Cooling: This should always be set to 100%
-


Cancel: I did not complete this guide.
11 other people completed this guide.