
Introduction
A relatively simple project to help stay organized. Requires plywood, acrylic, bright while LED strips, and a 12V DC wall wart
-
-
This is my take on a common laser cutter project - creating a holder for erasable cards on which you can write then organize to-do items.
-
Many of these project uses whiteboard material with a slotted tray that sits on your desktop. This version is a wall-mounted slotted shelf, and I also used LED strips so the cards (made from clear acrylic) are lighted.
-
For this first version I made two types of cards. The first are clear on which you write in neon Sharpies so the writing glows. The second card is the same, but was sandblasted on the back so you can use a dark Sharpie or white board marker.
-
The overall time to make this project is about 1.5 to 2 hours not counting time for the wood glue to dry overnight.
-
-
-
The total area of 1/8" plywood for this project is about 20" by 22". This will need two cuts in the Thunder Laser (which was used) and up to three in the Glowforge.
-
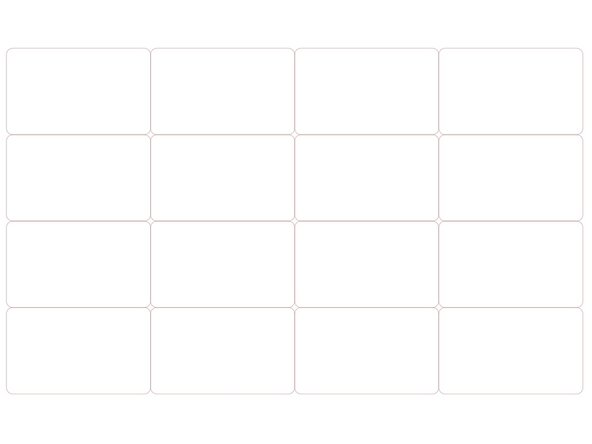
I used a 12" x 20" sheet of 3/16" acrylic to make 16 3"x5" to-do cards.
-
A strip of bright white LEDs was used to provide the lighting. I cut 4 16" long pieces off of a 4 meter long strip from Amazon. I scrounged a 12V wall wart to provide power.
-
-
-
I used Inkscape to design this project, using the Lasercut Box extension. Since the box is simple many tabbed box makers can be used.
-
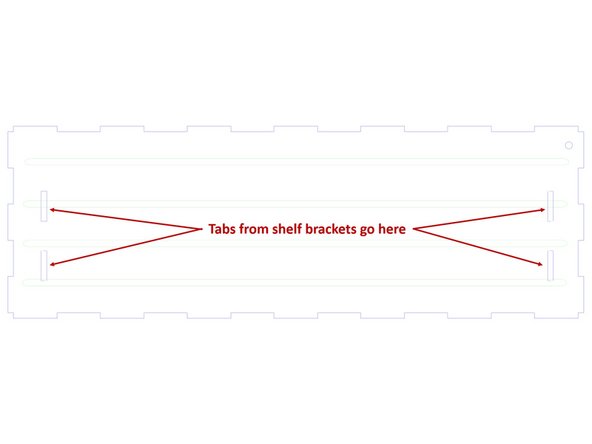
Once I created the box I created a separate box for the shelf brackets then dragged bits of that box to mark the places on the shelf for the brackets to mount.
-
If you create your own or modify make sure that the line thickness is really thin - I used 0.1 mm.
-
-
-
I used Baltic Birch I purchased from Home Depot that was 0.18 inches thick. The tabbed box was made for this thickness of material. If your wood is a different thickness you may have to modify the file.
-
Similarly the acrylic was 3/16" thick and the slots in the box to hold the tabs are set for this thickness. Redesign the slots if you use a different acrylic thickness.
-
You can download the shelf design from the shared MakerE Google Drive from this link.
-
The file for the acrylic cards, also a .svg file, is available at this link.
-
Note that in the file for the shelf the rectangles to mount the shelf bracket loaded as ovals in Lightburn for some reason. So before you laser cut the wood double check to make sure they are rectangles. See the image.
-
-
-
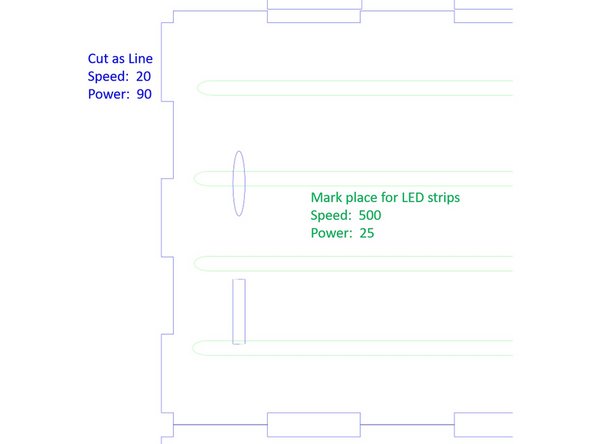
In laser cutting the plywood I used the settings on the figure. You can see here how the rectangle loaded as an oval as well.
-
The blue lines are to cut through. The green lines are to score the bottom part of the shelf to mark the space where the bright white LED strips attach.
-
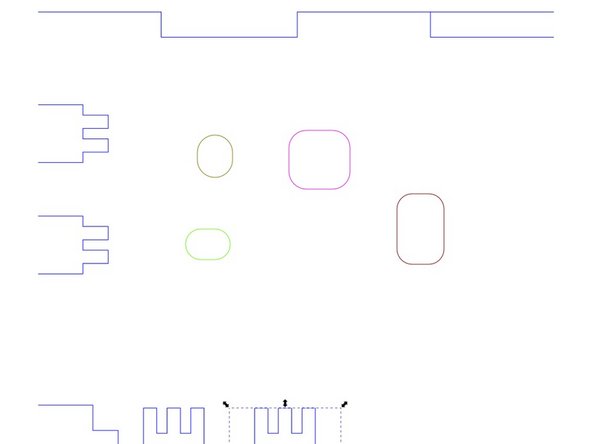
You'll notice on the right part of the drawing (see second image) some small rectangular shapes in different colors. You can skip these or use them to dial in settings for your wood.
-
The acrylic is a simple cut of a matrix of rectangles with rounded edges. I used speed of 12 with power of 90. Leave the protective film on the acrylic until you finish cutting.
-
-
-
Unfortunately I didn't get any images of assembling the shelf. The first step is to cut the appropriate length of the bright white LED strips and use their self-adhesive to stick them to the scored marks on the bottom part of the shelf.
-
The cut out circle is there to run the cord of the 12 V wall wart through and should be in the back right part of the shelf, where the brackets attach. Run the wire from the wall wart through this hole and secure the wire so it won't pull out.
-
Next get some copper hook-up wire and connect all four sections of LED strip together, making sure to run + to + and - to -. I just soldered these on.
-
The self-adhesive on the LED strips is terrible so mix up some 5 minute epoxy to hold the strips and wires down to the bottom board.
-
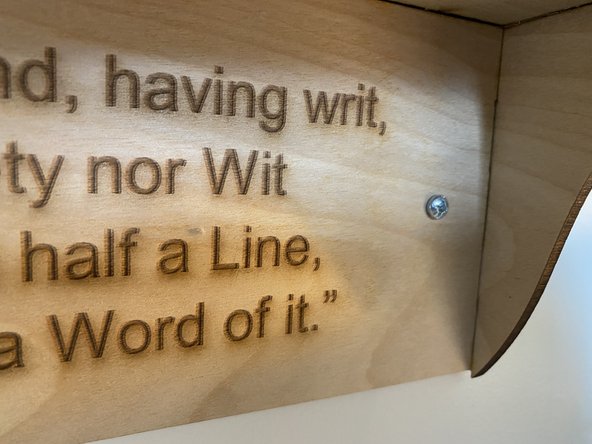
Now use wood glue to glue the shelf and brackets together. The images show some details of this that may help in assembly. Make sure to lightly clamp the pieces as they dry. Rubber-bands work well for this.
-
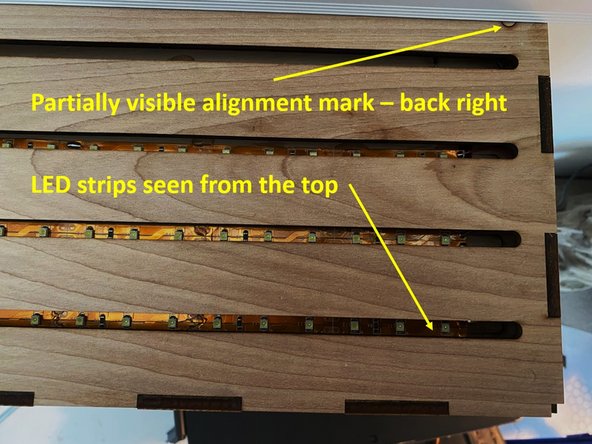
The third image shows the LED strips through the slots. Note the scored circle in the upper right. This aligns with the cord cutout on the bottom part of the shelf to help with orientation during assembly.
-
-
-
The most tedious part is peeling off the protective film from the acrylic cards. I used (with great care) a single edge razor blade.
-
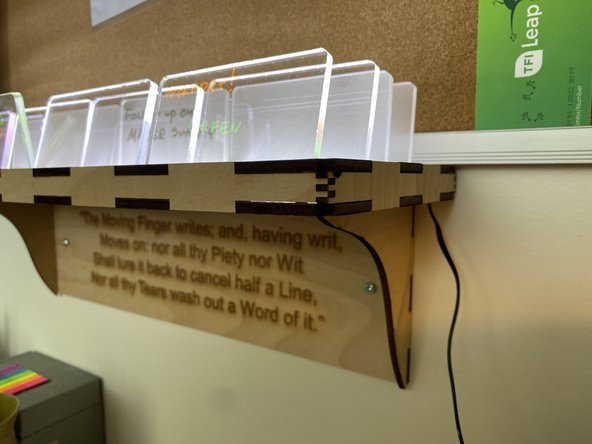
The first image shows a detail of the wall mount hole, mine is attached to drywall using a screw-n-grip.
-
If you want lighted background on the cards which works with dark markers, you can sandblast one side of the acrylic cards down in the PDL. Make sure you leave the protective film on one side!
-
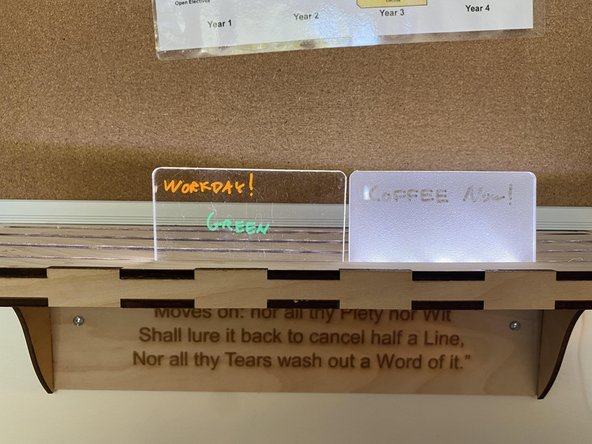
Neon Sharpie markers work great for clear cards with the underlight.
-
Both of these options for the cards can be seen in the second image.
-
If I had do do this again, I would save the long ovals from the slot cutouts and glue them behind the slots to provide more support for the cards.
-


A to-do shelf with files that will need to be modified for your materials
A to-do shelf with files that will need to be modified for your materials
