Tools
No tools specified.
Parts
-
-
The hazards coming from using the microscope arise primarily from your samples. Please work with laboratory staff if you have questions about safe operation and disposal.
-
The microscope is located in a shared laboratory space. While it may not pose a hazard other activities around you might. Always be aware of others in the lab and don appropriate PPE as required to stay safe in the shared environment.
-
-
-
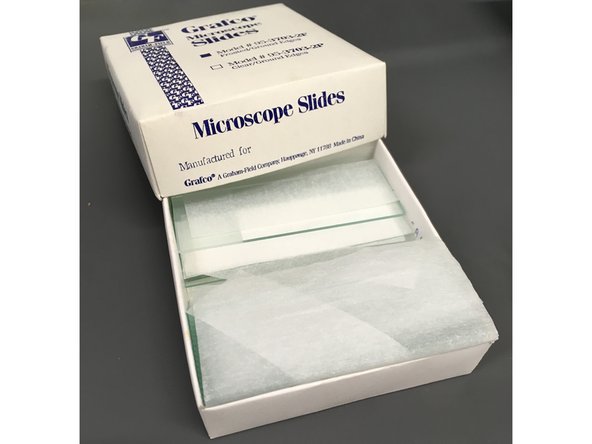
If we are out of slides or cover glasses in the lab (shelf above microscope) please alert the Chemical Engineering Lab Director.
-
Please also help keep our instruction space tidy by disposing of your samples or storing them in your lab or office as appropriate.
-
When done with the microscope we ask that you sign out on the PC, make sure the 5x objective lens is selected, switch off the microscope, and cover the microscope with its red dust cover.
-
-
-
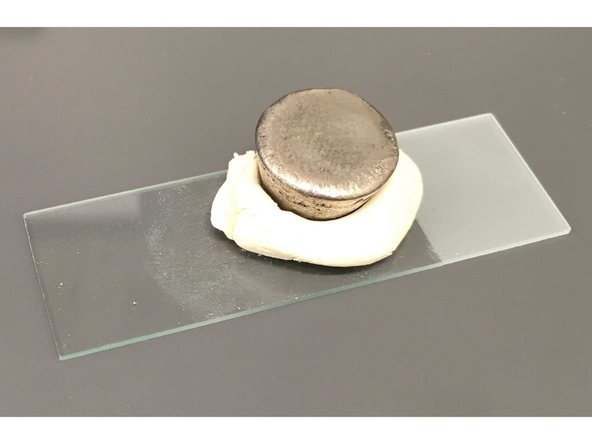
The Leica DM2700M is a versatile instrument with a variety of adjustments allowing a wide range of specimens to be examined. All samples must however be supported by a slide so as to not fall on the aperture condenser.
-
Secure polished material samples to a slide glass with a bit of modeling clay.
-
-
-
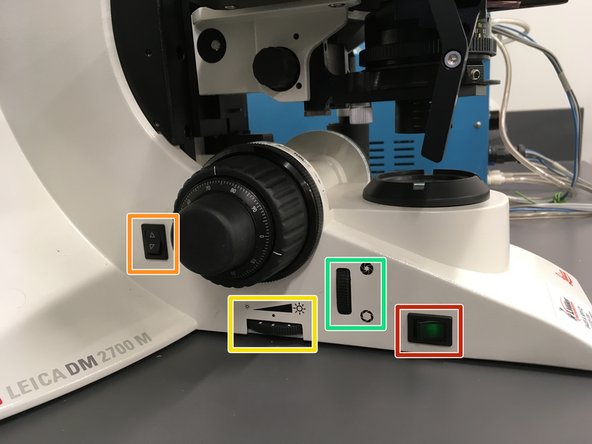
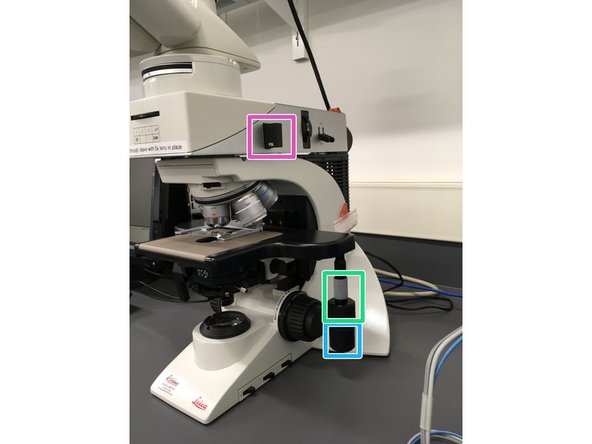
Power Switch - Turn illumination on or off
-
Illumination Direction Switch - Choose illumination from above for opaque samples and from below for translucent samples.
-
Illumination intensity dial
-
Bottom illumination aperture. - Adjust the aperture to match the viewable area of your objective lens to maximize contrast and minimize artifacting.
-
Aperture Diaphragm - Match to objective lens to maximize contrast in your image when illuminating from below
-
Aperture Diaphragm Height Adjustment - Adjust to compensate for your stage height when illuminating from below.
-
Daylight Filter - In older microscopes an incadensent or halogen bulb was used resulting in features reflecting red light to be more prominant. A daylight filter cuts out some red and yellow light to compensate. The DM2770 M features a "white" LED light source whose spectrum more closely matches the spectrum nominally perceived by humans.
-
-
-
Coarse focus adjustment
-
Fine focus adjustment
-
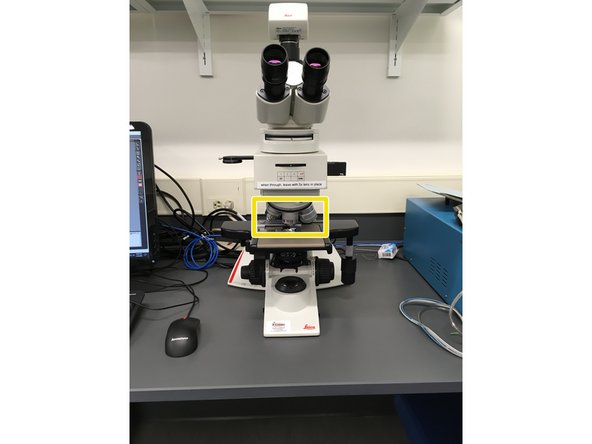
Objective lens selector - This lens selects the magnification of your image at the expense of working distance and for some lenses field of view.
-
Stage x axis adjustment - Use to adjust position along the long axis of the slide.
-
Stage y axis adjustment - Use to adjust position along the short axis of the slide.
-
Polarizing filter - Some samples eg. crystals in mineral samples polarize reflected light and can be detected by comparing images with and without the filter in the light path. Push in for filter or pull out to remove until the slide snaps in place.
-
-
-
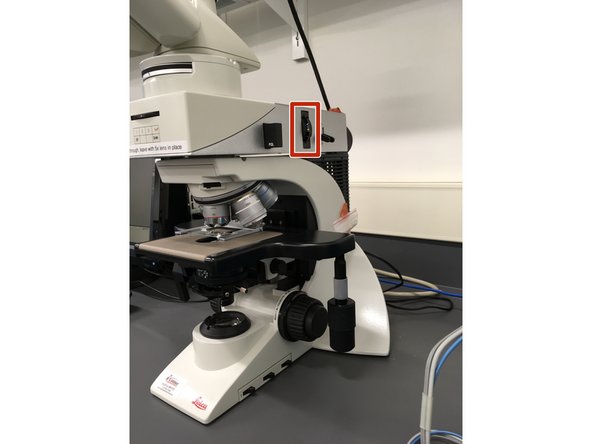
Camera aperture adjustment. The objective lenses are marked with thin color band, adjust this dial to the matching color for the best contrast in captured images.
-
The camera is powered through the PC, starting the LAS software on the PC will therefore start the camera.
-
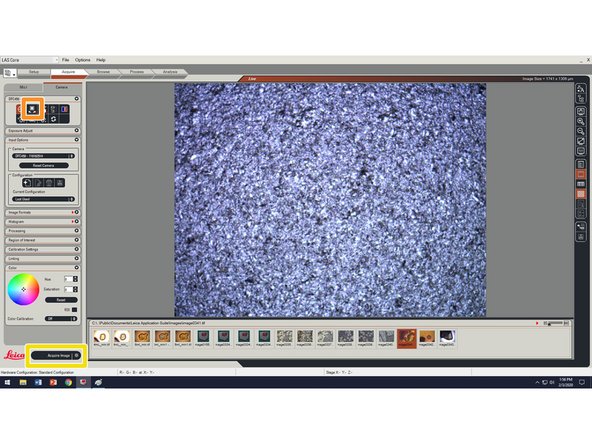
When launching LAS in your profile for the first time a set of default camera preferences will be used. The default white balance setting is not optimal. To select Auto White Balance while in Acquire mode, click the "Camera" tab then click the "Auto White Balance" button.
-
Once you have positioned, illuminated and focused on your sample, You can acquire a still image from the camera by clicking the "Acquire Image" button.
-
-
-
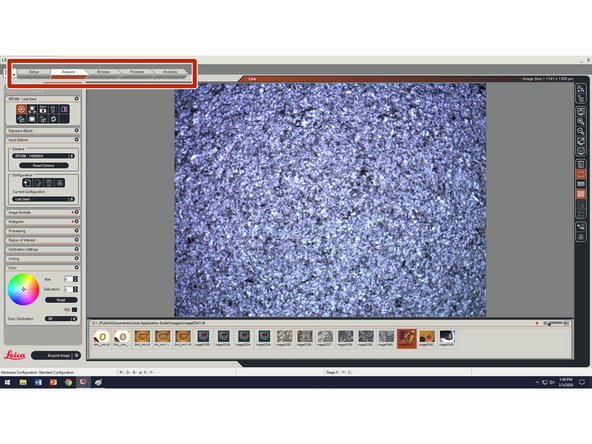
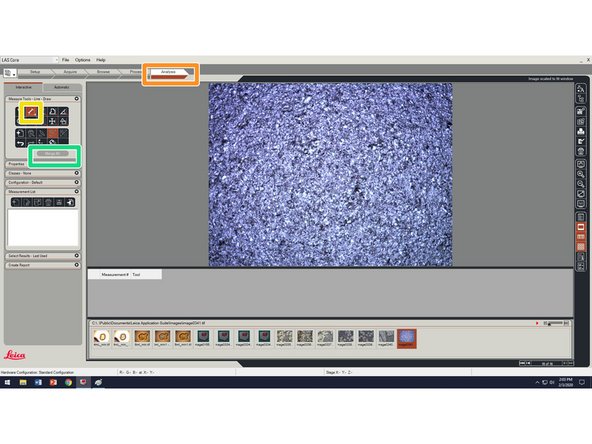
The mode bar at the top of the LAS window allows the user to switch between various operation modes. For nearly all tasks, users will find they only need concern themselves with the "Acquire" and "Analysis" modes. Regardless, clicking on a mode in the mode bar will change the application to that mode.
-
Clicking on the "Analysis" mode tab brings up the analysis tools.
-
Image features can be measured using the tools, in particular the "Distance" tool. Click the tool to select it then click and drag across a feature in the image to measure it.
-
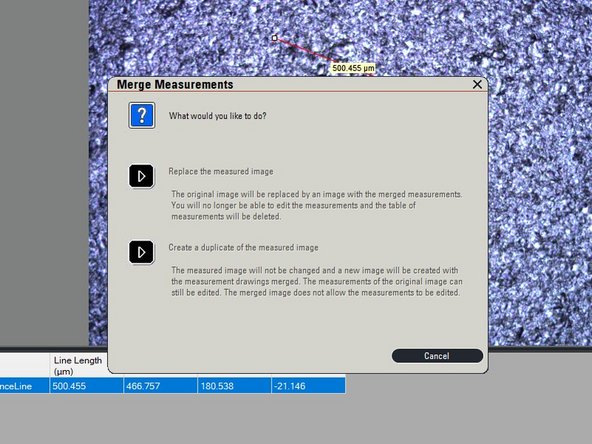
Measurements are saved in a database separate from the image unless the "Merge" button is clicked.
-
Unmerged measurements can be moved or removed. A merged measurement becomes part of the image data (a destructive operation). Because of this, users are prompted when merging whether they want to merge into a copy of the image, leaving the original untouched. Merging into a copy is recommended.
-
-
-
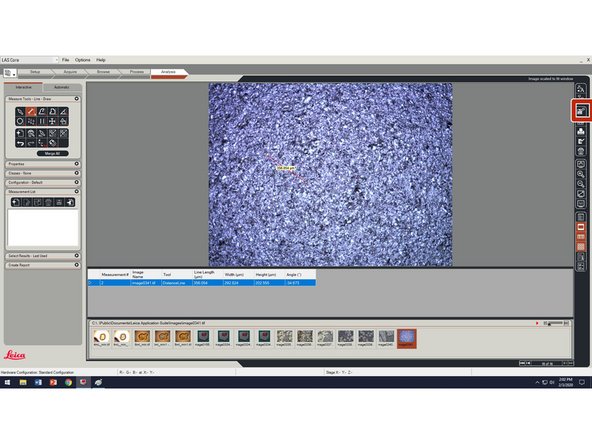
Images are saved by default as tiff files in C:\Users\Public\Documents\Leica Application Suite\Images. While they can be copied from this location, LAS provides the option to "Export" the images, optionally converting the file type. To export the current image, click the "Export" button.
-
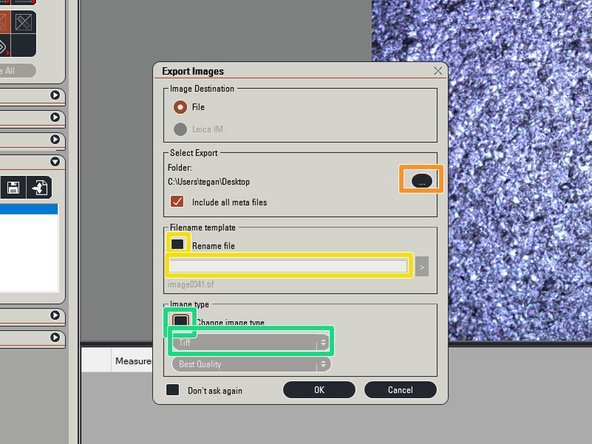
In the Export dialog, users are given the choice of location, file name, and file format.
-
Click the "..." button to choose the folder to export your image to.
-
If you wish to change the file name, click the "Rename file" checkbox and enter your preferred filename in the box just below.
-
If you are saving images for publication the default TIFF format is best. If you are saving images for a presentation or website Click the "Change file type" checkbox and choose JPEG.
-
TIFF (Tagged Image File Format) can utilize various compression algorithms or no compression at all. Typically no compression or a lossless compression algorithm are used meaning the file format preserves all data and is thus preferred for traceability and for publication.
-
JPEG (Joint Photographic Experts Group) is a lossy file format as the compression algorithm seeks to preserve the onscreen appearance of an image while minimizing its file size. This makes it ideal for use on websites and in presentations for projection.
-