
-
-
A specimen is the singular object which you test while a sample is a group of specimens that can be averaged to get a more correct value.
-
A "dog bone" is a commonly used industry standard for the shape of the specimen. More information on specimen shape can be found here.
-
Grips, or more specifically pneumatic side-action grips are what hold your specimen in place while testing.
-
To jog the grips is to adjust the upper grips vertical position live to a location which is best for your test. jogging is not used to test your specimen.
-
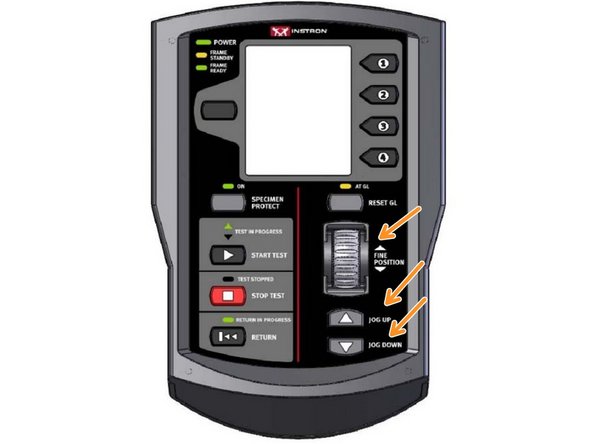
Control panel is the panel connected to the frame of the Instron that can be used to control basic functions such as Jogging, beginning a test, balancing and so forth.
-
The load cell is the sensor which identifies the force exerted on the specimen.
-
-
-
Please note the following precautions.
-
It is better to ask a question than it is to harm yourself or the Instron.
-
Use the lower and upper limit stops to make sure the grips do not collide with each other.
-
The front door must be closed durring a test or while "jogging".
-
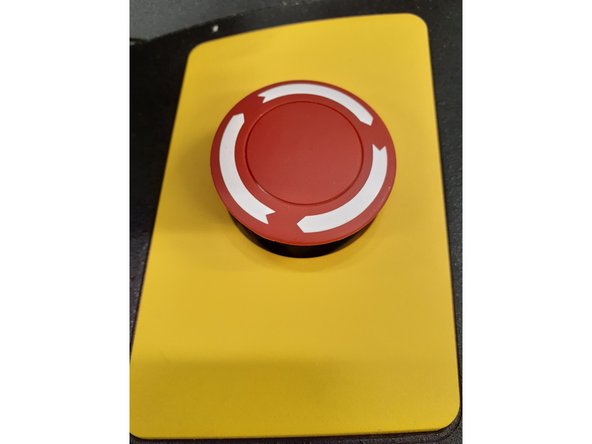
If there is any emergency that will harm someone or something now or in the near future, press the red emergency stop button located in the front right of the Instron.
-
The manual along with all hazards can be found here.
-
-
-
Verify the load cell and grips on the Instron are labeled to have a 5kN load limit. If this is not the case or if another grip type is desired, please ask the Lab Director.
-
Turn on the Instron using the power switch on the back right side.
-
Login to the computer using your credentials.
-
Open the "Bluehill Universal" software so that Instron can connect to the software.
-
Prior to loading the sample, dimensions needed for analysis should be known or obtained. Typical values needed are the cross section and length.
-
Strain(length) can be generally measured using calipers and the frame, however, more exact and consistent results are obtained using an extensometer. Ask Lab Director if this is needed for your test.
-
-
-
Once the software connects with the Instron you should be able to Jog the grip using the controller panel to a location which will be used when starting the test.
-
Do not Jog while your hand or sample is between the grips. Jog with nothing in between and check distances when the Instron is not moving.
-
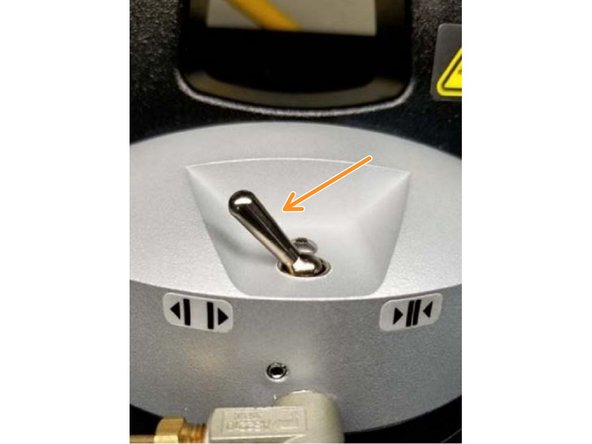
Secure the top of the specimen to the grip by using the pneumatic switch.
-
Secure the bottom of the specimen in a similar manner.
-
Sequence for securing specimen may be different according to standards due to loads introduced prior to testing. Consult standards for more information.
-
-
-
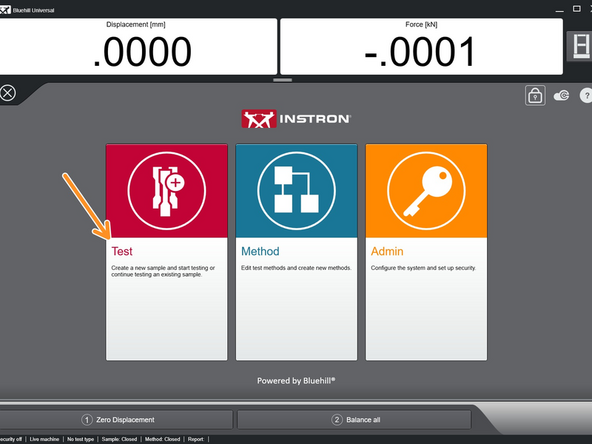
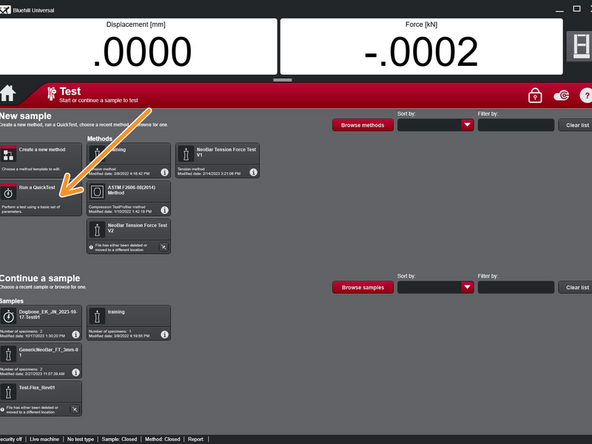
Within Bluehill Universal, select "Test".
-
Select "Run a QuickTest".
-
If QuickTest does not quickly appear under the section "New Sample", select the home icon and reselect "Test".
-
Within the QuickTest setup, there are minimal controls to make the test method as basic as possible. If more features are desired, please ask the Lab Director.
-
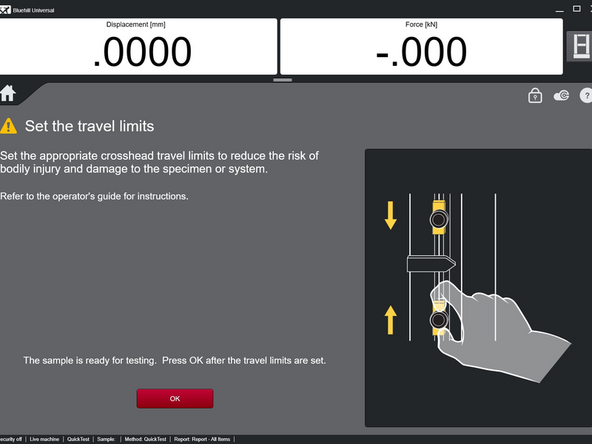
Verify that the limit switches are in an appropriate location and select OK. They should not be in a location that allows the grips or anything else to collide.
-
-
-
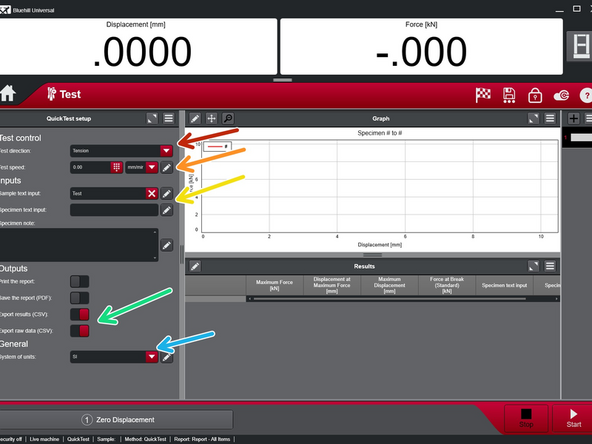
Verify or select "tension" for test direction.
-
Speed suggested is within the range of 1 mm/min to 100 mm/min. The slower the speed the greater the resolution.
-
20 mm/min is recommended.
-
Enter the "Sample text input" and "Specimen text input" as desired. The difference between the two was defined previously.
-
Verify "Export results (CSV)" and "Export raw data (CSV)" are selected. They are red colored when selected.
-
Select "System of units" as desired.
-
"SI" units will result in a kN-mm output whereas "US Customary" results in lbf-in.
-
-
-
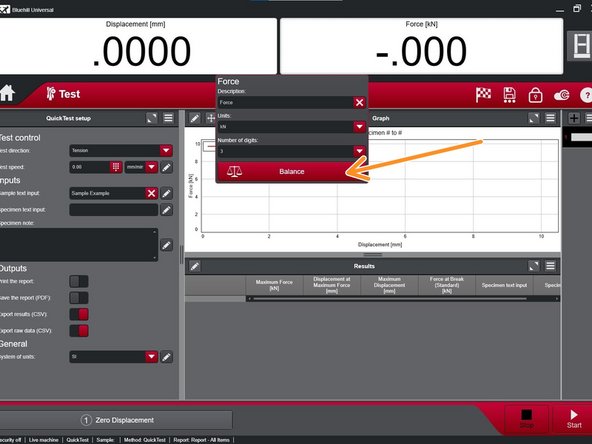
Before beginning test, "Balance" the force by left clicking the "Force" indicator at the top right of the screen and selecting "Balance".
-
In like manner, zero the displacement as well.
-
Verify that the specimen is secure, front door is closed and the Displacement and Force are reading near zero.
-
Note where the emergency stop button is located.
-
Select "start" on the screen.
-
Continue with the test and be ready to stop test if necessary.
-
Test should automatically stop when the specimen breaks.
-
-
-
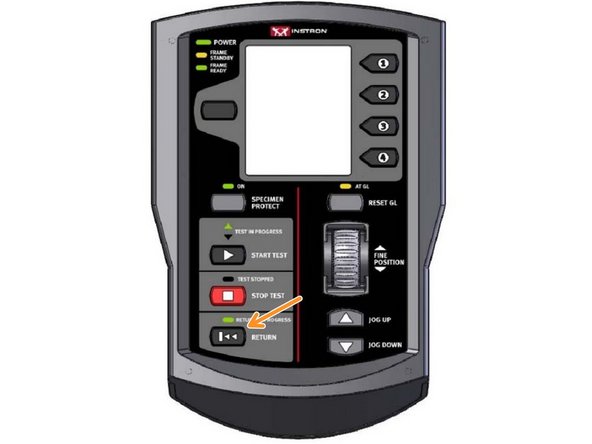
After the test has stopped, immediately remove both specimen sections using the pneumatic switch.
-
The grips can now return to the reference location as set previously by selecting return on the control panel.
-
The instron is now ready to load a new specimen and continue with the sample until testing is complete.
-
The displacement does not need to be zeroed each time, however the force does.
-
-
-
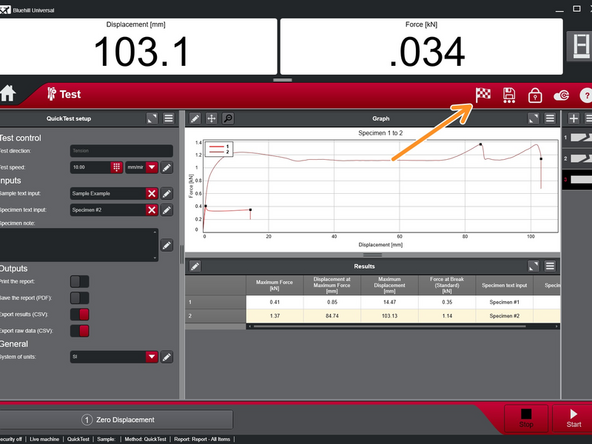
When testing is complete, select the "finish sample" icon which looks like a flag. It is located near the top right of the screen.
-
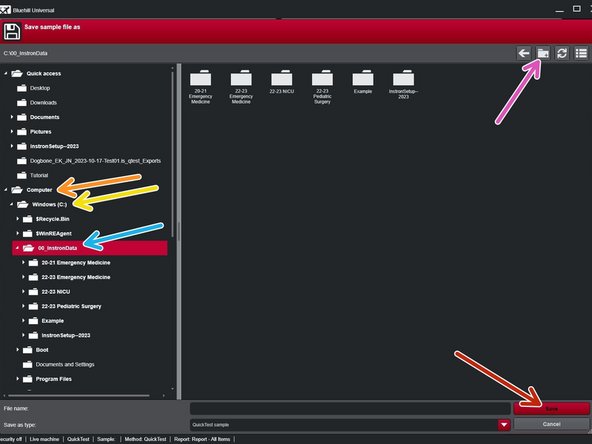
Choose a file location where this data is to be exported.
-
Select "Computer"
-
Select "Windows (C:)"
-
Select "00_InstronData"
-
Select "Add New Folder" and name the folder with your username or senior design team name and year. Then select "Create"
-
Select new folder
-
Select "Save" within that newly created folder
-
-
-
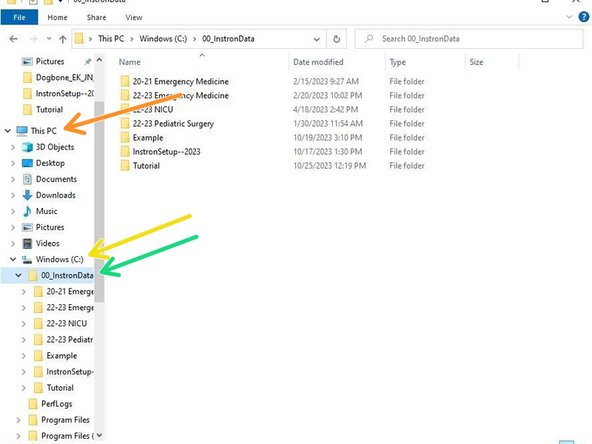
Navigate to the desktop and open "File Explorer".
-
Select "This PC"
-
Select "Windows (C:)"
-
Select "00_InstronData"
-
Select your folder
-
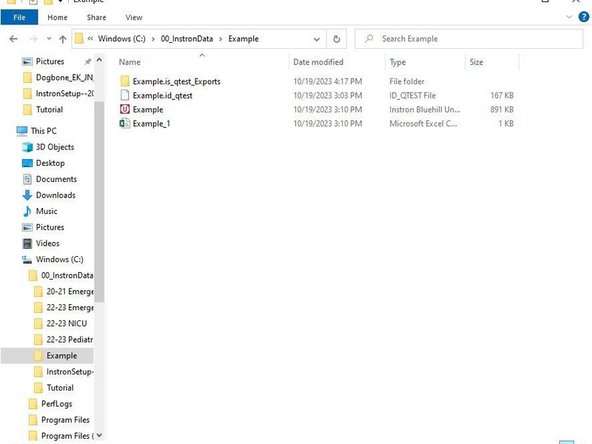
Inside your folder you will see an Excel file which contains basic information about each specimen or in other words basic information about the sample.
-
-
-
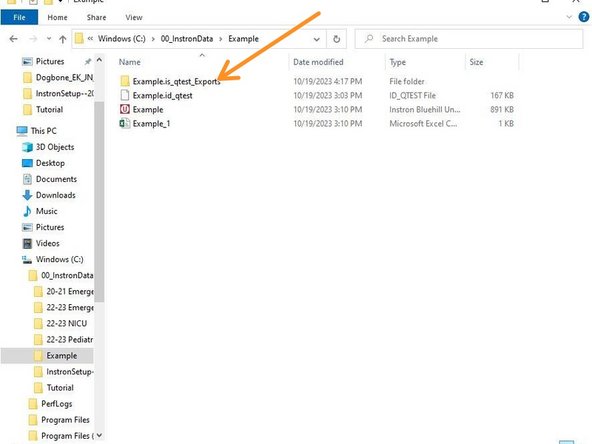
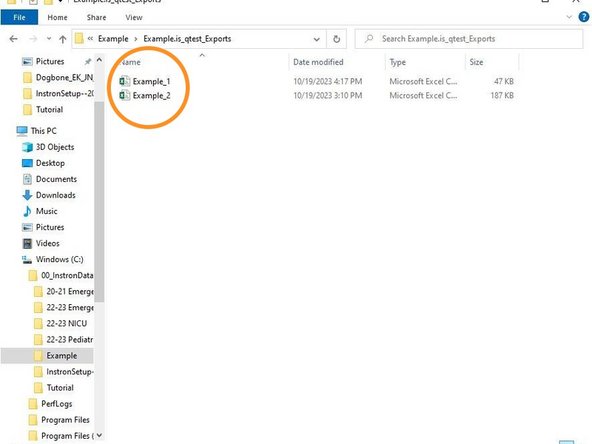
To access the raw data for each specimen, select the folder within the folder you created.
-
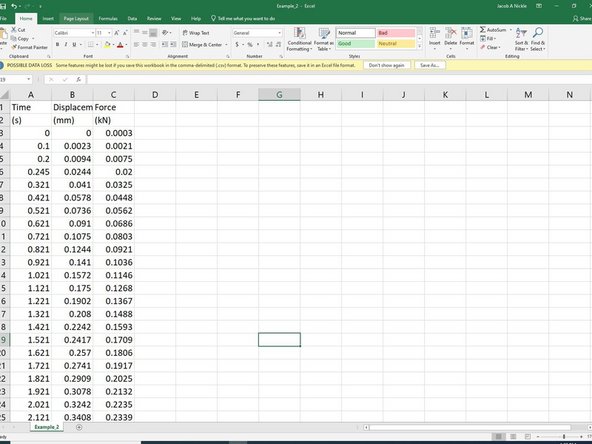
There will be a separate Excel file for each Specimen tested containing time, displacement and force measurements.
-
If this is all the data you need, you can take the data, logoff and turn off the Instron.
-
The rest of this tutorial will walk through a basic example on creating the stress strain curve.
-
-
-
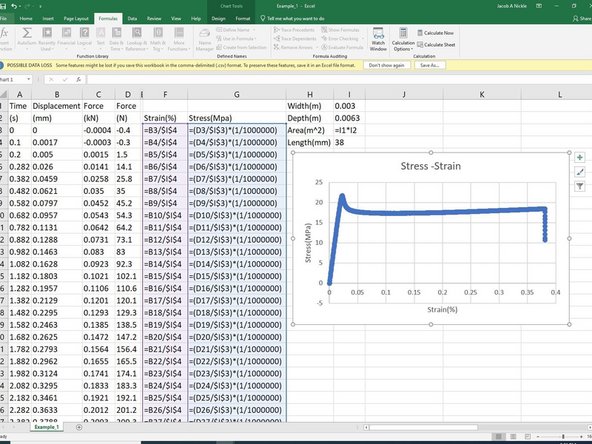
Within each specimen Excel file, there will be columns for time, displacement and force.
-
Note that these steps might vary depending on if you chose SI or US Customary.
-
Make sure that units are consistant.
-
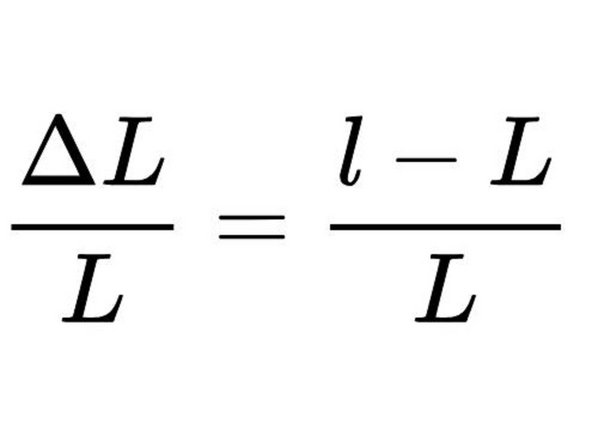
Calculate strain and fill in the column with data using absolute referencing as needed.
-
Strain can be calculated by dividing the displacement by the original length. Units end up as a percentage.
-
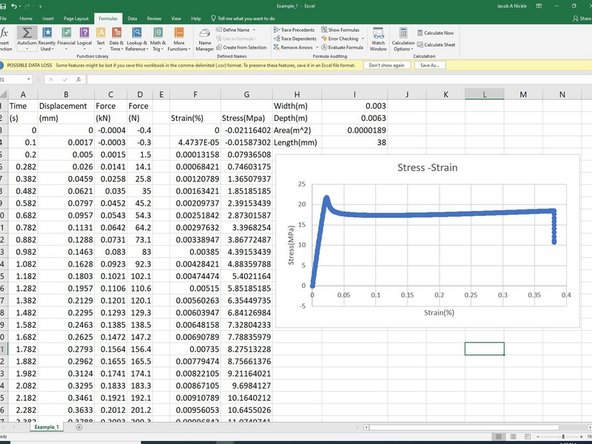
Calculate stress and fill in column with data using absolute referencing as needed.
-
Stress is calculated by dividing force by cross sectional area. Note the force should be in newtons and the cross sectional area should be in meters^2.
-
-
-
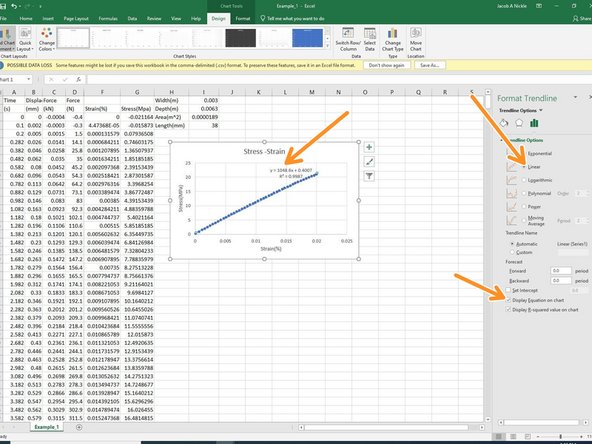
Using the Stress and Strain data, create a chart.
-
The attached image shows the functions used in the example. Each function is shown within the cells for reference if needed.
-
Modulus of Elasticity can also be calculated by finding the slope of the trend line assuming data is linear. Right clicking on points on the chart and choosing the trend line can give you these options.
-
Save Excel file as an excel document if you want to keep the functions in the cells to work on at another time.
-


Cancel: I did not complete this guide.
One other person completed this guide.