Introduction
This tutorial only covers basic use and does not include in-depth knowledge or theory of florescence microscopy.
-
-
While the ultraviolet light is passing through the objective, do not view the light directly unless using the ultraviolet light shield.
-
Be aware and adhere to all other warnings and cautions as stated in the product manual.
-
Images used in this tutorial have been taken from the Nikon Ti-U and Nikon TI-FL Epi-fl product manuals.
-
This microscope is capable of various imaging configurations including bright-field and phase contrast which will not be used here.
-
-
-
Stage - Platform where prepared microscope slides are placed and controlled.
-
Objective - Used to magnify image.
-
Focus - Adjusting distance between the lenses and the stage which holds the sample in order to make image look clear.
-
Shutter - A mechanical cover which blocks light from passing through.
-
Filter Block - Directs and filters light allowing only a particular wavelength section to be seen.
-
-
-
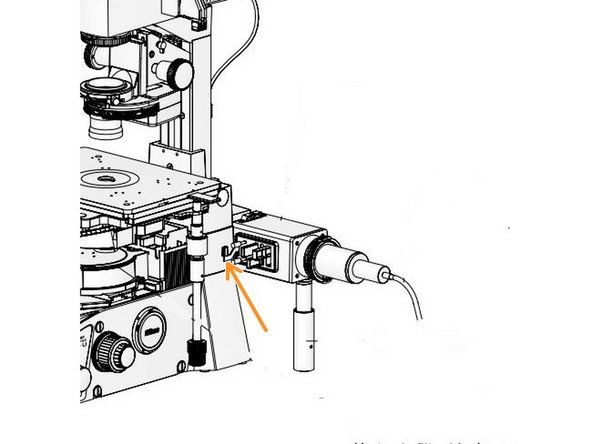
Make sure that the shutter is closed by positioning the lever on the Epi-fl turret to the "C" position as shown in the picture.
-
"C" is for closed while "O" is for Open
-
To avoid stray light entering the image, shut the curtain and turn off the light.
-
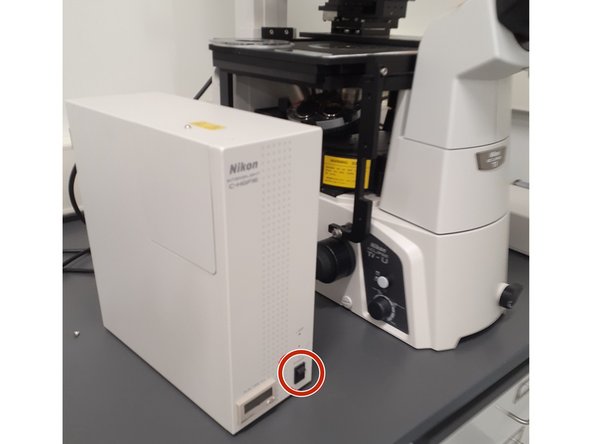
Turn on the mercury lamp using switch as shown in the picture.
-
This lamp must stay on for at least an hour before turning off. Failure to do this may cause the bulb to prematurely fail.
-
-
-
There are three commonly used wavelengths in florescent microscopy which this microscope is capable of producing including green(FITC), blue(DAPI) and red.
-
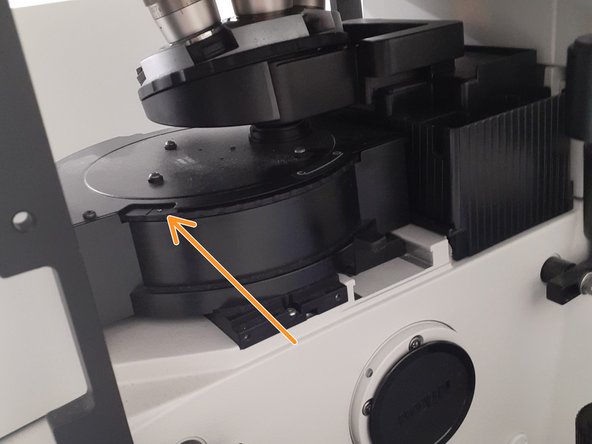
Producing these wavelengths is done using filter cubes which are located within the Epi-fl Turret.
-
Only 3 of the available 6 slots are filled with a filter cube.
-
Position 3 contains blue (DAPI)
-
Position 4 contains green (FITC)
-
Position 5 contains red
-
Place filter cube of choice within the optical path by rotating turret into position as shown in the picture.
-
-
-
Place sample onto stage within optical path.
-
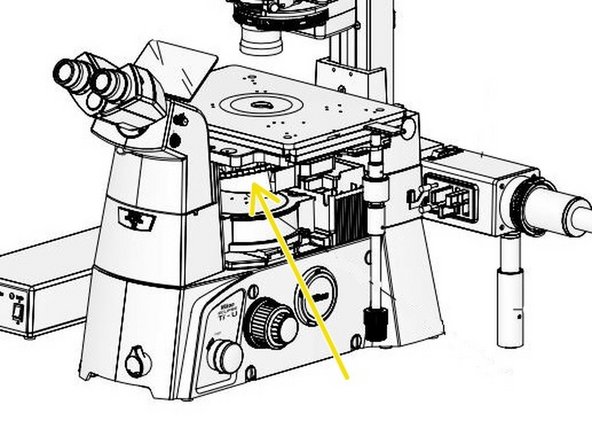
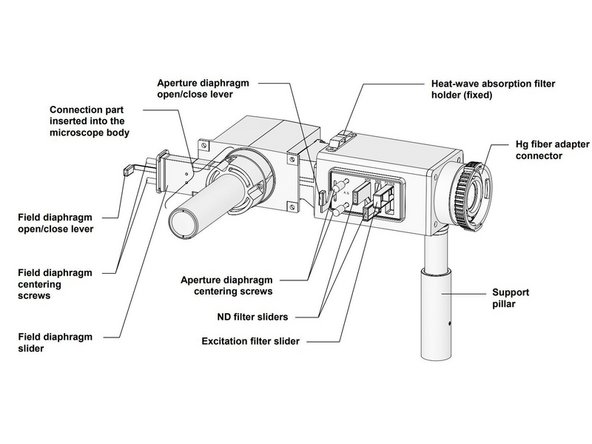
Insert aperture diaphragm by pulling slider as shown in the picture.
-
Make sure light filters are not in the optical path.
-
The filters are located next to the aperture diaphragm and should be in the "pulled out" position.
-
These filters are used to create repeatable brightness.
-
Rotate nosepiece until the 10x objective is in the optical path. Nosepiece location is shown in picture.
-
It is best to start with a low magnification objective in order to more easily resolve the image and verify the microscope is working as intended.
-
Be mindful that the objective should not touch the sample while changing objectives or while focusing.
-
-
-
Open the shutter by positioning the lever to the "O" position.
-
If all of the steps were correctly followed prior to this point, looking through the eyepiece should result in some sort of image.
-
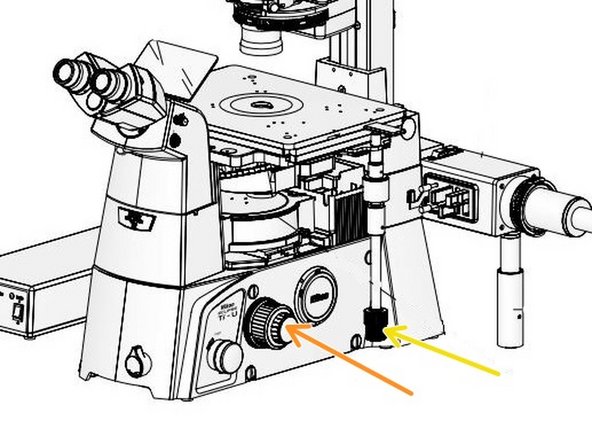
Adjust the focus using knobs as shown in the picture.
-
The larger knob is coarse while the inner knob is fine.
-
Avoid colliding objective with the sample while focusing.
-
In conjunction with the previous step, adjust sample position by using the stage positioning knobs.
-
-
-
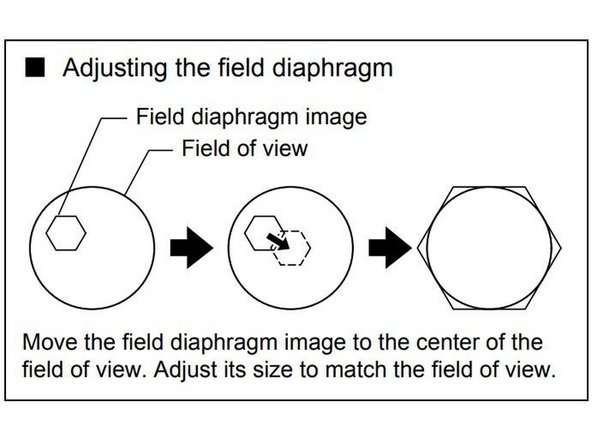
Stray light can be further mitigated by centering and circumscribing the field diaphragm.
-
The field diaphragm lever is located on the left side of the microscope. Picture shows location.
-
Too much light exposure can result in a bleached sample. Try and minimize the light exposure by utilizing the shutter lever.
-
Change objectives and refocus for greater magnification.
-
Again, avoid touching the sample with objective.
-
-
-
If there are any other questions or concerns, refer to the product manual or ask the Lab Director.
-
Once imaging is complete, remember that the lamp can't be turned off unless it has been on for at least an hour. Please turn off before leaving.
-


