
Introduction
This tutorial covers basic scanning using the turntable on the Einscan SP V2. The 3D scanner uses structured light to scan objects and turn them into 3D models. To learn more about how a 3D scanner works, visit this article.
-
-
Insert your maker card into the portal box to turn on the scanner
-
Login to the computer using your Bucknell account.
-
Open EXScan. If prompted to login, use the login info posted next to the computer.
-
If EXScan states that the device is offline, check that the scanner is on and plugged in
-
To get certified, you'll need to scan a small object with the turntable and create a 3D model. You'll also need to pass the quiz at the end of this tutorial.
-
-
-
EXScan may ask you to calibrate the scanner. Grab the calibration board and stand (located above the scanner) and follow the instructions given in EXScan.
-
Make sure to do the white balance test. The backside of the calibration board can be used for the white balance test.
-
Be careful with the calibration board! Don't drop it or get it dirty.
-
-
-
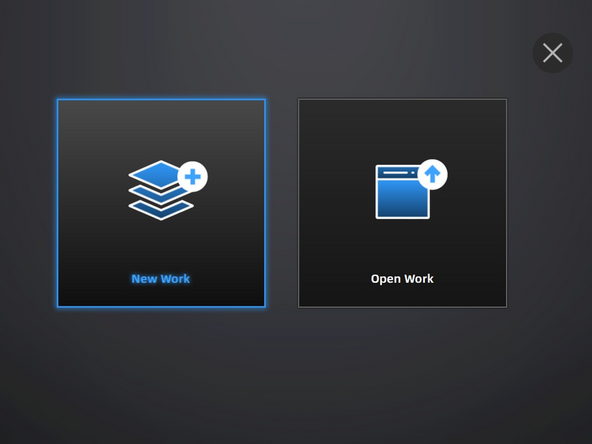
Select New Work to begin a new scan. Choose an appropriate name and file location for your scan.
-
Choose if you'd like to do a texture or non-texture scan.
-
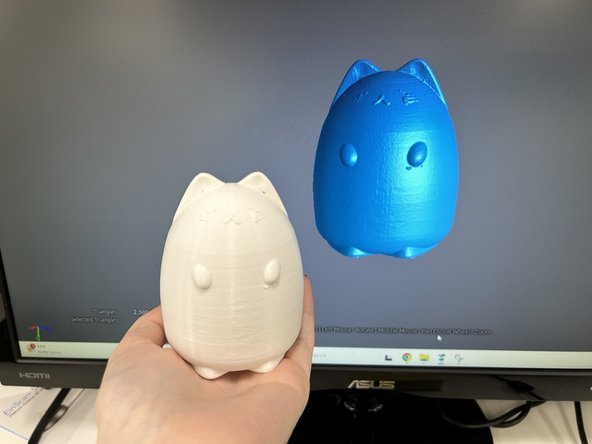
A texture scan will include the color(s) of the object while a non-texture scan will be gray. Texture scans take longer.
-
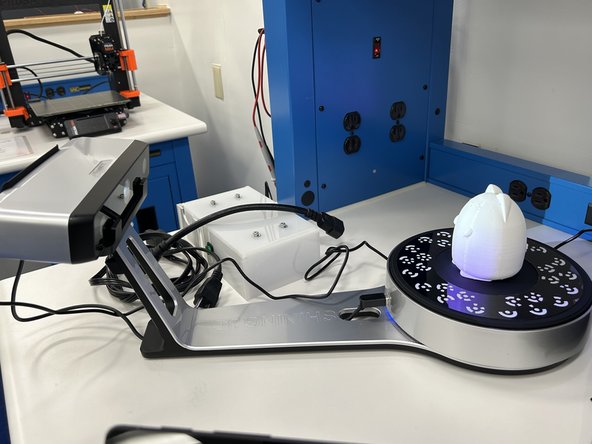
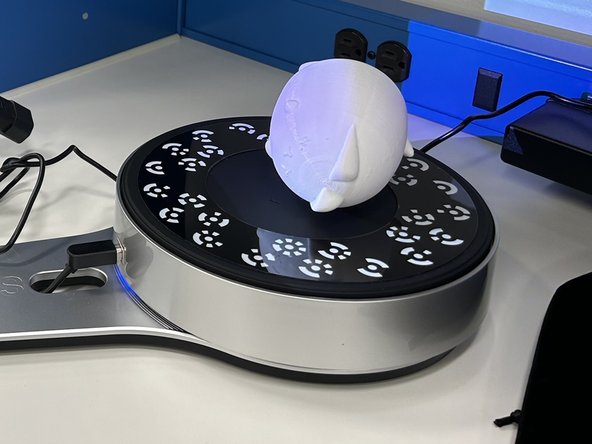
Place your object on the turntable. If your object is way too big to fit on the turntable or weighs over 10 lbs., you'll need to use the tripod. Instructions for the tripod are here.
-
Don't use the tripod unless absolutely necessary. It is time consuming and doesn't lead to great scans.
-
The scanner will have trouble scanning anything reflective, transparent, fuzzy, or tiny.
-
-
-
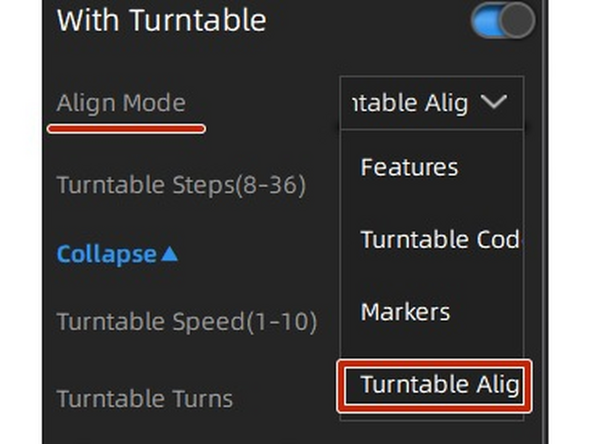
If using the turntable, under align mode, choose Turntable Align. There are other settings, but Turntable Align works best for most objects.
-
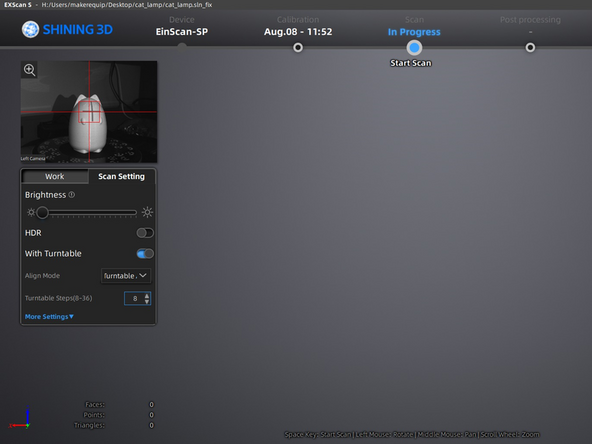
Adjust the brightness to just below when the red dots start appearing. Turn HDR on.
-
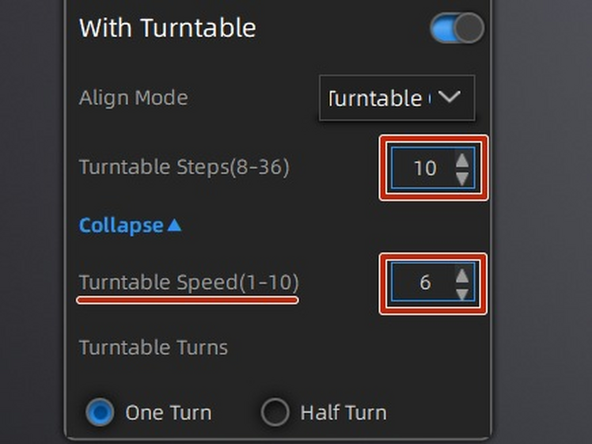
You can adjust the number of steps the turntable takes. More steps will take longer but will lead to a more detailed scan. 10-15 steps is a good number for most objects.
-
If your object has a risk of falling over or moving, reduce the turntable speed.
-
-
-
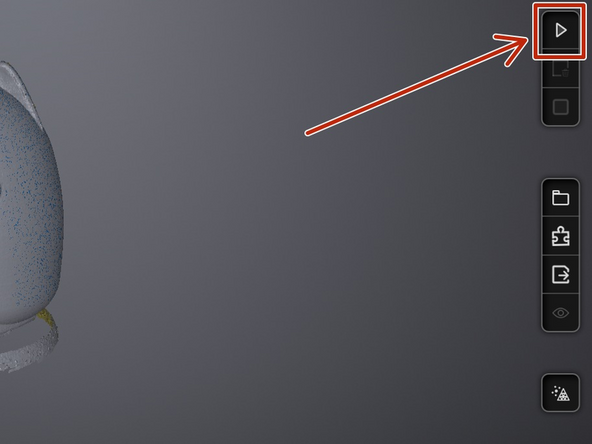
Press the start scan button to start scanning. Don't move the scanner while it's scanning.
-
After the scanner finishes scanning, review the scan. Select unwanted data with shift + left mouse, then press delete selected data to remove it. Hit the check mark when finished.
-
To capture the top/bottom of your object, turn it on it's side and do another scan.
-
You may have to do multiple scans to capture every angle.
-
The scans should automatically align. If they don't, then continue onto the next step.
-
-
-
If you did multiple scans, and the scans didn't align automatically, you'll have to manually align them. Otherwise, skip this step.
-
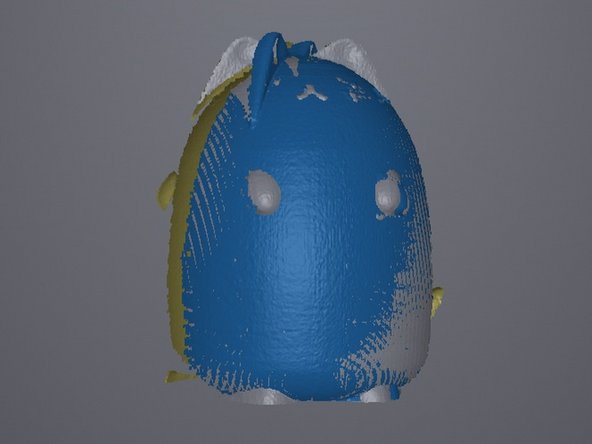
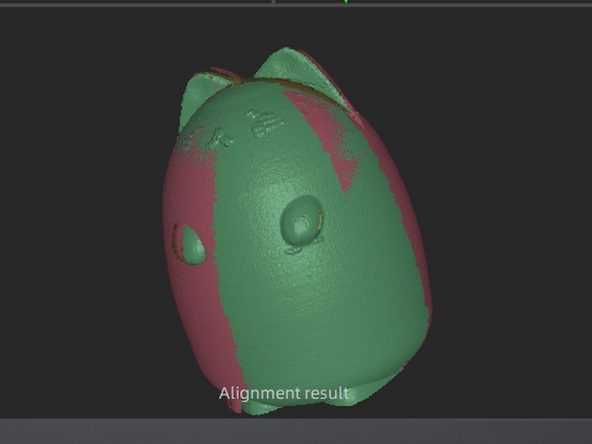
Unaligned scans have parts that overlap incorrectly or have parts that are in the wrong place. Compare your 3D model with the object to find misalignments.
-
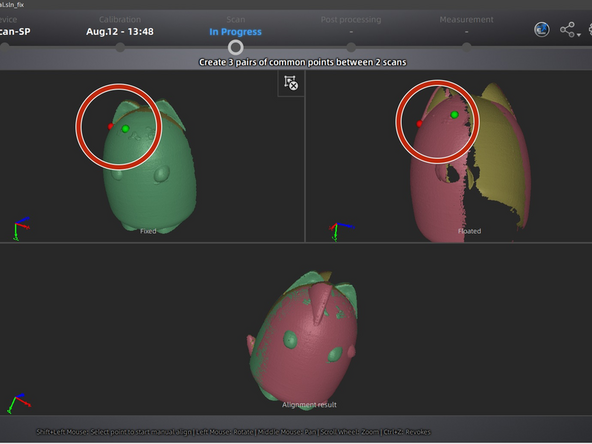
Enter the alignment menu. Drag and drop two different scans into the "fixed" and "floated" sections.
-
Use shift + left mouse to create a point. Place a point in the same place on each object. Repeat until you have 3 different sets of points
-
After you've placed enough points, EXScan will show a preview of the aligned scans. If the preview looks good, then hit next to continue aligning the rest of the scans.
-
After all of the scans have been aligned, hit complete and move onto the next step.
-
-
-
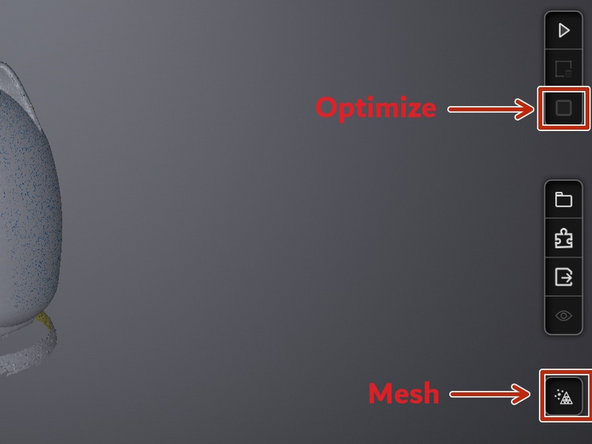
After you've done enough scans, click the optimization button. EXScan will optimize the model
-
Next, generate a mesh of your scan by clicking the mesh button.
-
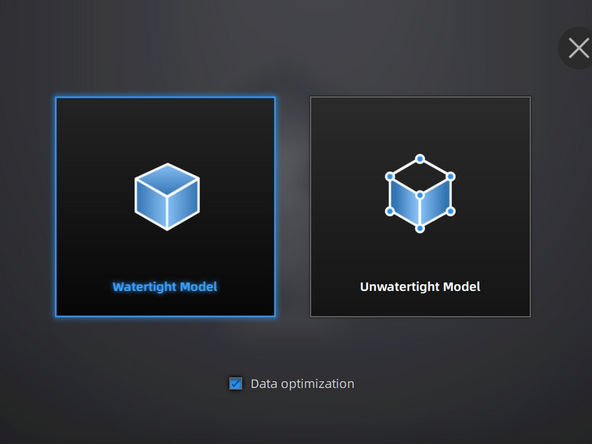
You can choose to do a watertight (closed) mesh or non-watertight (open) mesh.
-
A water-tight mesh will auto-fill any holes. If you choose a non-watertight mesh, you'll need to fill the holes using CAD software before you can 3D print.
-
Choose the amount of detail you want the mesh to have.
-
Higher detailed scans will take more storage space. If you plan to 3D print directly, choose a low detail mesh.
-
If you don't like the mesh, then you can go back to the scanning menu and re-mesh the scan.
-
-
-
You can now choose to remove parts, fill holes, sharpen, and smooth the mesh. You can remove parts using shift + left mouse.
-
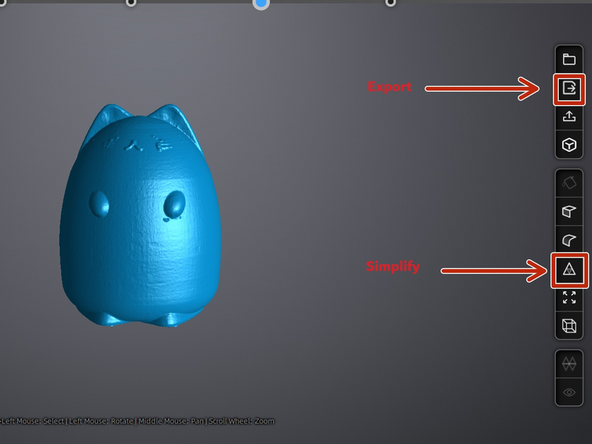
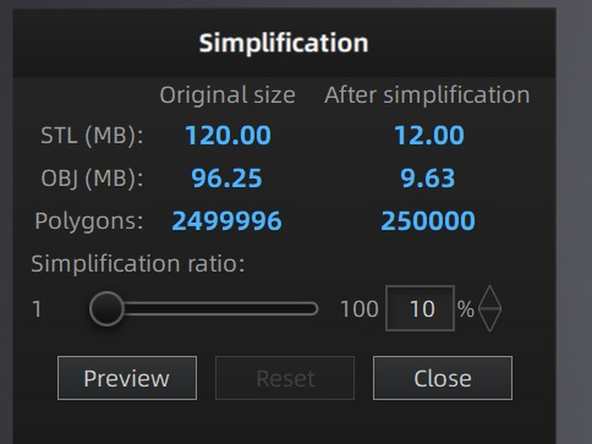
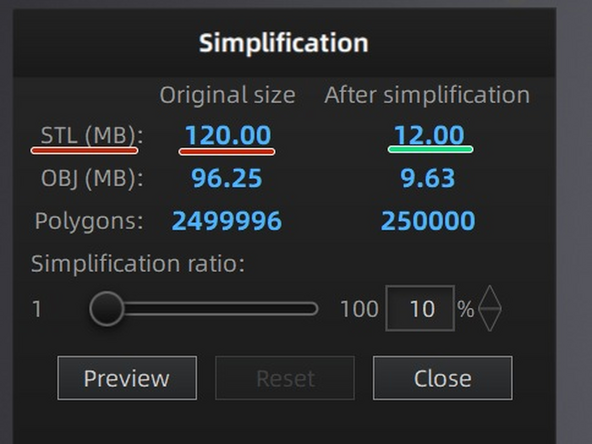
There is an option to reduce the file size of the mesh, as scanning creates large files (>100 mb)! The quality will be slightly reduced if you do this. You cannot reverse this process, so make sure to preview the simplified mesh!
-
Once you've edited the mesh and simplified it, you can export the mesh.
-
You are NOT allowed to save the file on the scanning computer! Save it to your netspace, a flash drive, or a Google Drive!
-
If you are unhappy with the result, you can go back to scanning section in EXScan and remesh the model.
-
You've now completed a 3D scan! Take the quiz at the bottom of this page and show a tech your meshed scan to get ceritified.
-
-
-
If you want to 3D print a scanned object, there are a few extra steps you need to take.
-
You must reduce the size of the mesh to under 20 MB.
-
You need to fill all holes, or else the print will fail. You can do this with the hole filling tool.
-
Once, you've reduced the file size and filled all holes, you can save the object as an stl file and use PrusaSlicer to prepare your print.
-


EinScan SP V2 - Basic Scanning: Quiz