
Introduction
The Roland GS-24 is a printer-like machine that cuts lettering and graphics out of adhesive-backed vinyl material. The Roland GS-24 is ideal for making stickers, decals, and signs. Prior to beginning this tutorial you will need a graphic file you would like to cut. You can also create a very basic design in the provided Roland CutStudio software. For this tutorial we will be using a graphic from the internet. You can either use the file provided on the Maker-E Google drive or follow along with your own design from the internet or some other source.
Published by Matthew R. Lenk with contributions from Matt P. Lamparter.
-
-
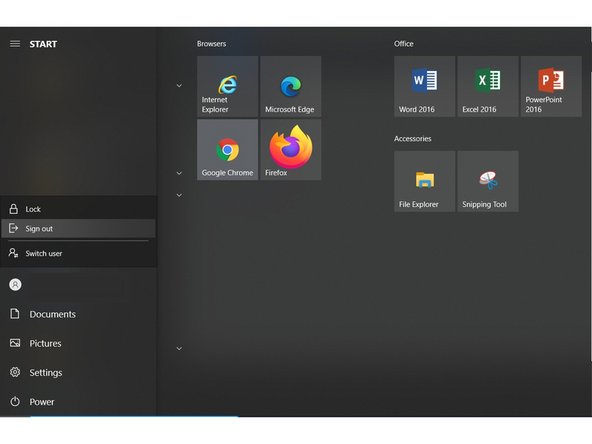
Make sure you are the only user that is logged in on the computer. To ensure this, RESTART the computer.
-
Begin by deciding what you want to cut:
-
Basic text can be created within the vinyl cutter software.
-
If there is an image or graphic you want to cut, it is best to find an existing file on the internet. High contrast, black and white (not grayscale) images work best. Try including the words "vector graphic" in your search.
-
-
-
Select the material you will use to create your sticker from the selection of vinyl provided in the Maker-E. The large rolls of vinyl are located in the Maker-E's stock room against the right wall, below the filament spools, wood, and acrylic.
-
There is also a box of smaller scraps of vinyl in a cubby below the laser printer. These scraps are perfect for small stickers.
-
You have two options for vinyl material:
-
A precut piece of vinyl is best for smaller stickers.
-
A roll of vinyl is better for larger stickers or banner length decals.
-
Be sure to use STICKER vinyl, and not t-shirt vinyl. Sticker vinyl has a white backing with the word "ORCAL" across it, along with a printed grid. T-shirt vinyl has either a solid white backing (no grid), or the backing is simply a paler version of the shiny front.
-
-
-
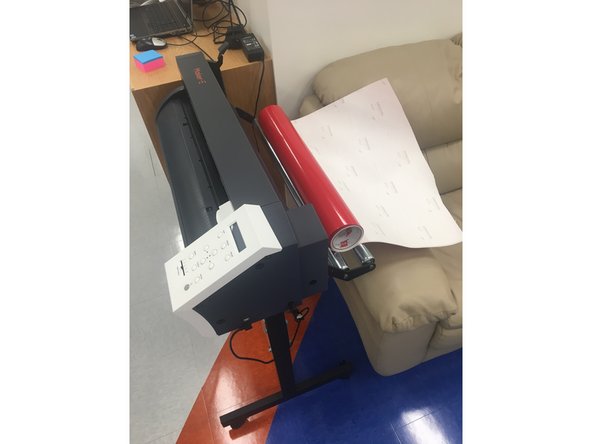
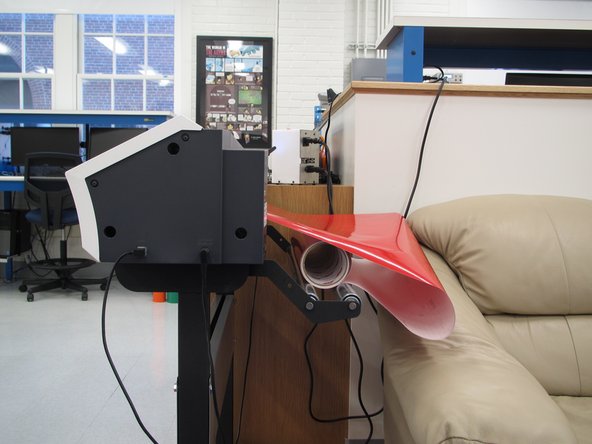
If you are using a roll a vinyl, set the roll on the silver rollers located on the back of the vinyl cutter so that the colored vinyl side of the roll is facing up when vinyl is pulled from the roll.
-
Be sure to leave a good amount of slack (several feet) of vinyl unrolled before feeding the end into the vinyl cutter. If there is not enough extra vinyl unrolled the roll will be pulled from the silver rollers and cause your cut to fail.
-
If you are using a precut piece of vinyl you can ignore the rollers and insert your vinyl into the cutter directly from the back.
-
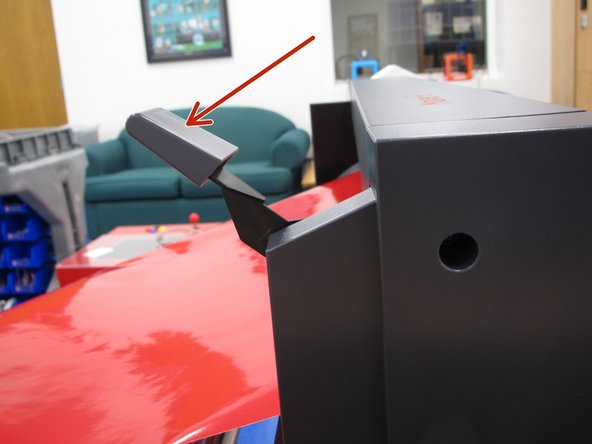
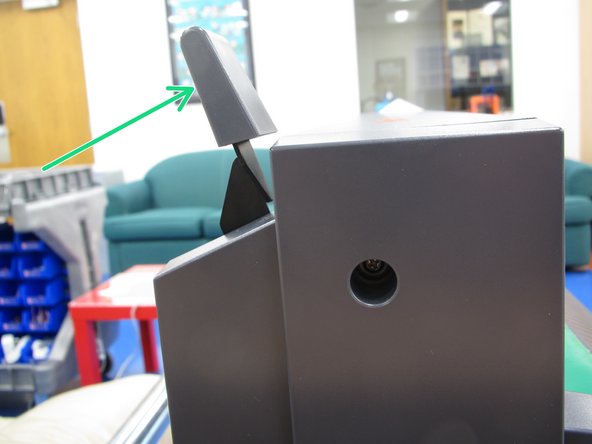
Ensure that the arm is in the down position to load vinyl.
-
-
-
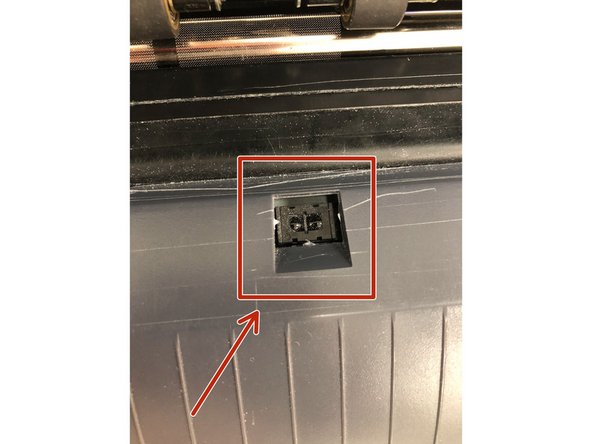
Feed material through the machine from the back. For inserting piece of vinyl make sure the following is true: (Min. Length: 2.5" and Min. Width: 3.25") *MAKE SURE TO COVER THE SENSOR (IMAGE #3)*
-
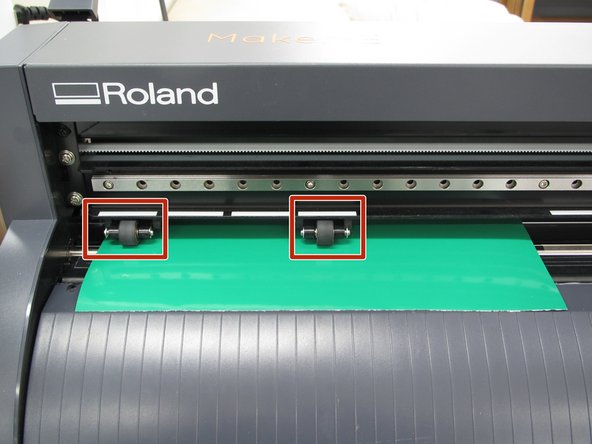
Ensure that the left edge of your material lines up with the left-most pinch roller verification mark (white marks).
-
Align the edges of the material parallel to the guidelines on the machine.
-
Move the right pinch roller over the material, ensuring that it is completely on top of the material. It is easiest to move the pinch rollers from the rear of the machine. For rolls of vinyl the right pinch roller should be moved to the extreme right position.
-
Note:The rollers must be aligned within the white marks. Failure to keep the pinch rollers within the white marks will cause a "Bad Position" error on the vinyl cutter.
-
Raise the loading lever once you have ensured that your material is lined up correctly.
-
-
-
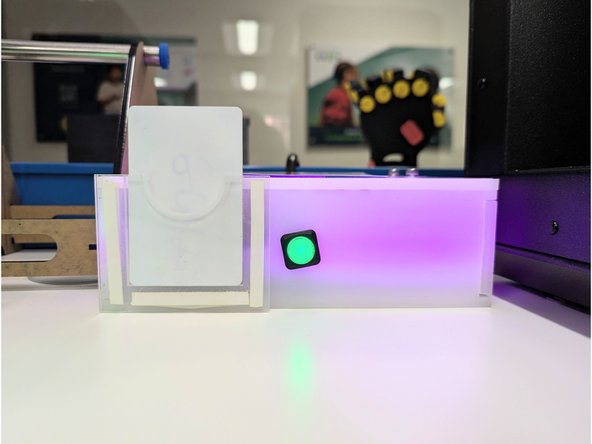
Have a Maker-E Assistant enable training mode on the Portal Box.
-
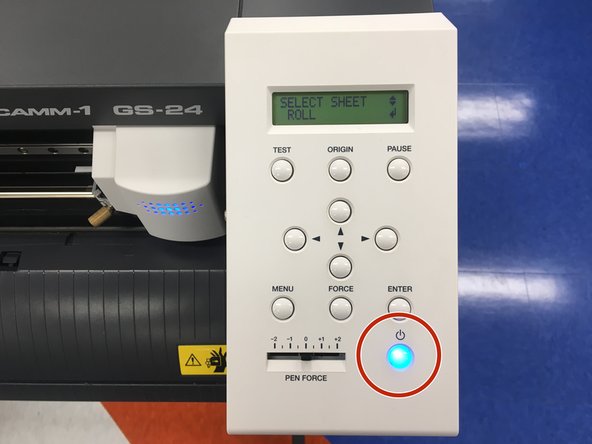
Turn the vinyl cutter on by pressing the power button. It will illuminate blue.
-
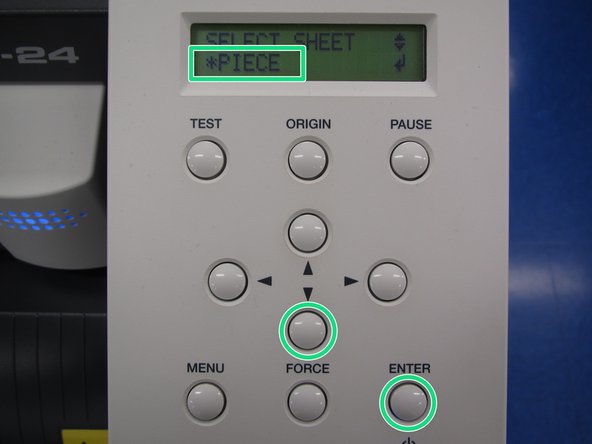
Press the down arrow on the control panel to display PIECE or ROLL depending on the material type you are using. Confirm your selection by pressing the ENTER button.
-
In this example we will use a piece of vinyl as opposed to a roll.
-
The cutting carriage will move to the left and the material will move forward and backward as the vinyl cutter measures the size of the material.
-
If the vinyl cutter is unresponsive, restart the cutter and the workstation.
-
-
-
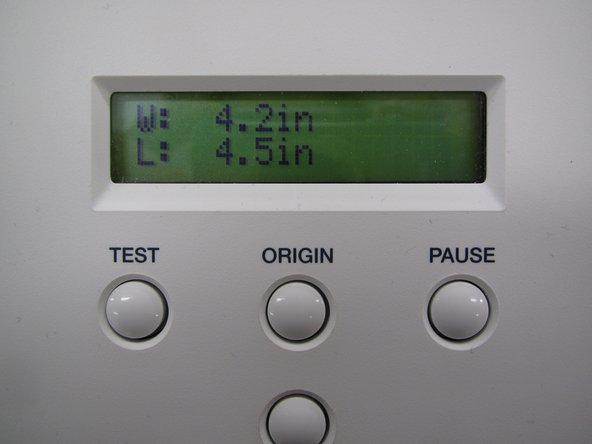
The cuttable width and length of the material will now appear on the screen.
-
Note that the cuttable area is smaller than the physical dimensions of the material itself. The width measurement (W) corresponds to the inner distance between the pinch rollers. The length (L) is the total length of your material minus about 2 inches.
-
Ensure that your material is lined up correctly and that it has not come loose.
-
-
-
Prior to cutting your design you will want to run a test cut. This will ensure high quality cutting results.
-
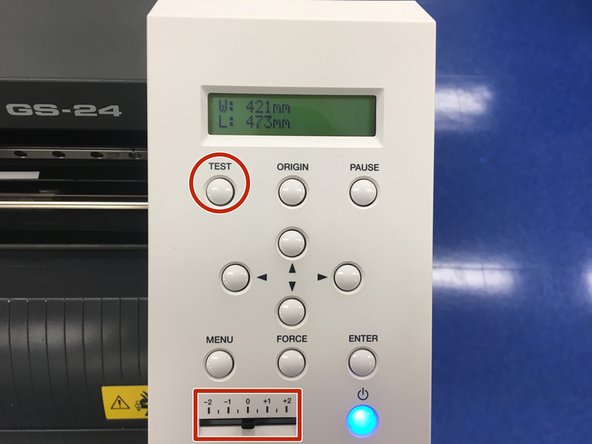
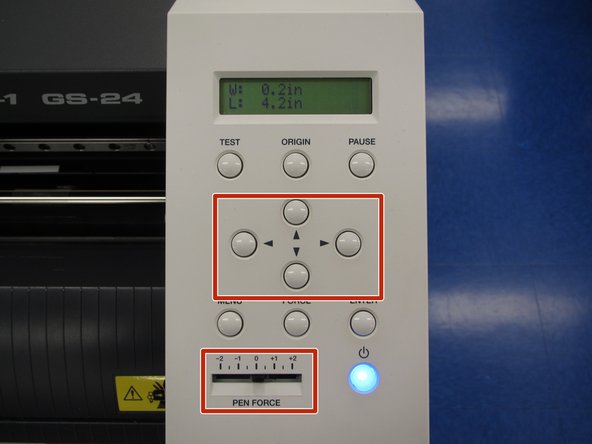
Begin by setting the PEN FORCE slider to 0 on the vinyl cutter.
-
Hold down the TEST button until the vinyl cutter begins to move, then release the button.
-
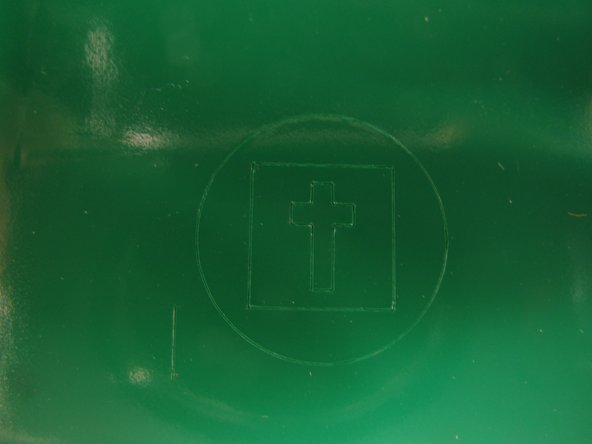
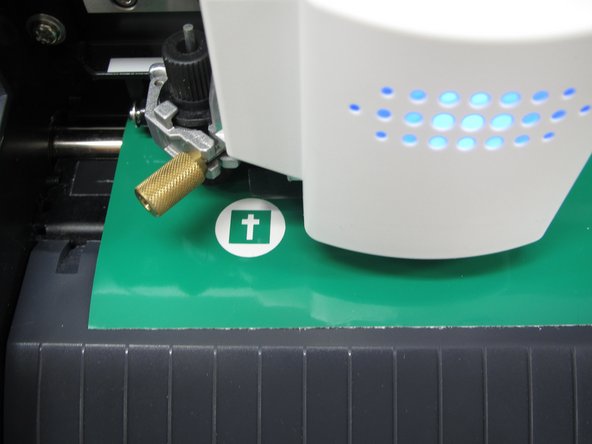
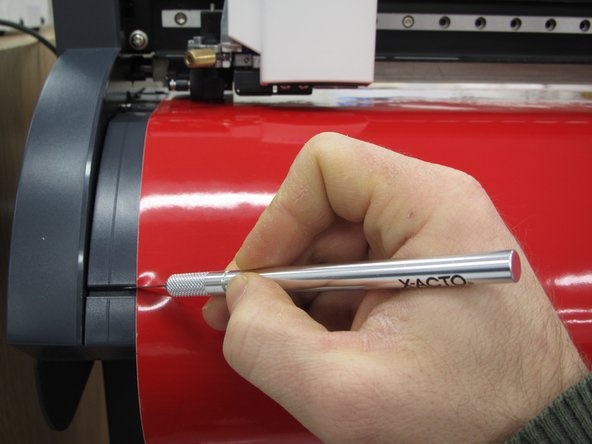
Once the test completes, press the down arrow key to move the material forward and examine the cutting test. You should see faint lines have been cut in the shape of a cross within a circle.
-
-
-
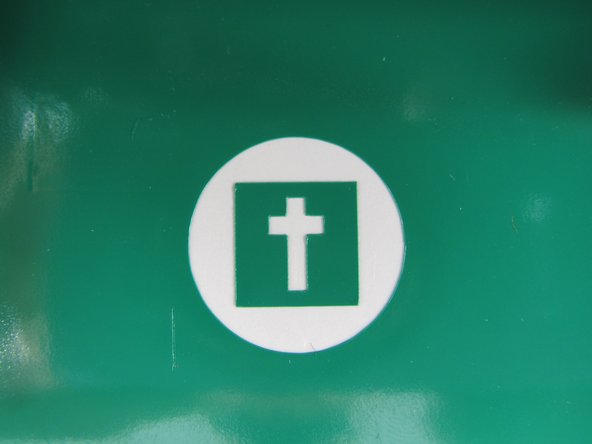
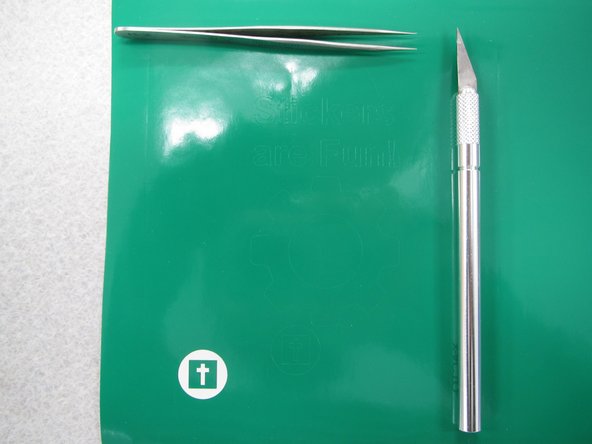
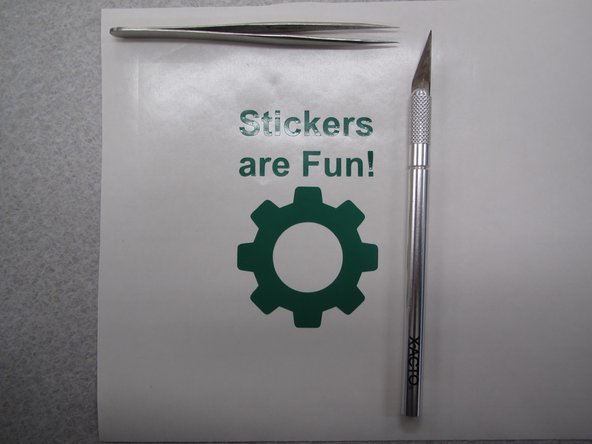
Use tweezers or an X-Acto knife to peel off the outer circle and the inner cross. Ideally you should be left with a result similar to that shown here.
-
If your result looks like the image shown here, skip the next step and proceed to "Setting the origin".
-
If the square peels off along with the circle and the cross or the cutting seems to be too strong and is causing damage to the vinyl by either removing all the way through the vinyl or messing the test design then the blade force may need to be adjusted.
-
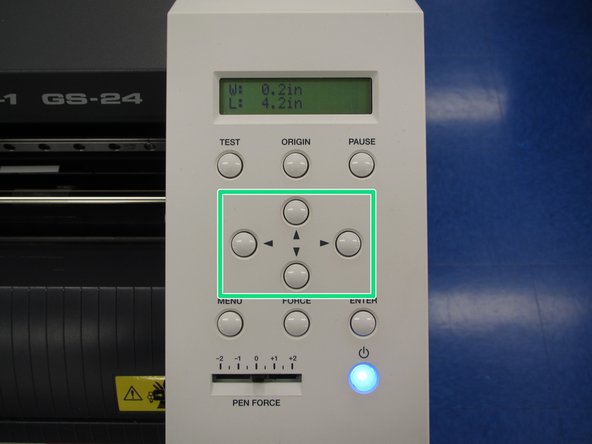
Begin by adjusting the PEN FORCE slider on the vinyl cutter to increase or decrease the force. Then move the cutting carriage using the arrow keys. Position the carriage so that a new test will not overlap with the previous test.
-
Press and hold TEST again to cut a new test pattern.
-
If the cutting is still not crisp and the square is still peeling off or it still seems to be too strong proceed to the next step to further adjust cutting force.
-
-
-
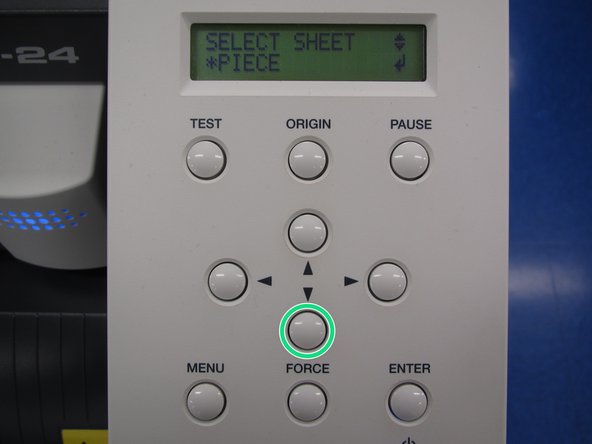
Move the PEN FORCE slider to 0. Press the FORCE button.
-
Increase the blade force with the up arrow or decrease it with the down arrow based on your test examining results. Only adjust by 10gf at a time. Press ENTER to accept the increased force.
-
Move the cutting carriage by using the arrows to perform another cutting test next to the one you just performed. Try to position the carriage so your tests will not overlap.
-
Execute another test cut by holding the TEST button. Again, peel off the outer circle and inner cross to match the image shown in the previous step.
-
Repeat this process until the cutting force is calibrated correctly and you can peel of the circle without the square.
-
If you find that you need to increase the cutting force by more than 20gf, please stop and alert a technician.
-
Do not decrease force too much or your cutting will be crisp and hard to peel off the vinyl. You would need to go back and increase the force.
-
-
-
After performing the test cut and setting the pen force, you will want to set the orgin.
-
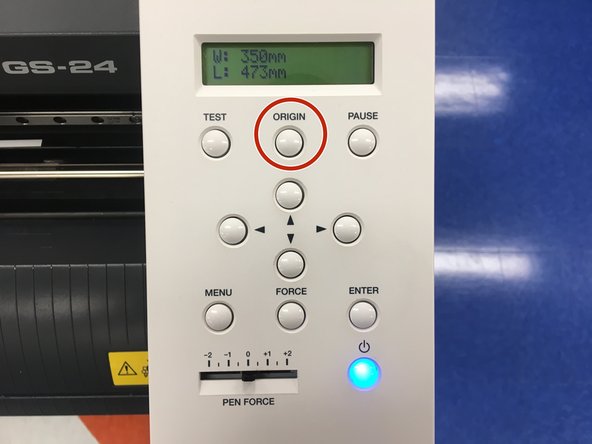
Move the cutting carriage to the far left and advance the material forward by using the arrow keys. This way your sticker will not overlap with your test cut.
-
Hold down the ORIGIN button until the display flashes ORIGIN SET.
-
Note: the origin will correspond to the red dot shown in the CutStudio Software discussed in the next step.
-
-
-
Log in to the vinyl cutter computer and launch CutStudio, located under Start -> All Apps -> Roland CutStudio -> Cut Studio.
-
After the program opens up select File -> Cutting Setup and press the Change button.
-
In the next window click Get from Machine to transfer your material size to the CutStudio application. Feel free to change the units to suit your needs. Click OK in both windows to return to the CutStudio workspace.
-
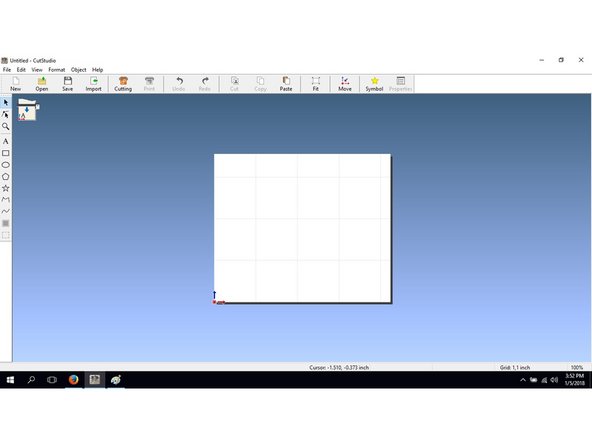
The workspace should now reflect the size of the vinyl you loaded in the cutter. Any graphics or text placed outside of the white area will not be cut.
-
Notice the red dot at the bottom left of the cutting area. This dot corresponds to the point where you set the origin on the cutter in the previous step.
-
-
-
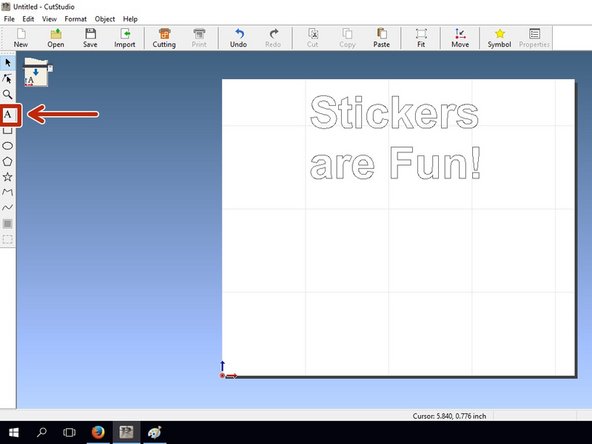
If you wish to add text, you can use the text tool within CutStudio.
-
Right clicking on your text and choosing Properties will allow you change all sorts of parameters like size, font, rotation, etc.
-
-
-
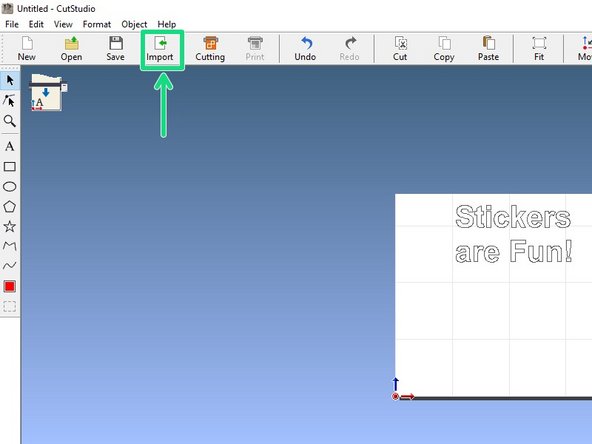
CutStudio supports the following file formats for import: BMP, JPG, PNG, AI, EPS.
-
Click the Import button, locate the graphic from the Maker-E Google drive or use your own graphic, and import it into the workspace.
-
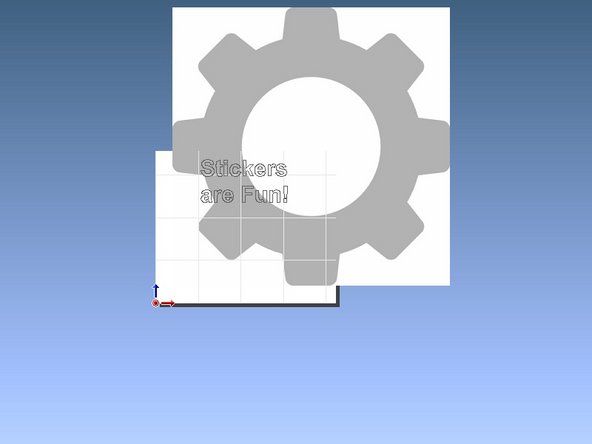
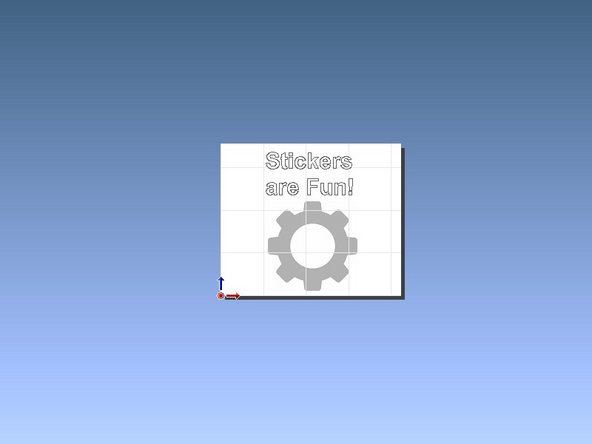
If your graphic falls outside the bounds of the white workspace you will need to move and resize it to fit.
-
You can move by clicking and dragging your image.
-
You can resize by clicking and dragging one of the four corner markers on your image.
-
-
-
The vinyl cutter needs a two dimensional path for its blade to follow. You need to convert your image into a set of lines the vinyl cutter can understand.
-
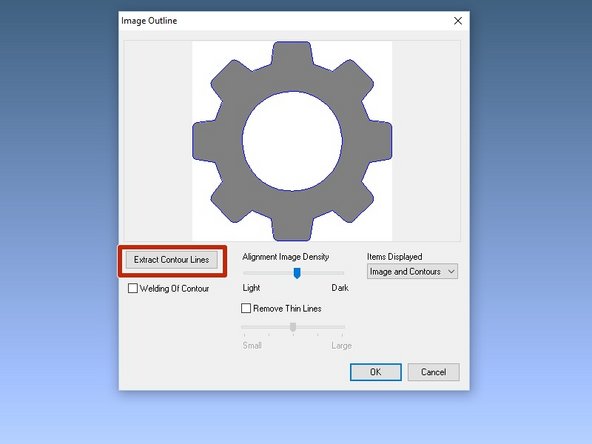
Begin by right clicking on your image and choosing Image Outline.
-
Click the Extract Contour Lines button to have CutStudio determine where the appropriate lines should be.
-
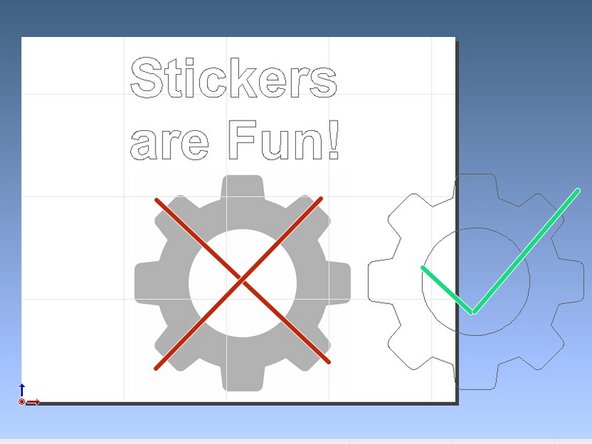
Notice that there are now blue lines shown on top of your image. If you are not happy with where the lines were placed you can adjust the extraction process by using the Alignment Image Density slider and then press Extract Contour Lines again.
-
Click OK when you are done to return to the workspace.
-
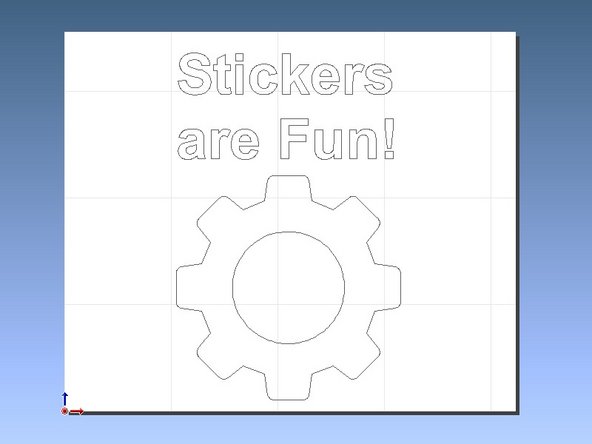
Click and drag your newly created contour lines so they are separate from the original image. Click on the original image and delete it.
-
-
-
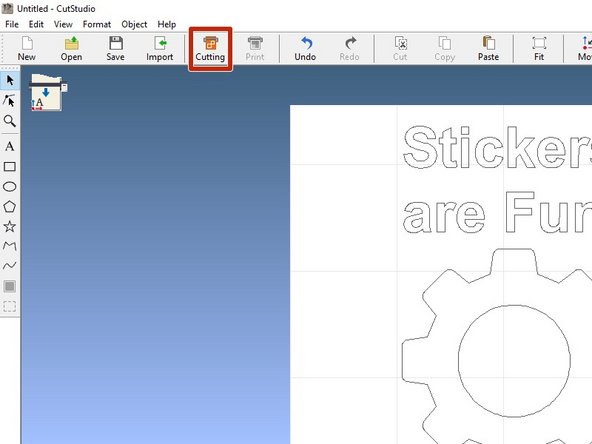
To start the cutting process, click on Cutting on the top toolbar.
-
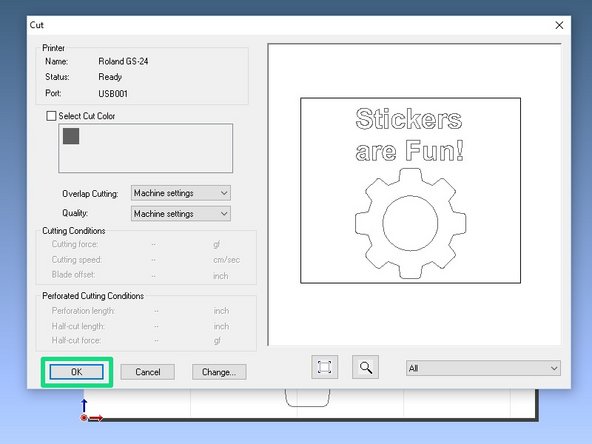
For finer detail cuts, use the “HEAVY” setting for cutting speed.
-
Click OK in the following window. The machine will now cut your design.
-
Please make sure to log out of the computer after you have sent over your cut and are done using it.
-
-
-
If you used a roll of vinyl, you will need to cut off the length of vinyl you used. Push the down arrow key on the vinyl cutter until your sticker is beyond the knife guide. Use an exacto or utility knife to cut along the knife guide and remove your vinyl from the machine.
-
Lower the loading lever and remove the material or the remaining vinyl roll.
-
If you used a vinyl roll, roll up the excess vinyl and return the roll to the storage location.
-
Remove the Vinyl Cutter training card from the badging box and return it to a technician.
-
Remember to log out of the computer when you are done.
-
-
-
Use tweezers or a knife to remove the outer material from the rest of your design. This process might take some time depending on the complexity of your design.
-
Hint: Using an X-Acto knife is helpful during this process, particularly when removing small pieces of vinyl from negative space.
-
WARNING: SHARP TOOLS! Be careful when using the knife as it is extremely sharp.
-
-
-
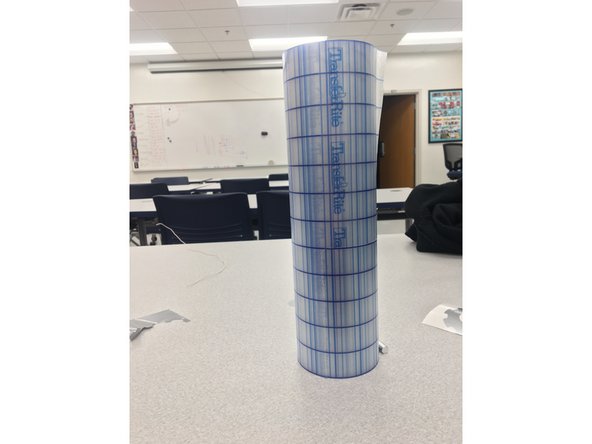
Pick up a roll of transfer tape from the same place the vinyl is stored. The transfer tape will allow you to transfer your sticker from the backing material to where you want to adhere it.
-
Measure the size of your sticker and cut out the required size of application tape to fit over your entire design. The tape can be slightly larger than your sticker.
-
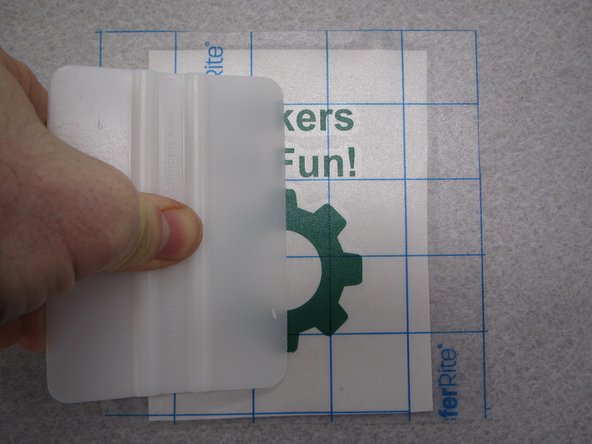
You should use the white plastic squeegee to firmly apply the tape to your sticker and ensure there are no air bubbles between the tape and sticker.
-
At this point your sticker is portable and you can take it with you wherever you would like.
-
-
-
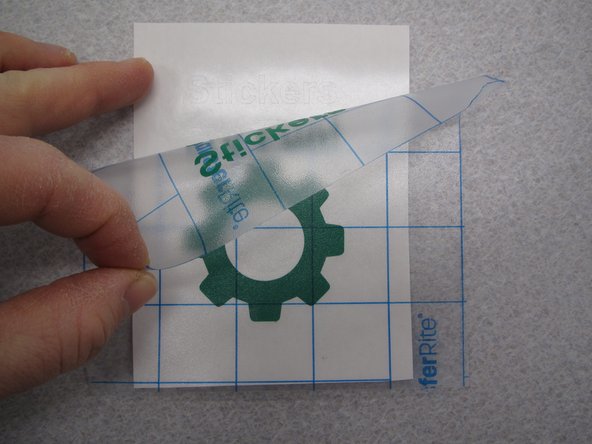
Peel back a corner of the transfer tape and remove the sticker from the backing material. Pay attention to small shapes and fine detail in your sticker to make sure they are removed properly.
-
If a piece of your sticker does not come up with the transfer tape, lay the tape back down and go over the problematic section again with the squeegee.
-
Once you have your tape/sticker removed, place it where you would like it and again go over it with the squeegee. A credit card will work as well.
-
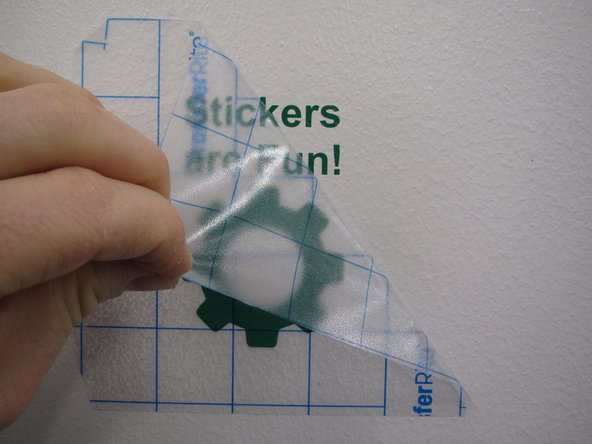
When you are confident your sticker has been properly adhered to where you want it, carefully peel back a corner of the transfer tape.
-
Continue pulling off the transfer tape slowly, trying to maintain a 45 degree angle for best sticker adhesion, until all of the tape is removed.
-
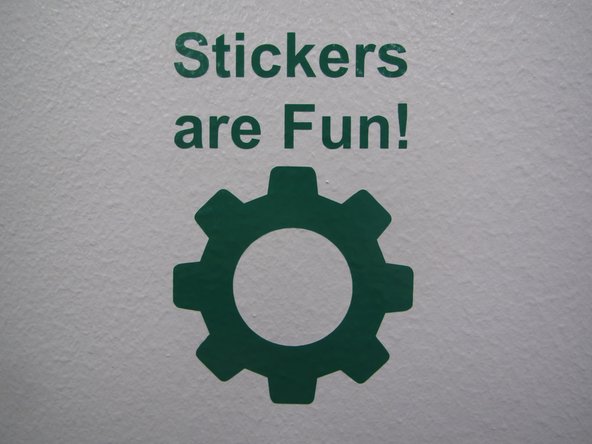
Congratulations! You have made your first sticker.
-
-
-
Please make sure the workstation is logged out before leaving
-
If you don't log out properly, the vinyl cutter can cause connection issues for other users
-


Cancel: I did not complete this guide.
57 other people completed this guide.