Video Overview
Featured Document
-
-
To connect your device refer to the previous tutorial: Getting Started on Edge Impulse with Arduino Nano 33 BLE
-
Open Edge Impulse and Log in to your account. Once you've done this, you will be taken to your projects. Either create a new project or select one you've created.
-
I am selecting my project named "Motion_Activated_LED" in the RED box.
-
Be specific with your titles.
-
You'll then be taken to your project's main screen. Here you want to select "Collect new data" in the ORANGE box.
-
NOTE: If you've already connected your device through using edge-impulse-daemon, continue. If you have not, please refer to the previous tutorial, Step 13.
-
Once your device is connected, you will see it in "Devices" listed in the GREEN boxes.
-
-
-
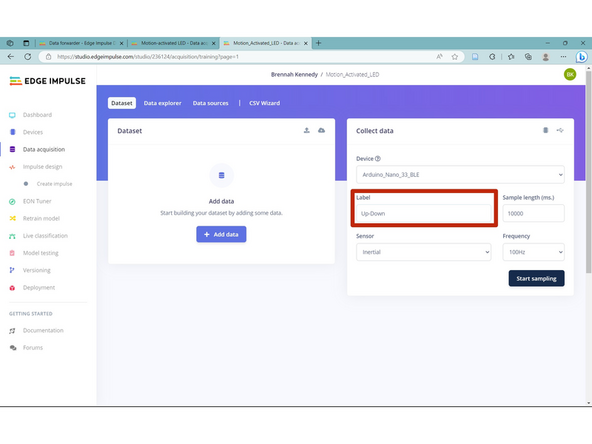
For data collection, select "Data Acquisition" in the index on the left of the screen (in the RED box).
-
You will also see your device located in the "Collect Data" box.
-
Since we are doing motion, go to "Sensor" (ORANGE box) and use the drop down menu to select "Inertial"
-
NOTE: You may also have "Built-in Accelerometer" so select either one.
-
You will see "Sample Length" listed as 10000 s, so for this case, we will be collecting data in 10 second intervals, though feel free to increase.
-
Don't do more than 5-minute sampling intervals because you will overload the web browser.
-
-
-
Since we are focusing on motion, pick three or four simple movements. This tutorial will be assessing up-down, side-to-side, and idle. This is when you physically move the Arduino.
-
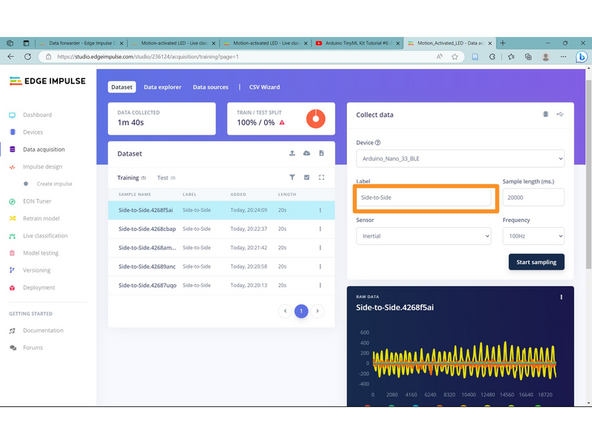
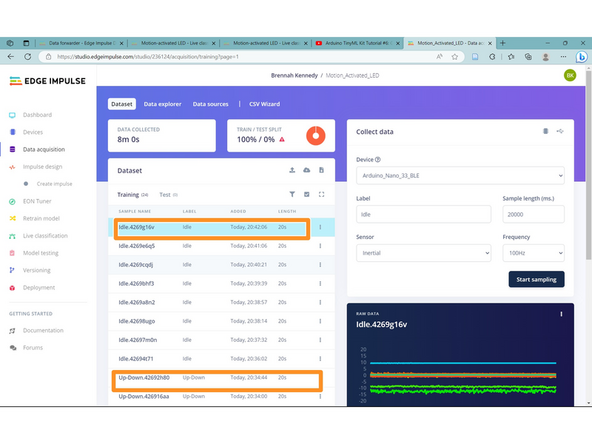
Type each classification into "Label" and repeat data collection until you have approximately 5-10 minutes of data (more the better)
-
In the ORANGE boxes, you can see the labels and how they appear in data collection. (images 2 and 3)
-
NOTE: Try to vary your movements, make the motion long and slow, others short and fast. Try to account for as many irregularities in movement as possible. This will result in better training data.
-
-
-
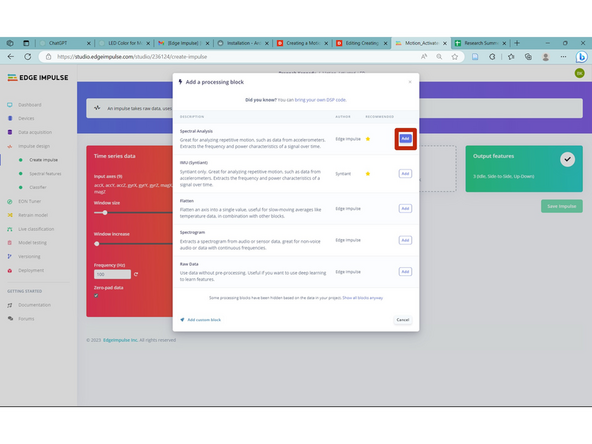
In the tools bar on the left, located "Impulse Design."
-
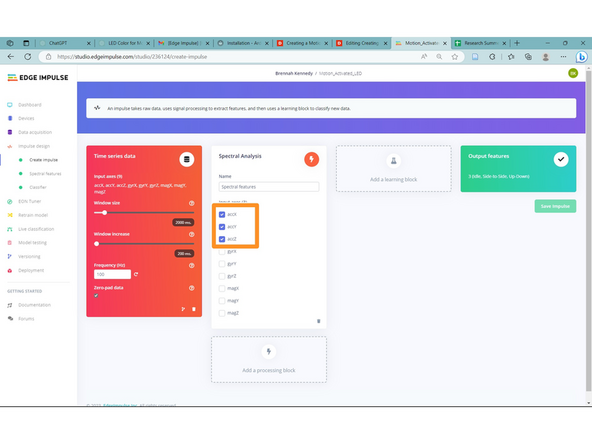
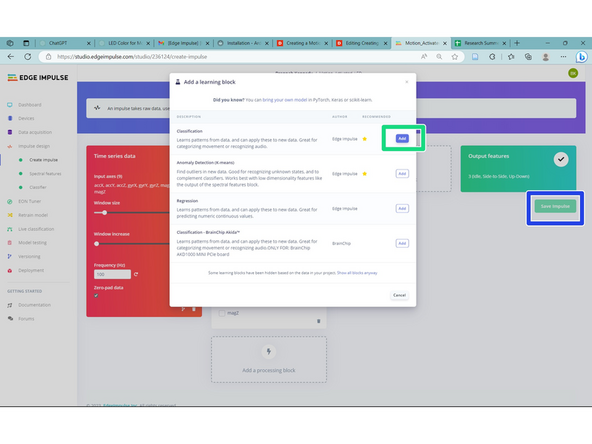
Once selected, you will must add a "Processing Block." When selected, a drop-down menu will prompt you to pick one or more block, we will be using "Spectral Analysis" (RED box).
-
Only select accX, accY, accZ since we are only working with accelerometer measurements.
-
Next, add a Learning block labeled as "Classification." (GREEN box)
-
Once you've added your blocks, select "Save Impulse" on the far right located under "Output Features."
-
-
-
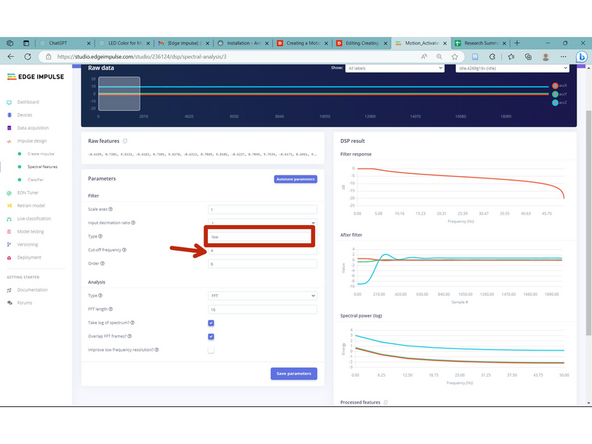
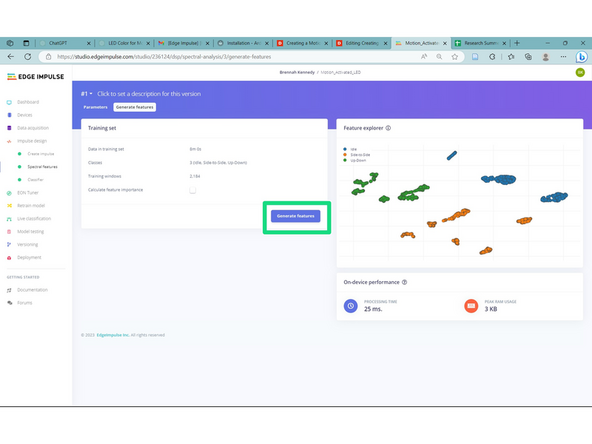
Found in "Spectral Feature" in the index bar on the left, you will be given your raw data.
-
In the parameters, in "Type" select "Low" and change the cut-off frequency to 4.
-
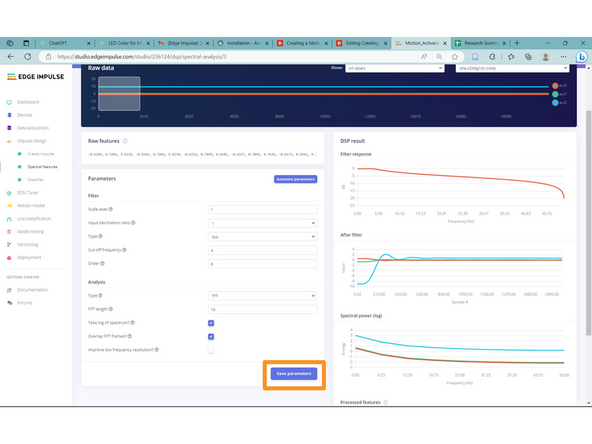
Don't change anything else, and then select "Save Parameters."
-
This will take you to "Generate Features" where in order to see your data as depicted, you must select the purple button "Generate features." Once this is done you will see your data in "Feature Explorer."
-
NOTE: This generation will take some time.
-
Troubleshooting: If your job fails, close out the tab and reopen your Edge Impulse project. Everything will be saved, and then try generating again.
-
-
-
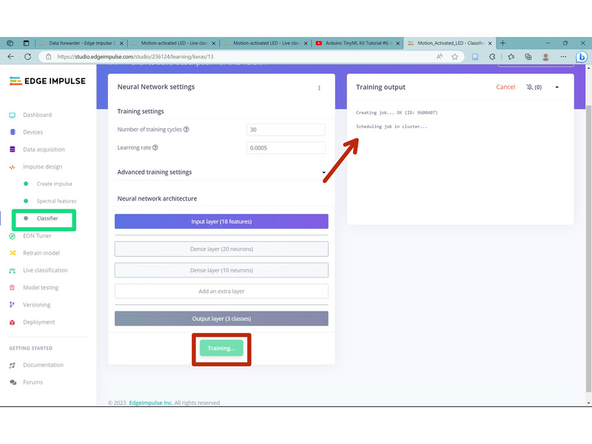
In the index on the left, select "Classifier." Here is where you train your data set.
-
In the first image, keep everything the same and then select "Start Training" (RED arrow). This will take some time.
-
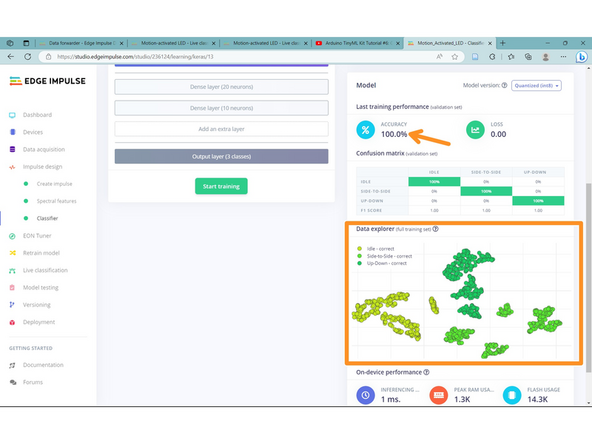
Once your data's training is completed, you will have a Model of your data along with its accuracy (ORANGE arrow and box).
-
You will want a higher accuracy (between 80% and 95%). 100% is fine, but it may show that it has memorized the data and won't perform well when it has variations.
-
To get in this range, you will need to collect more data with larger variations.
-
-
-
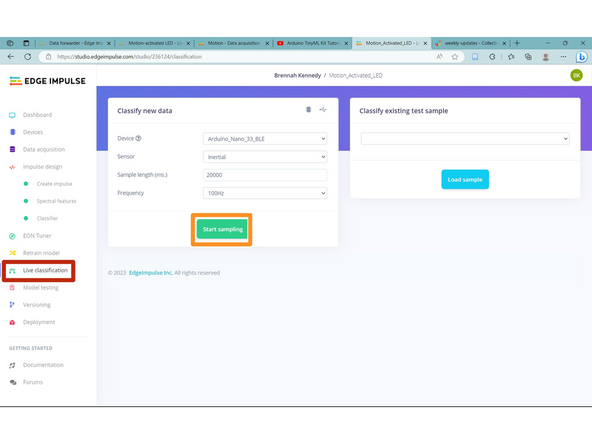
In the Index on the left of the screen, select Live Classification. You want to create a test set to train your data further where you manually create new sample data.
-
Select "Start Sampling" and begin to do one of the three motions. You want to evenly distribute your training and test data, so do approximately two tests for each movement (6 tests total).
-
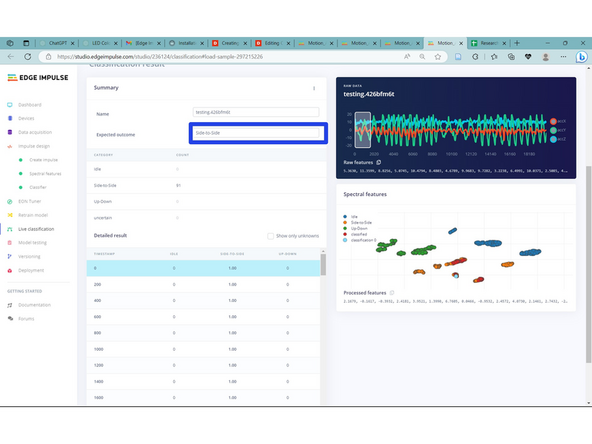
When you test the data, you will see something like in Image 2. The "Expected Outcome" will be listed as "testing," change this to whatever motion you were doing. In this case I was moving it Side-to-Side.
-
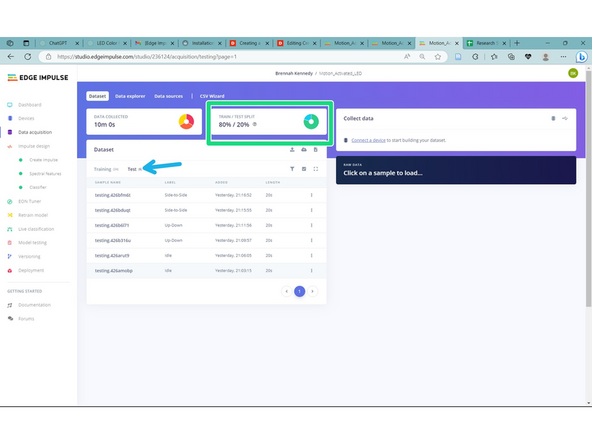
Once you've gotten about 6 tests, go back to "Data Acquisition" and select "Test (6)" (BLUE arrow).
-
In the GREEN box, you can see that it has achieved the recommended proportion of 80% to 20%.
-
To get this ratio, continue collecting test samples in "Live Classification."
-
-
-
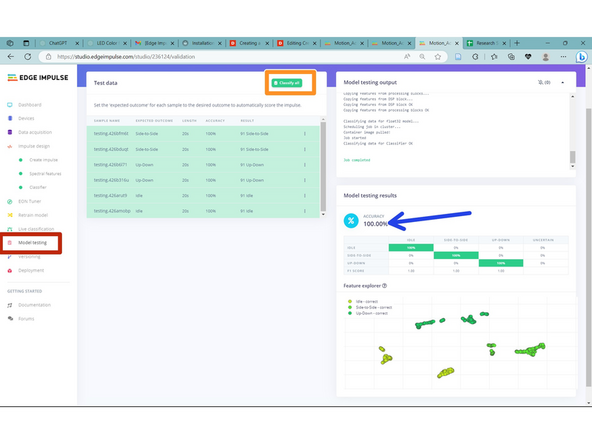
To test your model data, go to "Model Testing" on the left. This will take you to use your test data and see how accurate your model is.
-
To see your results, select "Classify All" in the ORANGE box.
-
This will output the image on the right of the Model Testing Results. You want to make sure your accuracy is high.
-
-
-
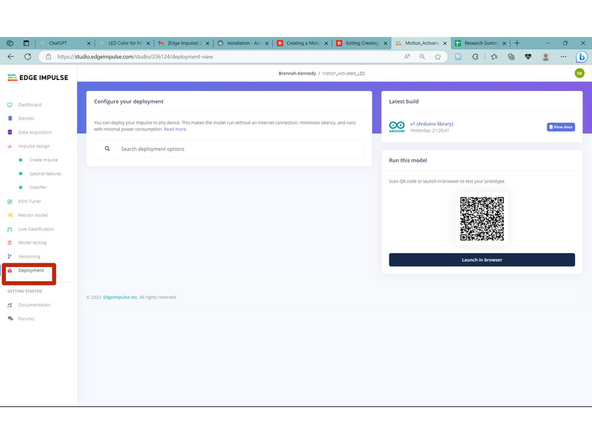
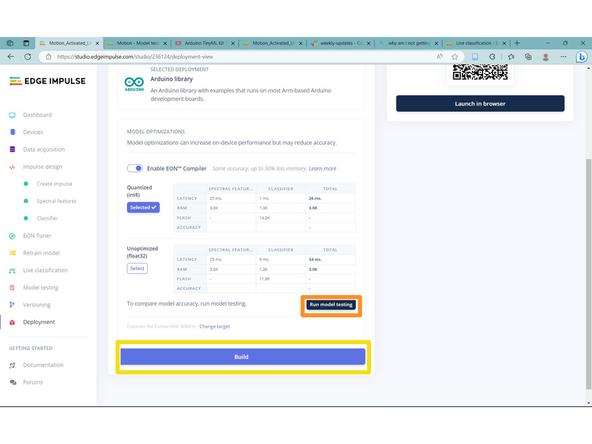
Once you're done modeling, go to "Deployment" in the index.
-
In the "Search Deployment Options" type in Arduino Library and select the only result.
-
In the second image, your screen will appear like this once you've selected the Arduino Library. Next, is to select "Run Model Testing" (ORANGE box).
-
Once you tested your data, select "Build" (highlighted YELLOW).
-
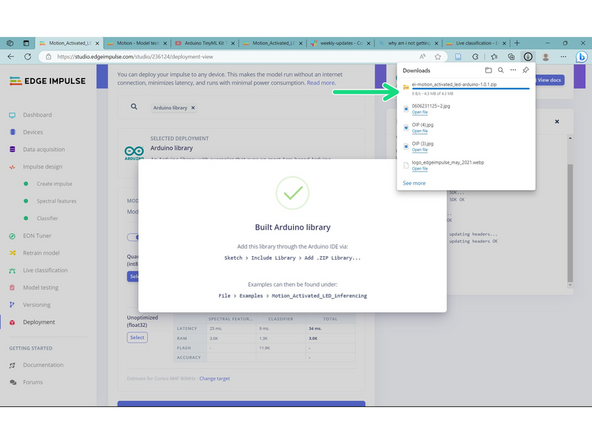
After you built your library, you will see a file download (highlight by the GREEN arrow).
-
Move download to your designated file created in the first tutorial.
-
-
-
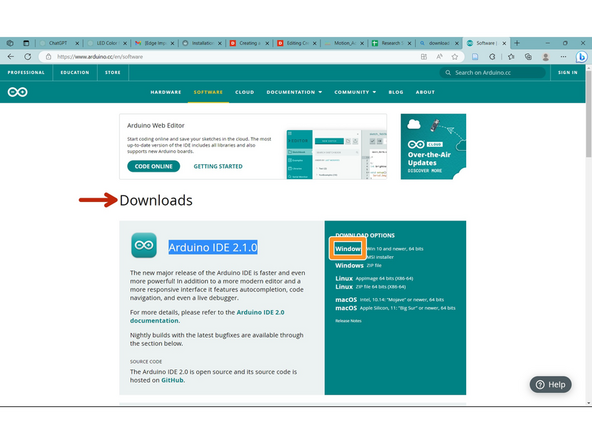
To deploy the project you just created, download Arduino IDE by going to this website: https://www.arduino.cc/en/software
-
Once opened, go to "Downloads" and Arduino IDE 2.1.0.
-
Then select your devices download. Since I am running a Windows, this is the download you want to select (Select inside of the ORANGE box).
-
Once downloaded, open Arduino IDE.
-
-
-
To run Edge Impulse code on Arduino IDE, please follow the video on library downloads: (Stop at 5:40) https://youtu.be/LXgL850p7b0?t=140
-
Continue until all required libraries are downloaded.
-
If you haven't done so already, download Arduino Mbed OS Nano Boards.
-
-
-
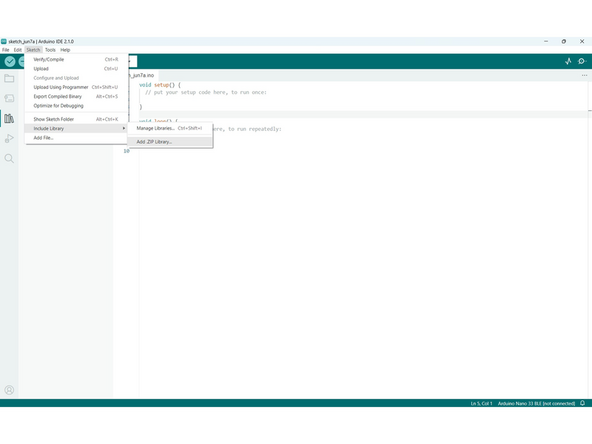
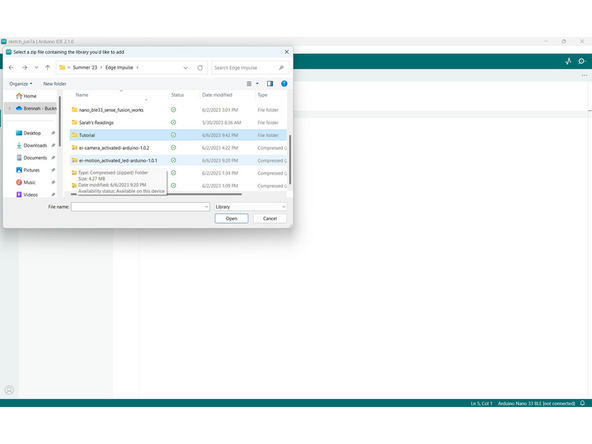
Once you have Arduino IDE open, go to Sketch > Include Library > Add .ZIP library...
-
Go to your designated folder for Edge Impulse and locate the ei-motion_activated_LED file (second image). Double click and wait for the library to download.
-
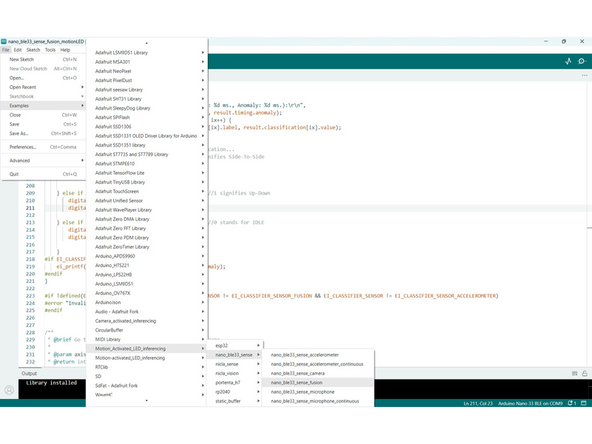
Next (third image), open File > Examples > Motion_Activated_LED (file name) > nano_ble33_sense > nano_ble33_sense_fusion. Then click and your code with open.
-
NOTE: If your library is not there, then reload Arduino IDE by closing and reopening it.
-
-
-
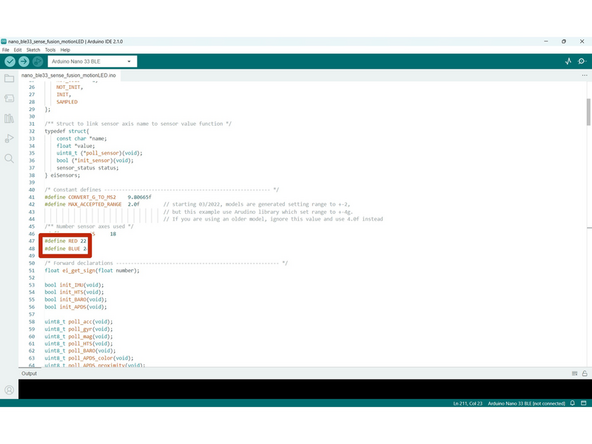
Now to extend the code and add in snippets to make the LED turn off when Idle, Red when labeled as Side-to-Side, and Blue labeled as Up-Down.
-
Scroll down on your Tutorial Page and locate the section, after the finish line, stated as "Attached Documents." Open the pdf which will have copy and past code for the LED snippets. Also, you can scroll up to Feature Documents (underneath video) if you can't open it in a new window.
-
NOTE: Make sure all indentations align as depicted in the images. (MAKE SURE THE UPPERCASING, LOWERCASING, AND INDENTATION IS EXACT)
-
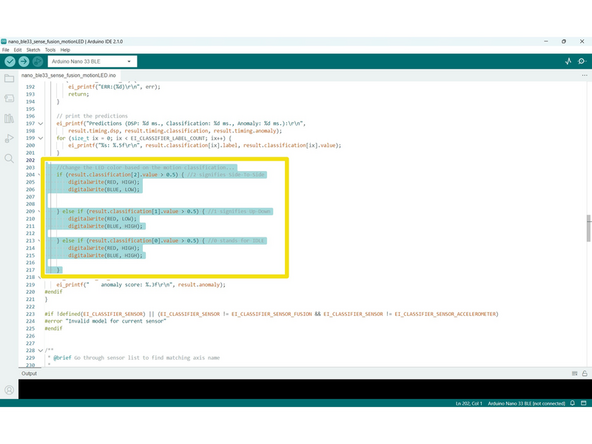
First, define the LEDs under #define N_SENSORS 18.
-
#define RED 22 > Press ENTER > #define BLUE 24
-
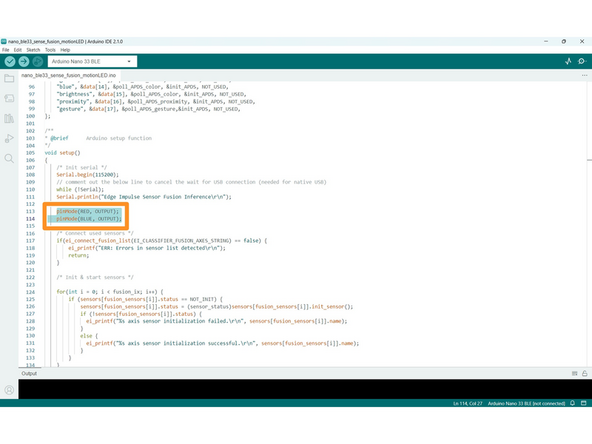
Find Serial.printIn("Edge Impulse Sensor Fusion Inference\r\n"); and print
-
pinMode(RED, OUTPUT); > Press ENTER > pinMode(BLUE, OUTPUT);
-
Find the statement: ei_printf("%s: %.5f\r\n", result.classification[ix].label, result.classification[ix].value); } and print the statement from the pdf.
-
-
-
Now, if you haven't done so already, close your Command Prompt window so that you disconnect your device from Edge Impulse.
-
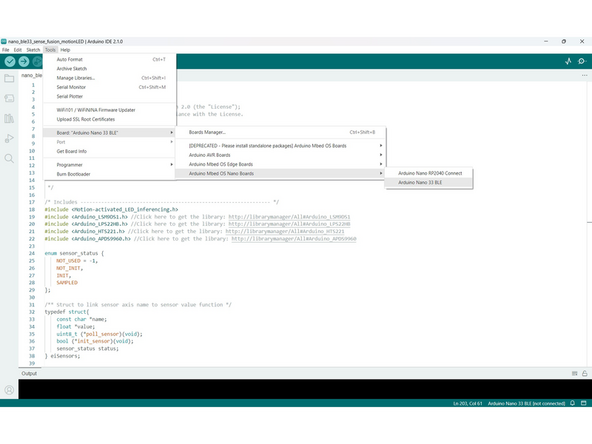
Now, on Arduino IDE, go to Tools > Board > Arduino Mbed OS Nano Boards > Arduino Nano 33 BLE (first image)
-
In the second image, go to Tools > Port > select your only COM port. Now your board is selected and you can upload your code.
-
In the third image, select the button highlighted in PURPLE.
-
Your code will take a bit to upload, but once it has, open your serial monitor by clicking Ctrl + Shift + M or Tools > Serial Monitor.
-
NOW START MAKING THE MOTIONS WITH YOUR BOARD AND WATCH THE COLOR CHANGE!
-