Introduction
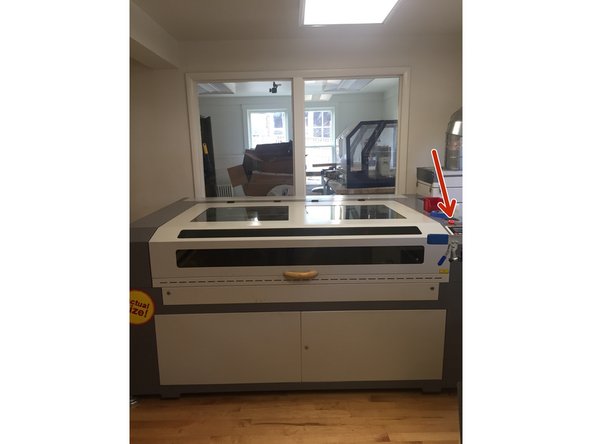
The BOSS Laser Cutter is a high end machine utilized to engrave and cut a variety of materials to create products. You may NEVER cut PVC because of the poisonous chlorine gas that it would release. Metal may not be cut on this machine at this time either. Popular materials you can cut or engrave include wood (up to 6mm), Acrylic, Paper, and Cardboard. You may also engrave glass. An exhaustive list of materials this machine can cut/engrave can be found at: https://www.bosslaser.com/laser-settings.... Any other materials must be approved by a student employee before use.
Tools
Parts
No parts specified.
-
-
All files will ultimately need to be opened through RDWorks. RDWorks accepts DXF, TIFF, and Bitmap files . JPEG images must be converted to a bitmap through the program InkScape prior to importing in RDWorks.
-
Files can be created through programs including InkScape, Photoshop, Illustrator, Rhino, AutoCAD, etc.
-
-
-
If you do not need to convert an image from JPEG to Bitmap, you can skip to step 5.
-
Open the program InkScape.
-
Import your image from File--> Import.
-
Click Ok.
-
-
-
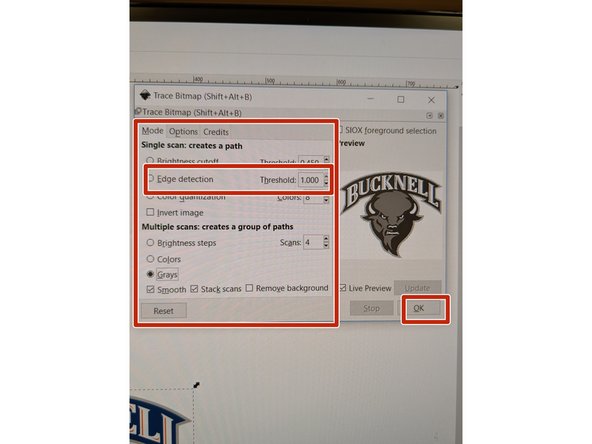
Right click on your image and select Trace Bitmap.
-
In the Trace Bitmap window , check the box that says "Live Preview". This will allow you to see the alterations your making to your image in the smaller window above.
-
Select "Edge Detection" and play around with the Threshold and Color numbers in order to get a design that looks like your own. Click "Ok".
-
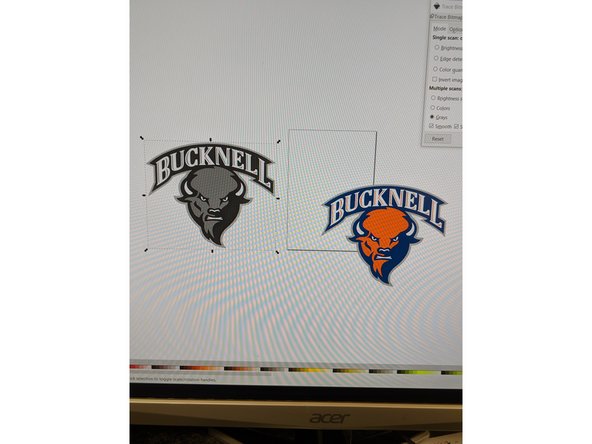
Close out of the "Trace Bitmap" Preview Window.
-
-
-
Now you can delete out the original image.
-
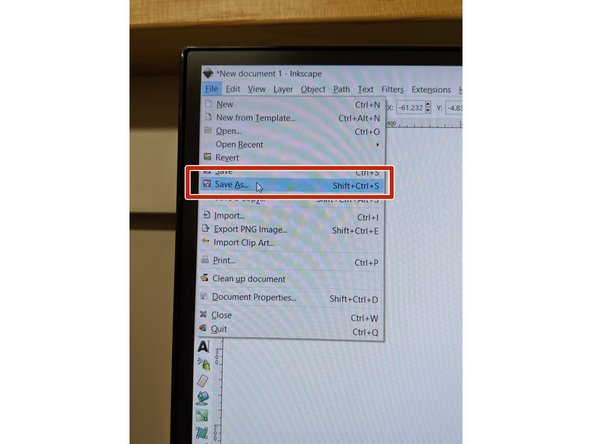
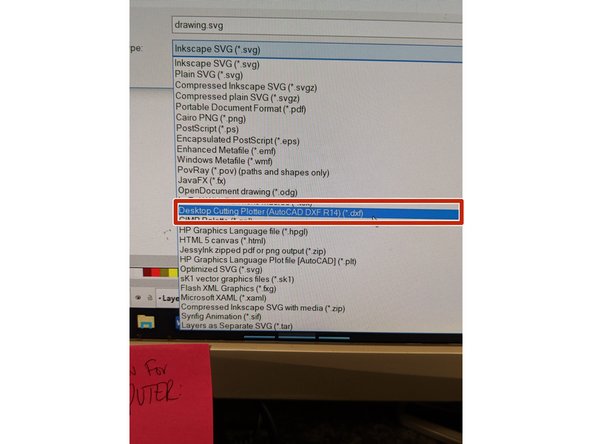
Save your file as a .dxf by going to File -> Save As -> .dxf.
-
This will take all of the different line segments in your original image and save them as separate components so you can alter them each separately once in RDworks.
-
-
-
Once your image is in an acceptable file (BITMAP, DXF, TIFF) open the program RDWorks.
-
RDWorks is the graphics program that came with the laser cutter and is used to translate your designs so the laser can cut/raster(engrave). All dimensions are in mm. This tutorial will cover the basics of what you can do with RDWorks.
-
-
-
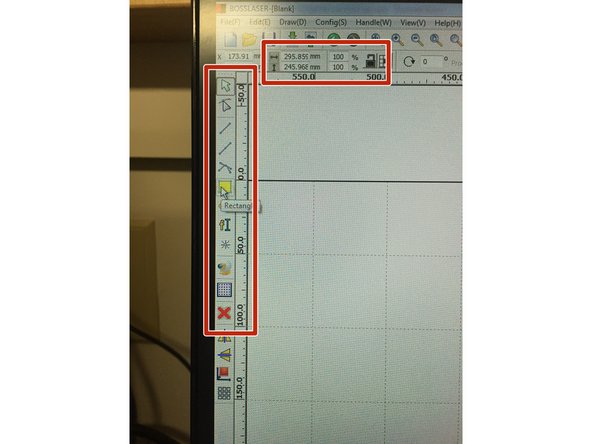
Import your image or design into RDWorks by going to file-> import.
-
Resize your image but typing in the correct length and width next to the horizontal and vertical arrows in the top toolbar. These measurements should be in mm.
-
Click the lock icon at the top left of the screen so the design will lock in positioning and will keep scaled proportions when resizing.
-
Draw a rectangle around your image (which you will end up setting to "cut").
-
This rectangle will allow us to reuse material easily.
-
-
-
Creating lasercut layers is important because the power and speed settings that you establish for your material will instruct the machine whether it should cut or engrave your image.
-
In the top right hand corner of your screen, you should see at least one color followed by different settings. You will be altering these settings based on the material you use and what you wish to do.
-
If you would like your lasercut image to have different settings (ie. one part cut and another part engraved) each segment must be correlated with a different color. These are called layers.
-
To create layers, click the line representing the segment you want to change. Then click a new color in the bottom left corner of your screen.
-
If you are selecting multiple lines, you can click and drag a box around all of those lines to change multiple lines at once.
-
The line you clicked should now be that new color and a new layer should have been added in the top right hand corner of the screen.
-
-
-
To change the settings for the layer, double click on the color of the layer you wish to alter. This is located in the top right-hand corner of the screen.
-
The settings you decide are determined based on the material you've selected and how you want to alter the material (cut/engrave/etc.) Remember, we never cut PVC!
-
A dialogue box will then pop up called the "Layer Parameter". In this section, you are going to specifically focus on changing the Speed, Processing Mode and Min Power/Max Power.
-
The power parameter describes the output of power of the laser. Typically, the higher the power the darker the engraving. (Please follow recommended settings on the white board in the MakerSpace).
-
The speed parameter describes the movement of the laser. Typically, the slower the laser movement the longer the exposure time. For example, a photo engraving would have a slower engraving time.
-
-
-
In your layer parameters, you are going to keep the "Is Output" on Yes.
-
The Speed (mm/s) you will be adjusting based on the material you are using (see settings below.
-
Leave the "If Blowing" setting on Yes.
-
The "Processing Mode" will tell the laser whether you want to cut or engrave your image. If you choose the setting "Scan" you are engraving/rastering the image. If you choose "Cut" you will be cutting your image. If you choose "Dot" your image will comprised of many dots.
-
If you want to just create outlines of your image, use the "Cut" setting under "Processing Mode" but set the power and speed settings to those of a raster.
-
Under the Min Power/Max Power you are going to want to uncheck the number 2 box and input your power setting based on the material you are using and settings below. The mix/max should be the same number.
-
You do not need to change any of the other settings but instead just press "Ok".
-
The settings for different materials can be found on the white board located in the makerspace or at: https://www.bosslaser.com/laser-settings...
-
-
-
For each layer you are cutting/rastering, you are going to want to repeat the "Changing Layer Parameters" step.
-
-
-
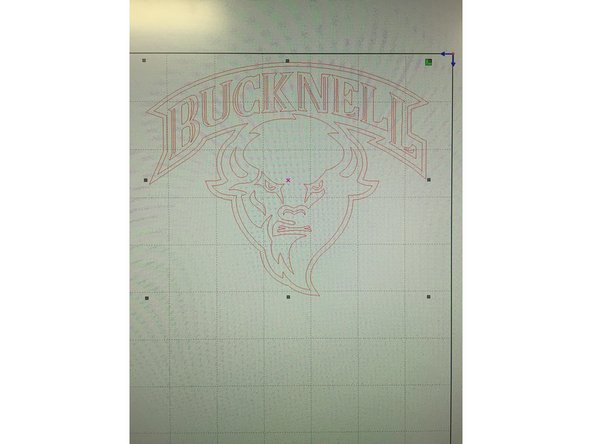
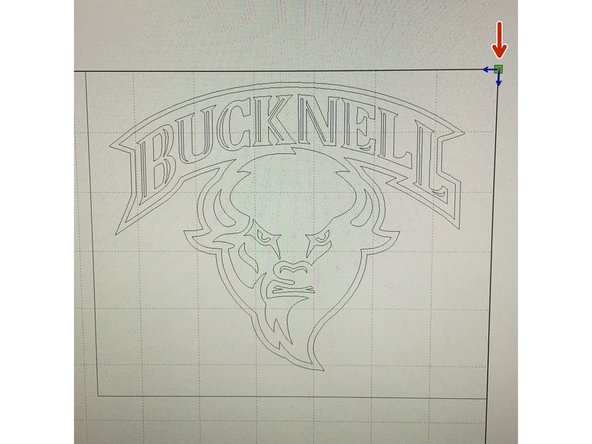
Before saving your file, make sure all renderings are located in the top right-hand corner of the laser cut template because this is the point of origin.
-
To move your file, you must select the entire image. Click and drag outside of your image to select it in its entirety. Then grab the pink "x" in the middle of your image and drag it to the top right-hand corner.
-
To save your file, you want to insert a flash drive into the computer and click "Save to UFile" located in the bottom right-hand corner of the screen.
-
Be sure to also save your file under "File -> Save As" so you can have a working file for later edits. If you just save to a USB via "Save to UFile", you will not be able to open this document at a later time.
-
Program may default to saving to the documents folder so make sure you are saving the file to the inserted flash drive.
-
Create a unique name for your file and press save.
-
A box will pop up with a mix of characters/symbols --- this means your file has been successfully saved.
-
Remove your flashdrive.
-
-
-
The laser cutter system has three main components, all of which must be turned on as the first step in operating the system.
-
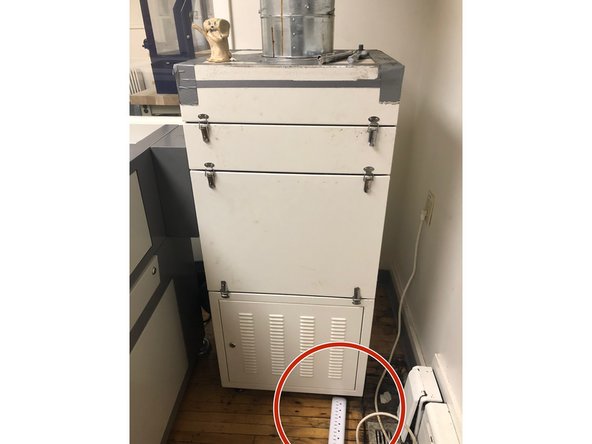
First, turn on the exhaust system on the right side of the laser cutter using the power strip on the floor.
-
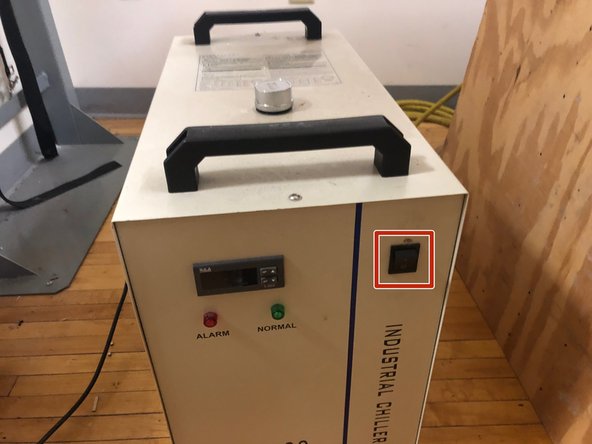
Next, turn on the chiller located to the left of the laser cutter. It will beep several times. This is normal.
-
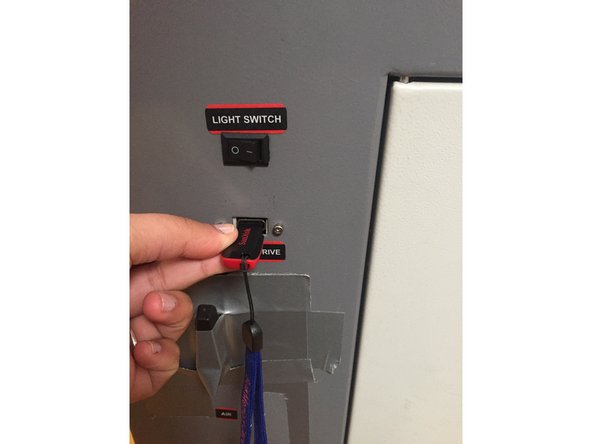
Finally, turn on the laser cutter itself by turning the key on the laser cut machine.
-
At this point, there are probably a lot of loud noises going on around the laser cutter between the machine, chiller and exhaust system. Please close both doors to the space to remain respectful of those working outside of the room.
-
Remember you MUST stay in the MakerSpace for the entirety of your piece cutting/engraving.
-
-
-
Take the flashdrive that you saved your laser cut file to and insert it on the right side of the laser cutter close to the bottom of the machine.
-
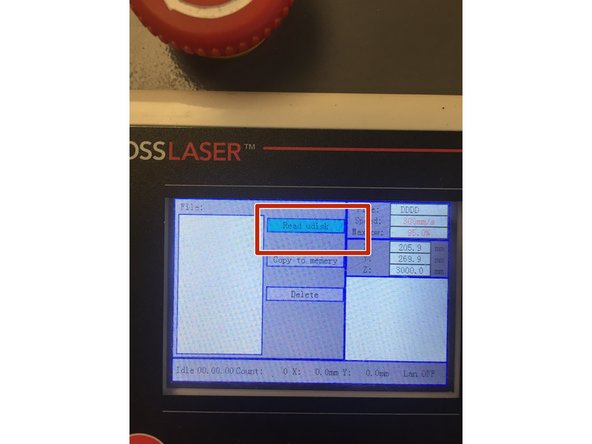
Press the "File" button of the keypad.
-
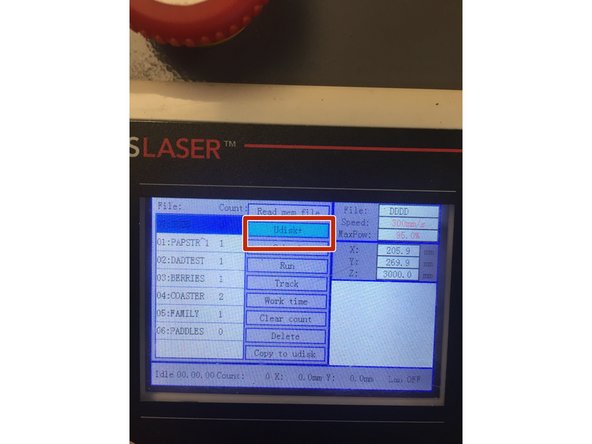
Press the arrow to the right and then down arrow until "Udisc+" is highlighted. Then press the "Enter" button.
-
-
-
The program should have "Read Udisk" highlighted in light blue. If it is not, scroll over the button "Read UDisk" until it is highlighted.
-
Press "Enter".
-
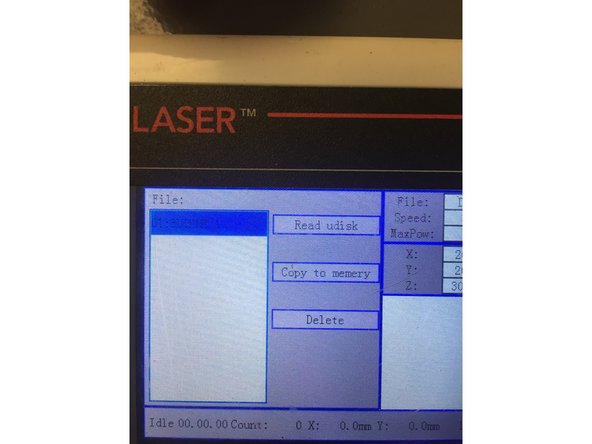
You should now see the files saved to that particular flash drive.
-
Press the left arrow and then using the up/down arrows click until you have found your file. Highlight the file you want, and then using the right arrow click to the menu options on the right side and press the down arrow until you have highlighted over "Copy to Memory". Press Enter.
-
Your file has now been saved to the laser cutter and you no longer need the flash drive. Press "ESC" twice to return back to the main menu.
-
-
-
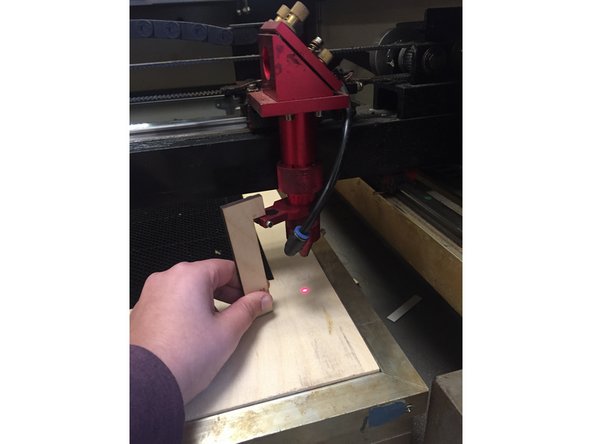
Before we place our material on the laser cut bed, it is important to make sure you material will not hit the laser otherwise it will damage laser.
-
Press the "Z/U" button located on the keypad. With "Z Move" highlighted, use the left arrow on the keypad to lower the laser cut bed to a position where you can safely put your material under the laser.
-
Take the focal length tool located in the red box on the laser cutter and position it on the ledge of the laser with the long part of it's "L-shape" towards your material and the short end parallel to the bed.
-
While still under the "Z Move" press the left and right arrows to move the laser bed so the focal length tool is touching your material but not too tight. Your laser should now be focused.
-
-
-
Press “ESC” to return to the main menu page. This menu should look like a blank screen.
-
Now you can use the arrows on the key pad to move the laser left and right and back and forth.
-
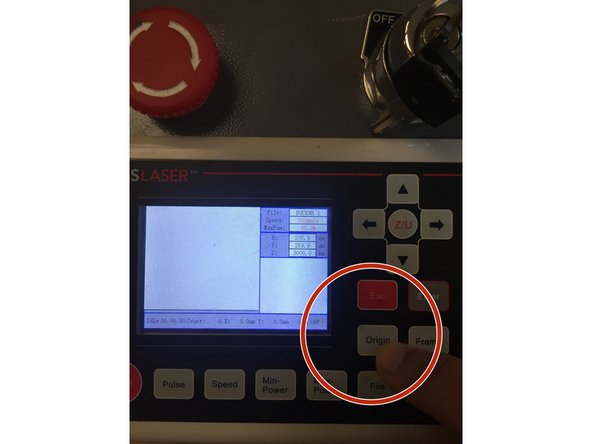
Move the laser head until it is in the upper right corner of your material. Then hit the button called “Origin”. This will set the X=0, Y=0 point to the location of the laser head.
-
Since we set the origin of your file to the top right hand corner in the initial document, this will be the starting point of your cut/engrave on the laser cutter.
-
-
-
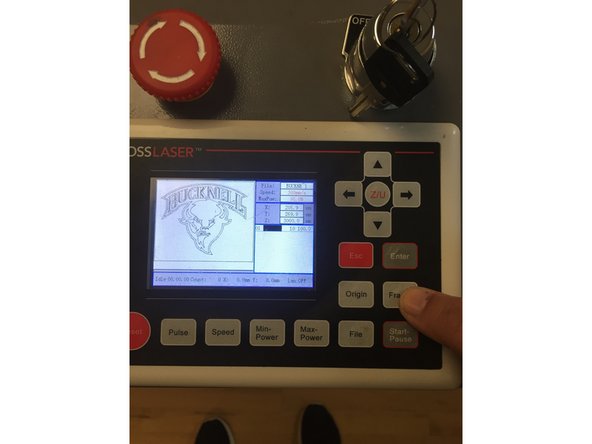
Once your piece is in the correct origin, you are going to want to Frame your image.
-
Framing your image allows you to ensure that the size of the image you are engraving/cutting fits on/within the material you are using.
-
Press the "File" button and then press the up and down keys until you have your file highlighted.
-
Press Enter. Your file should be an image on the screen now.
-
Press the "Frame" button. The laser will begin tracing a box outline of the parameters in which your image will be cut within. This should be able to help you better position your material. You typically want your entire material to be found within this framed box.
-
-
-
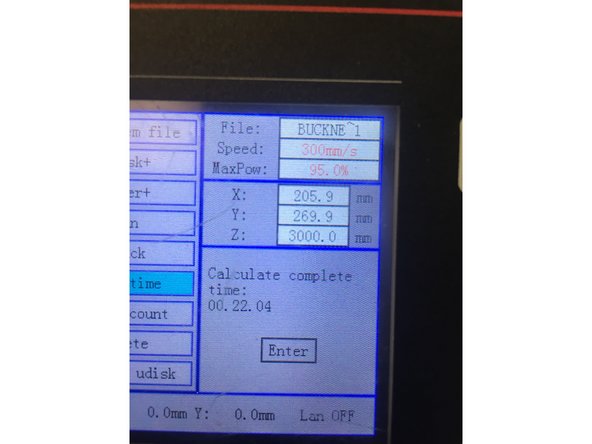
It can be really important to check how long your file is going to take to cut especially because you cannot leave the machine while it is working.
-
To do this, press "File" and press the up and down arrows until your file is highlighted.
-
Then press the right arrow to highlight the menu next to the files.
-
Press the down arrow until you get to the option "Work Time".
-
The machine will calculate the length of your file cut and will display it in the screen to the right side.
-
If you cannot stay for the length of your cut do not start the machine. Come back when you have more time. A student employee cannot watch the machine on your behalf.
-
-
-
Now that your material has been framed you should be ready to cut/engrave!
-
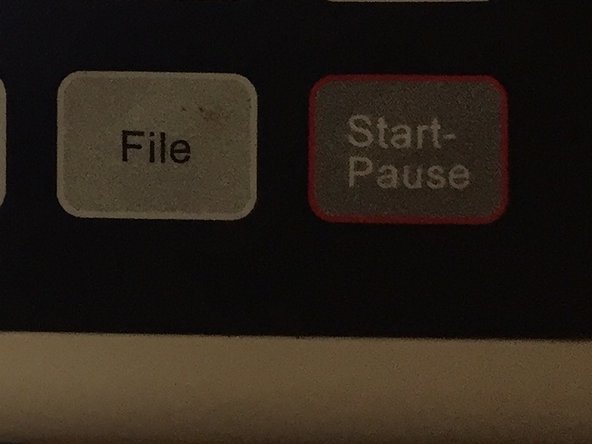
Bring your file back up to the screen by going "File" -> "Enter".
-
Make sure the laser cutter lid is closed.
-
Press the "Start/Pause" button to begin cutting!
-
Don't forget you must stay with your file the entire time! This is important just in case a fire begins within the laser. (See next step on how to do this).
-
-
-
When your file is all done being cut and/or rastered, turn off all 3 machines that you turned on at the start (The machine itself, the exhaust, and the chiller). Close the lid of the machine.
-
Remove all of your materials and clean out the laser cut bed so the next student can use it. Put your scrap material back in the inventory room.
-
If you engraved an image, rinsing it off with water and wiping it down will clean the dust and residue producing a sharper image.
-