Introduction
Using electroluminescent wire, you can create a "neon" sign without dealing with the struggles of using actual neon! You'll need certification on the laser cutter.
Tools
Parts
-
-
You'll need some EL wire, and EL wire inverter, and two AA batteries. You'll also need super glue and masking tape from the maker-e closet and a piece of acrylic
-
The tools needed for this projects are Inkscape and the laser cutter.
-
-
-
Open Inkscape or download it here. Inkscape is also available on the computers in the maker-e
-
If you've never used inkscape before, I highly recommend watching this short video to learn the basics before you begin this tutorial
-
Type out some text or find an image you'd like to use. The image can be any size!
-
EL wire can't do sharp corners or tight bends, so try to pick something simple with rounded edges!
-
-
-
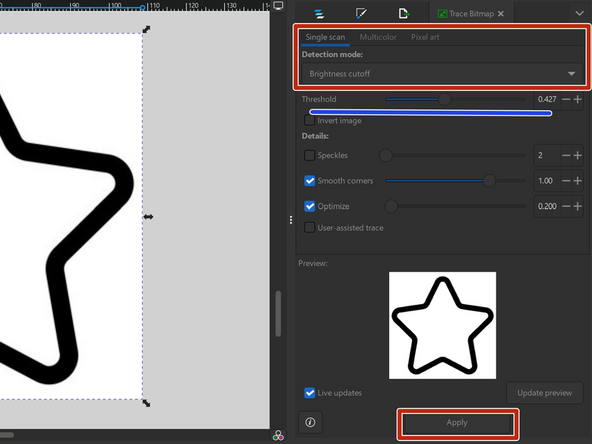
Hit Shift + Alt + b to open the trace bitmap menu.
-
Play around with the threshold slider until the outline looks good.
-
Hit apply at the bottom, and Inkscape will generate a vector graphic of the image.
-
Select the new graphic and drag it off to the side. Delete the original image.
-
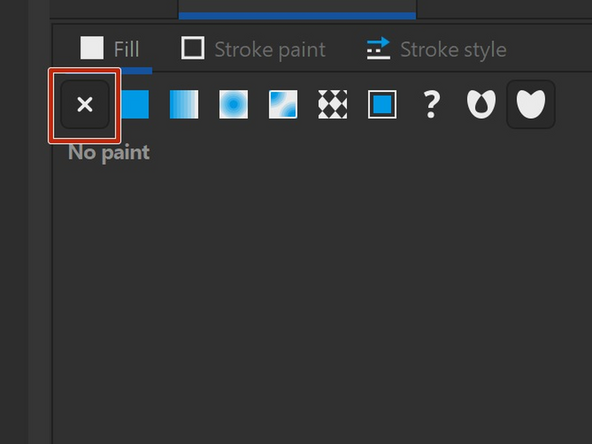
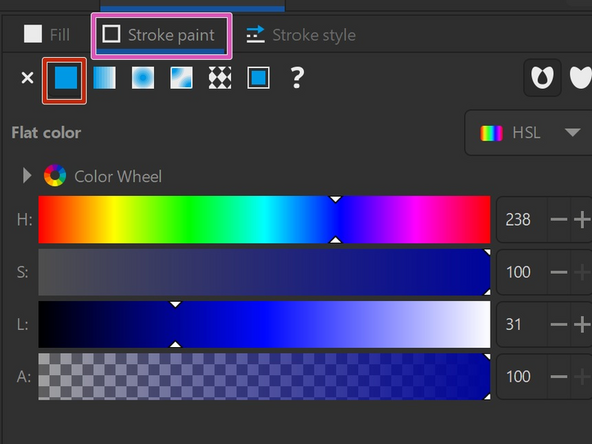
Use Shift + Ctrl + F to open the fill and stroke menu. Remove the fill. Switch to the stroke menu and add a stroke.
-
-
-
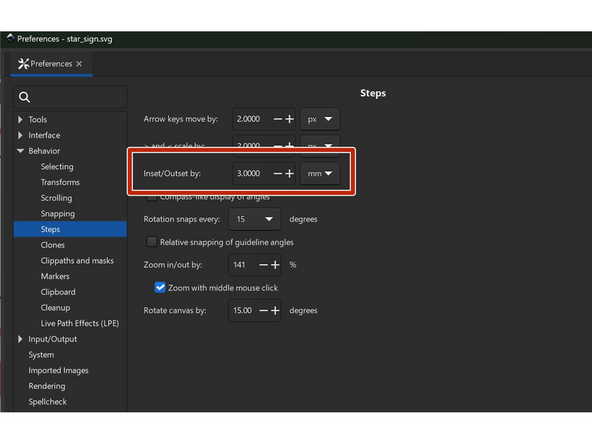
Outsetting the design will create the outline for the sign
-
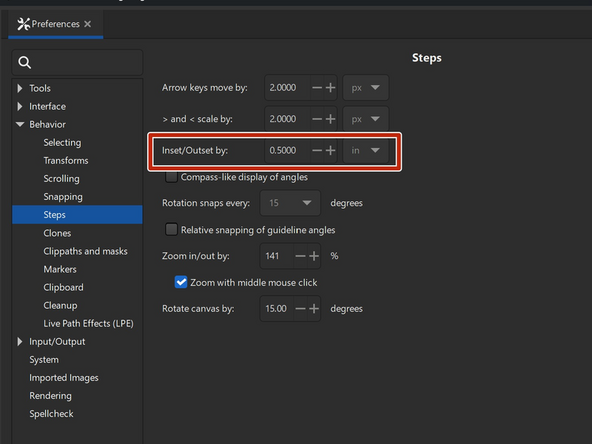
Go to edit>preferences>behavior>steps and change the outset/inset to 0.5 inches
-
Select the design and use ctrl + D to duplicate the design
-
Press ctrl + ) to outset the design. Inkscape will outset the duplicated design.
-
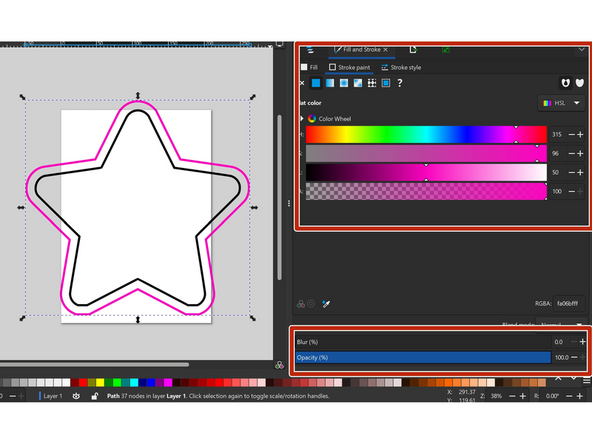
Change the stroke color of the outline and check that the opacity is set to 100%
-
-
-
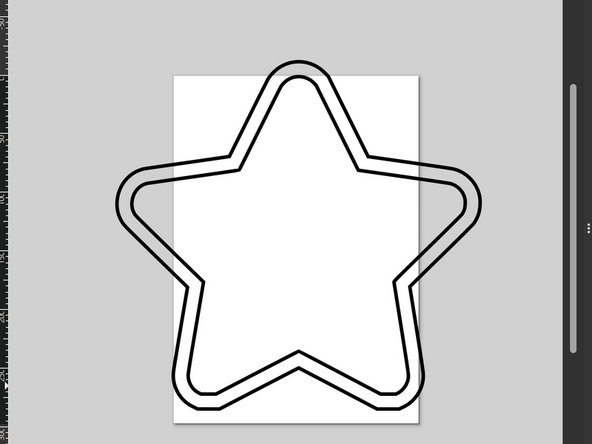
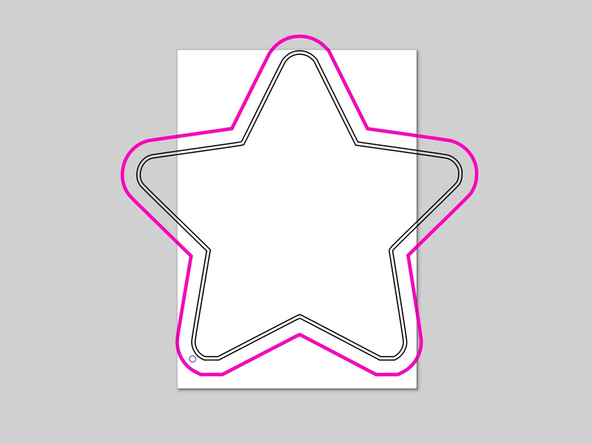
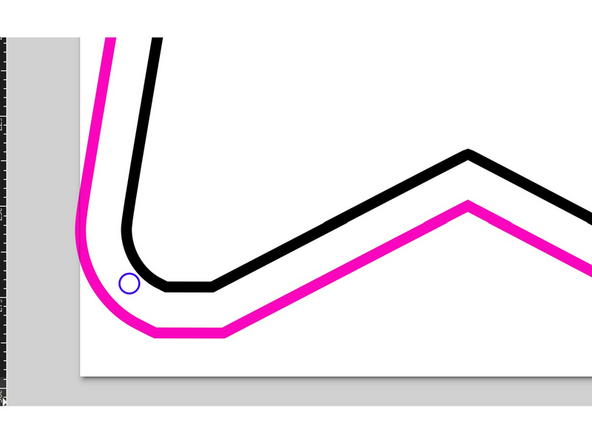
If your outsetted design ends up like image #1, you'll need to do some more work in Inkscape.
-
This happens with text and images that already had a outline!
-
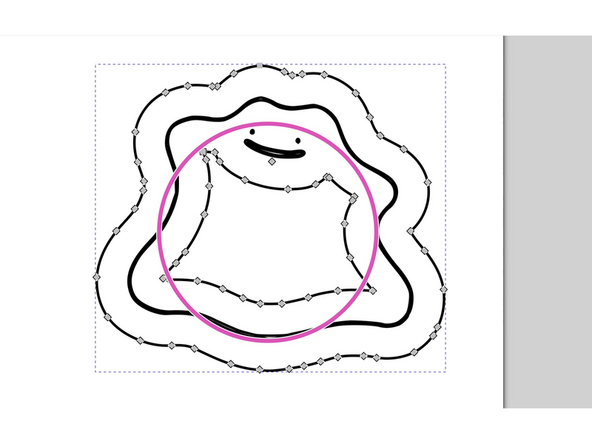
Select your outline and double click to use the node editor tool.
-
Anywhere there are nodes in the middle of the outline select and delete them.
-
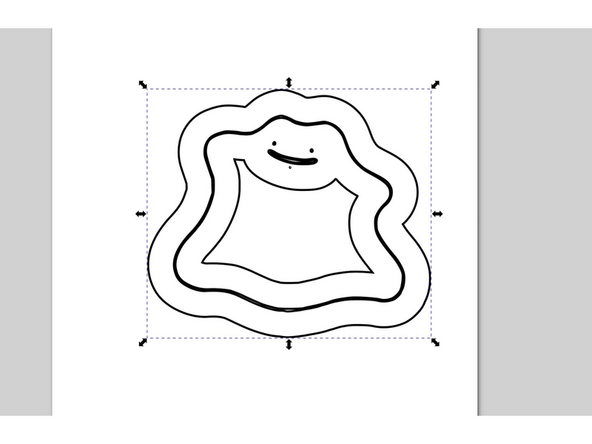
Select your original design. If it looks like image #3, you'll need to repeat the above step.
-
-
-
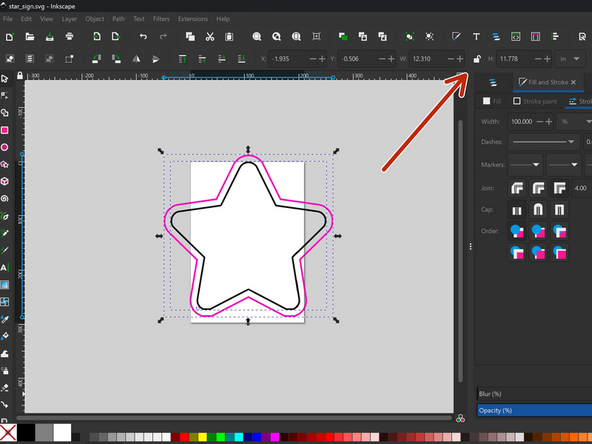
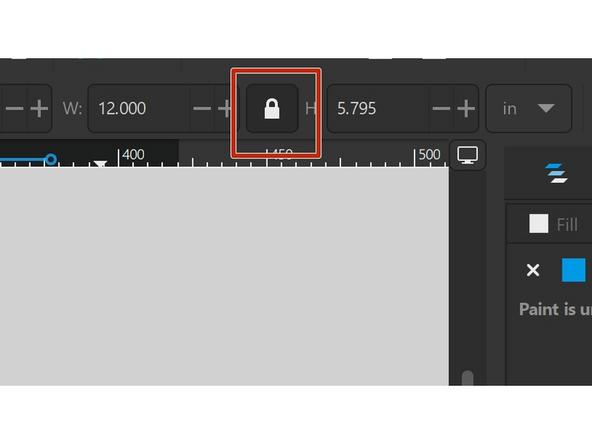
Use the shift key to select the outline and design. Click the lock icon at the top of the page- this will allow you to scale the width and height proportionally. Change the width/height to the desired size.
-
The sign should be at least 8-10" wide or tall. However, it can't be larger than 24" x 22" or it won't fit on the laser cutter
-
-
-
Go to preferences>behavior>steps and change the inset/outset to 3 mm.
-
Use ctrl + d to duplicate the design. Click ctrl + ( to inset the duplicated part.
-
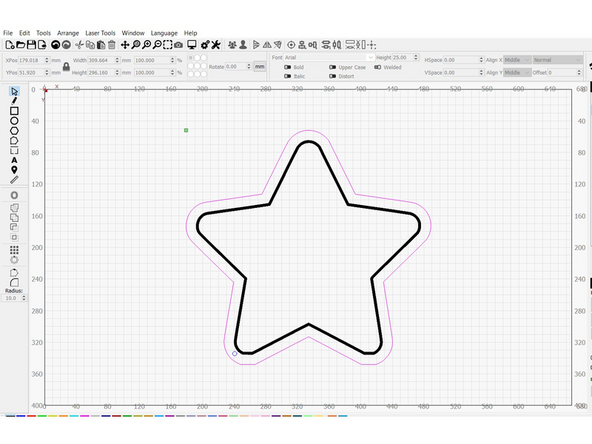
Select both designs and use ctrl + - to subtract the paths. It should now look like image #2
-
-
-
You'll need to add holes for the wire to feed through.
-
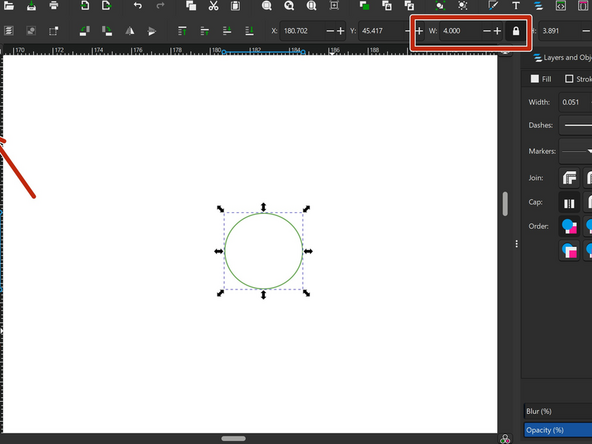
Create a hole by using the circle tool on the side bar. Click and drag to create a circle.
-
Hit the cursor icon on the side bar to go back to the selector tool. Make sure the diameter of the circle is 4 mm. Change the stroke color of the hole to a new color.
-
Use copy & paste to add a hole anywhere you want the wire to end and/or re-appear
-
I added hole at one corner of the star where the wire will start and end
-
-
-
Save your sign as an svg to your public network folder or email it to yourself. Find the sign file and open it in Lightburn on the laser cutting laptop
-
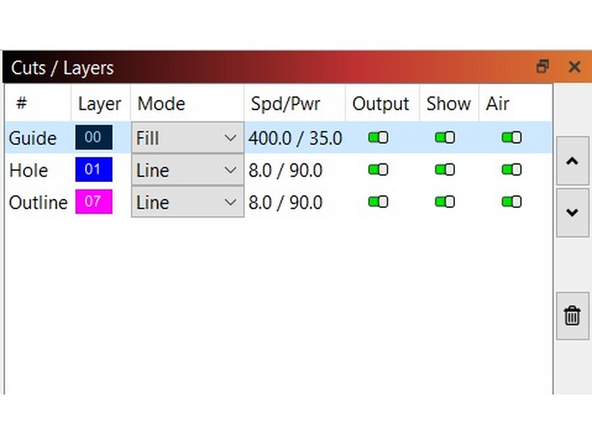
Check the order of the cut layers. The design should be first, followed by the holes, then the outline. Change to mode on the design layer to fill.
-
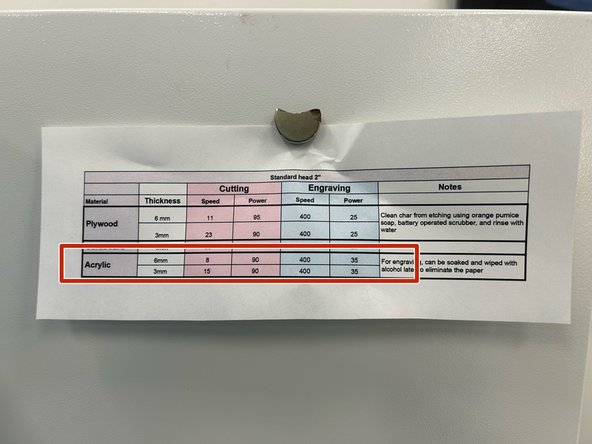
Change the cut settings so that the top layer is engraved and the other two are cut.
-
-
-
Grab a piece of acrylic located near the laser cutter.
-
If you use black acrylic, you may need to decrease the cut speed
-
Make sure to adjust the bed height properly, or else the laser won't cut through all the way!
-
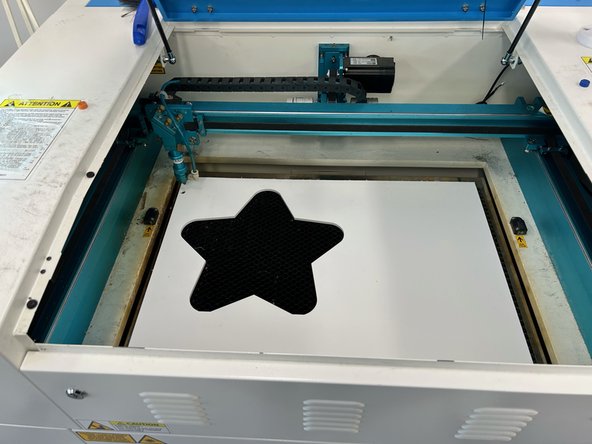
Cut out the acrylic sign
-
-
-
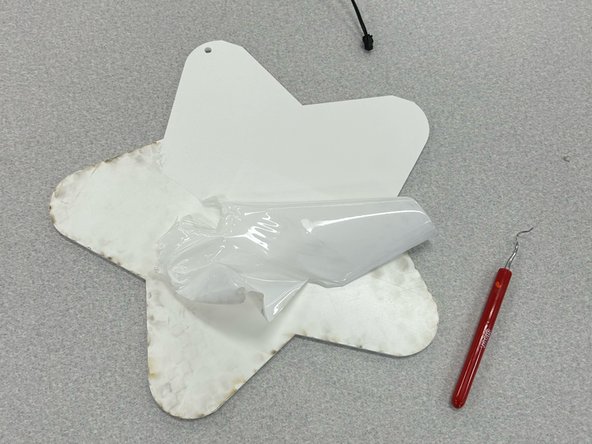
Peel the paper off of the acrylic.
-
Wipe down the acrylic with rubbing alcohol or water
-
-
-
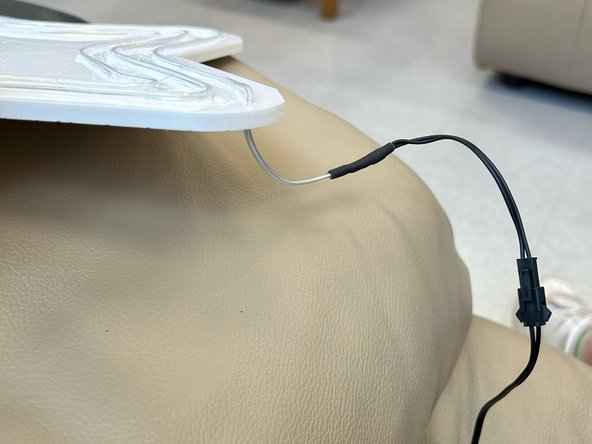
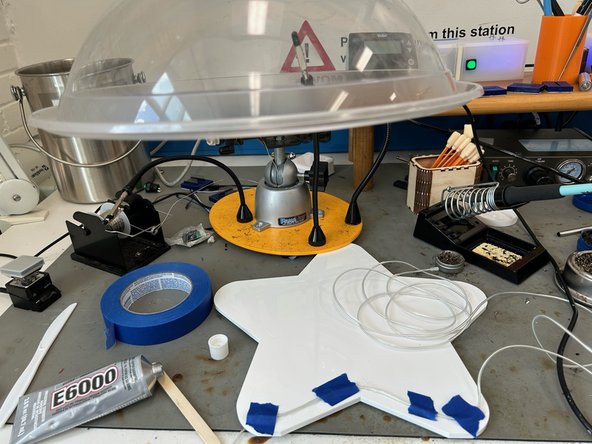
Thread the black end of the wire through the hole to the back of the sign.
-
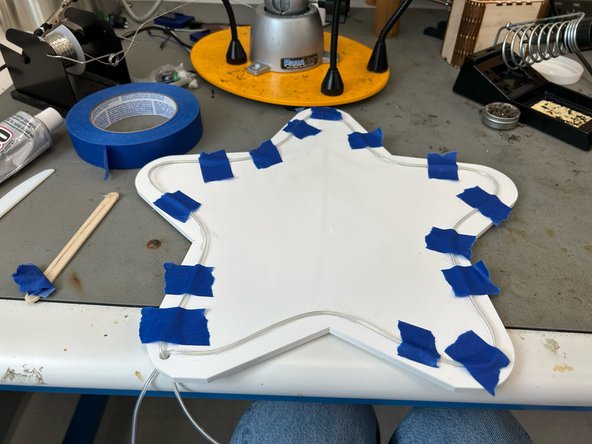
Make a small line of glue where the wire will go. Lay the wire down on top of the glue. Take a small piece of tape and tape the wire down over the glue. Repeat this for the rest of the sign.
-
Any extra wire can be taped to the back of the sign
-
Wait a few minutes for the glue to dry
-
Carefully peel the tape off. It'll take up to 24 hours for the glue to fully cure, but you can keep working on your sign.
-
-
-
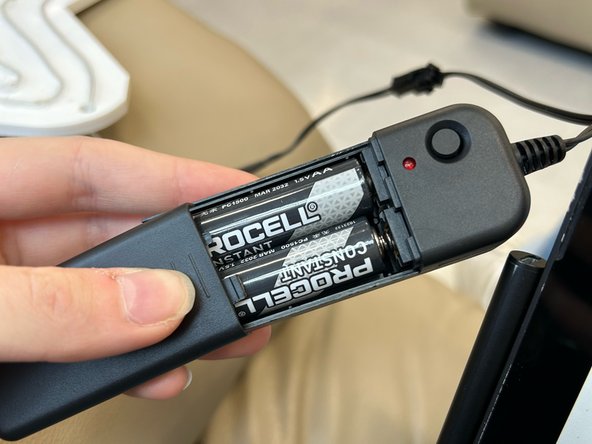
Connect the wire to the inverter using the connector.
-
Add the batteries to the inverter
-
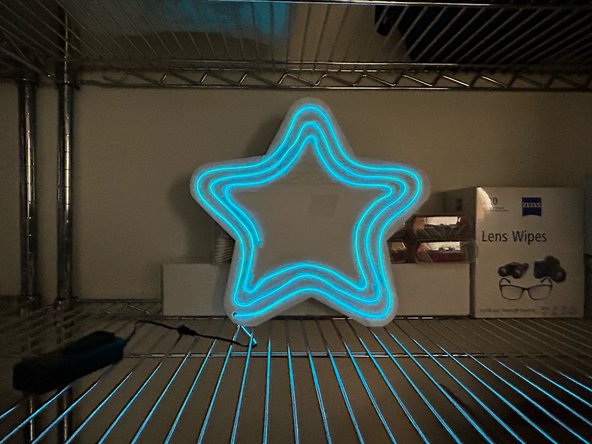
Turn the sign on using the button on the inverter!
-
The EL wire isn't very bright, so you may have to turn a light off to see it well
-
-
-
If you want to make your sign extra cool, you could add a vinyl decal onto the sign!
-
You could also add a mirror or glue gems or other embellishments on!
-